Protect a Link with a Password

Sometimes a short link needs to stay private. Whether you're sharing early access to a product demo, distributing internal documents, or gating a landing page behind a simple access code, password protection gives you a lightweight way to control who can follow your link. In Middlewr, adding a password takes seconds and works across all redirect types. This guide shows you how.
Prerequisites
Before you begin, make sure you have:
- A Middlewr account
- A workspace with the Manage Links permission
- An existing link to protect (or create one first)
Step 1: Open the Protection tab
Navigate to Links and click the edit icon on the link you want to protect. In the link detail view, click Configuration to open the settings panel, then select the Protection tab.
You'll see a password input field with a description explaining that visitors will need to enter this password to access the destination URL.
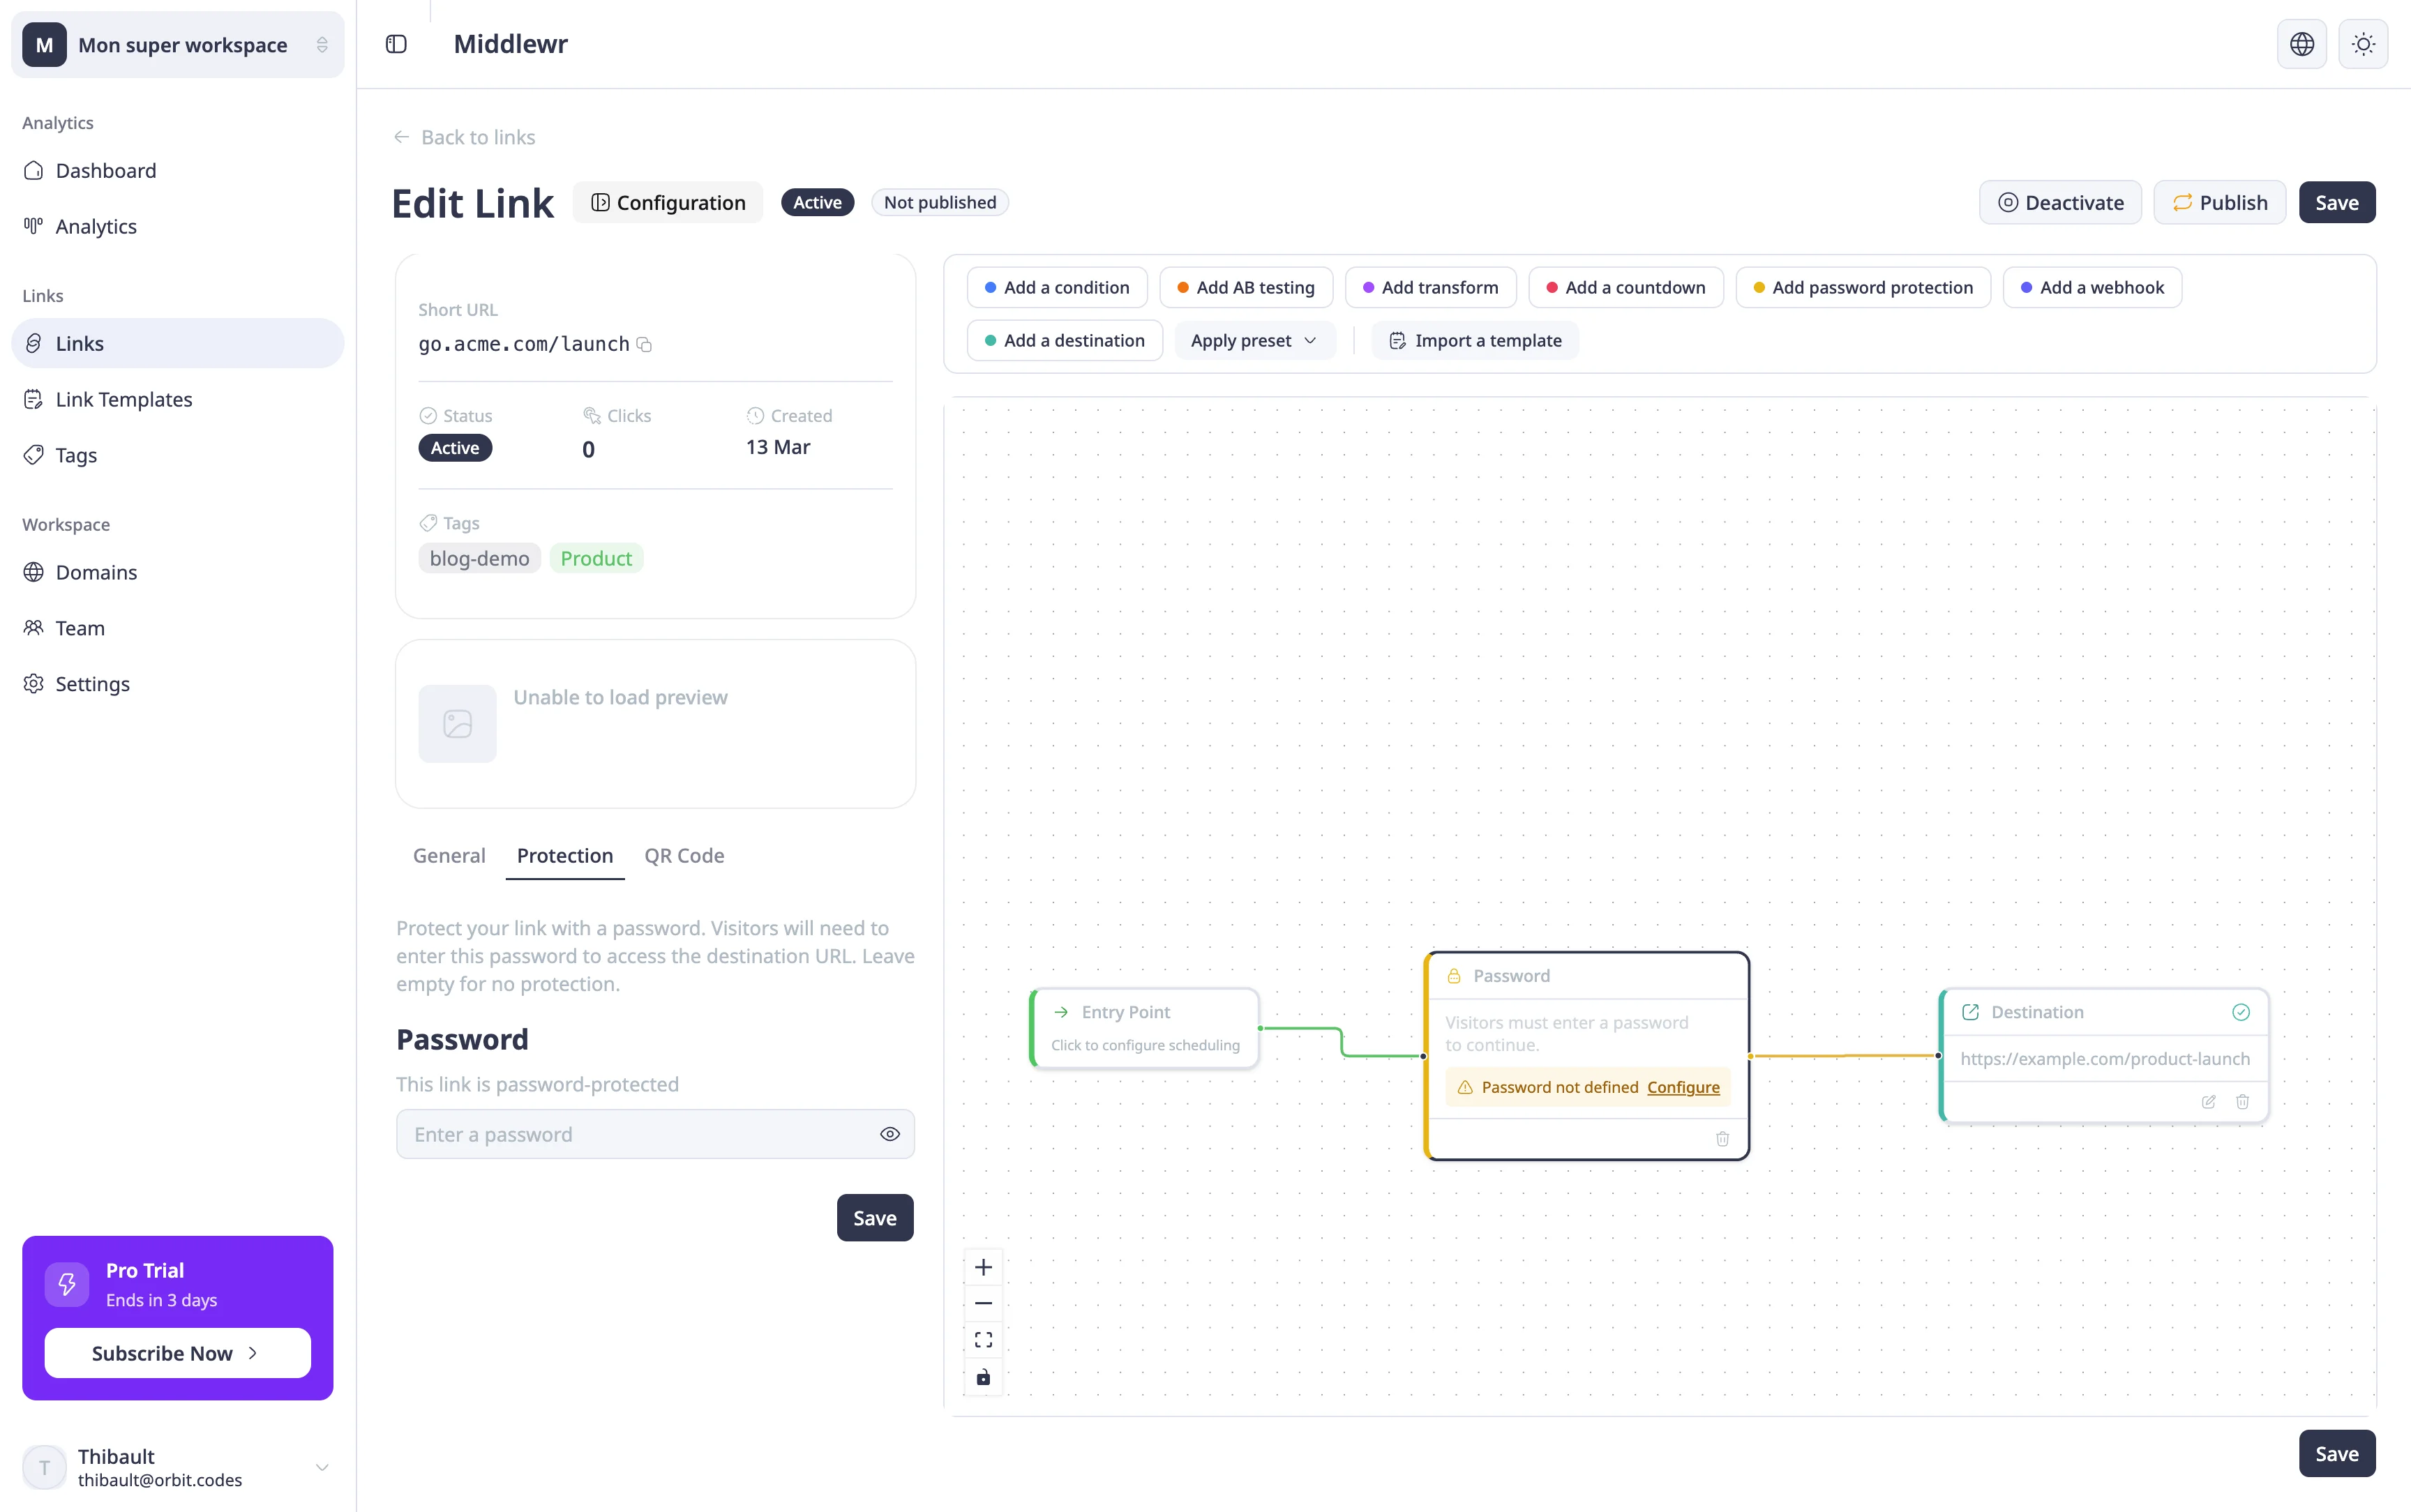
Step 2: Set a password
Enter a password in the field — it must be at least 4 characters long. You can use the eye icon next to the field to toggle visibility and double-check what you've typed.
Once you've entered your password, click Save at the top of the page. The link is now password-protected.
After saving, the password field switches to a masked view (••••••••) with a confirmation message that the link is protected. You can remove the password at any time by clicking the delete icon next to the field.
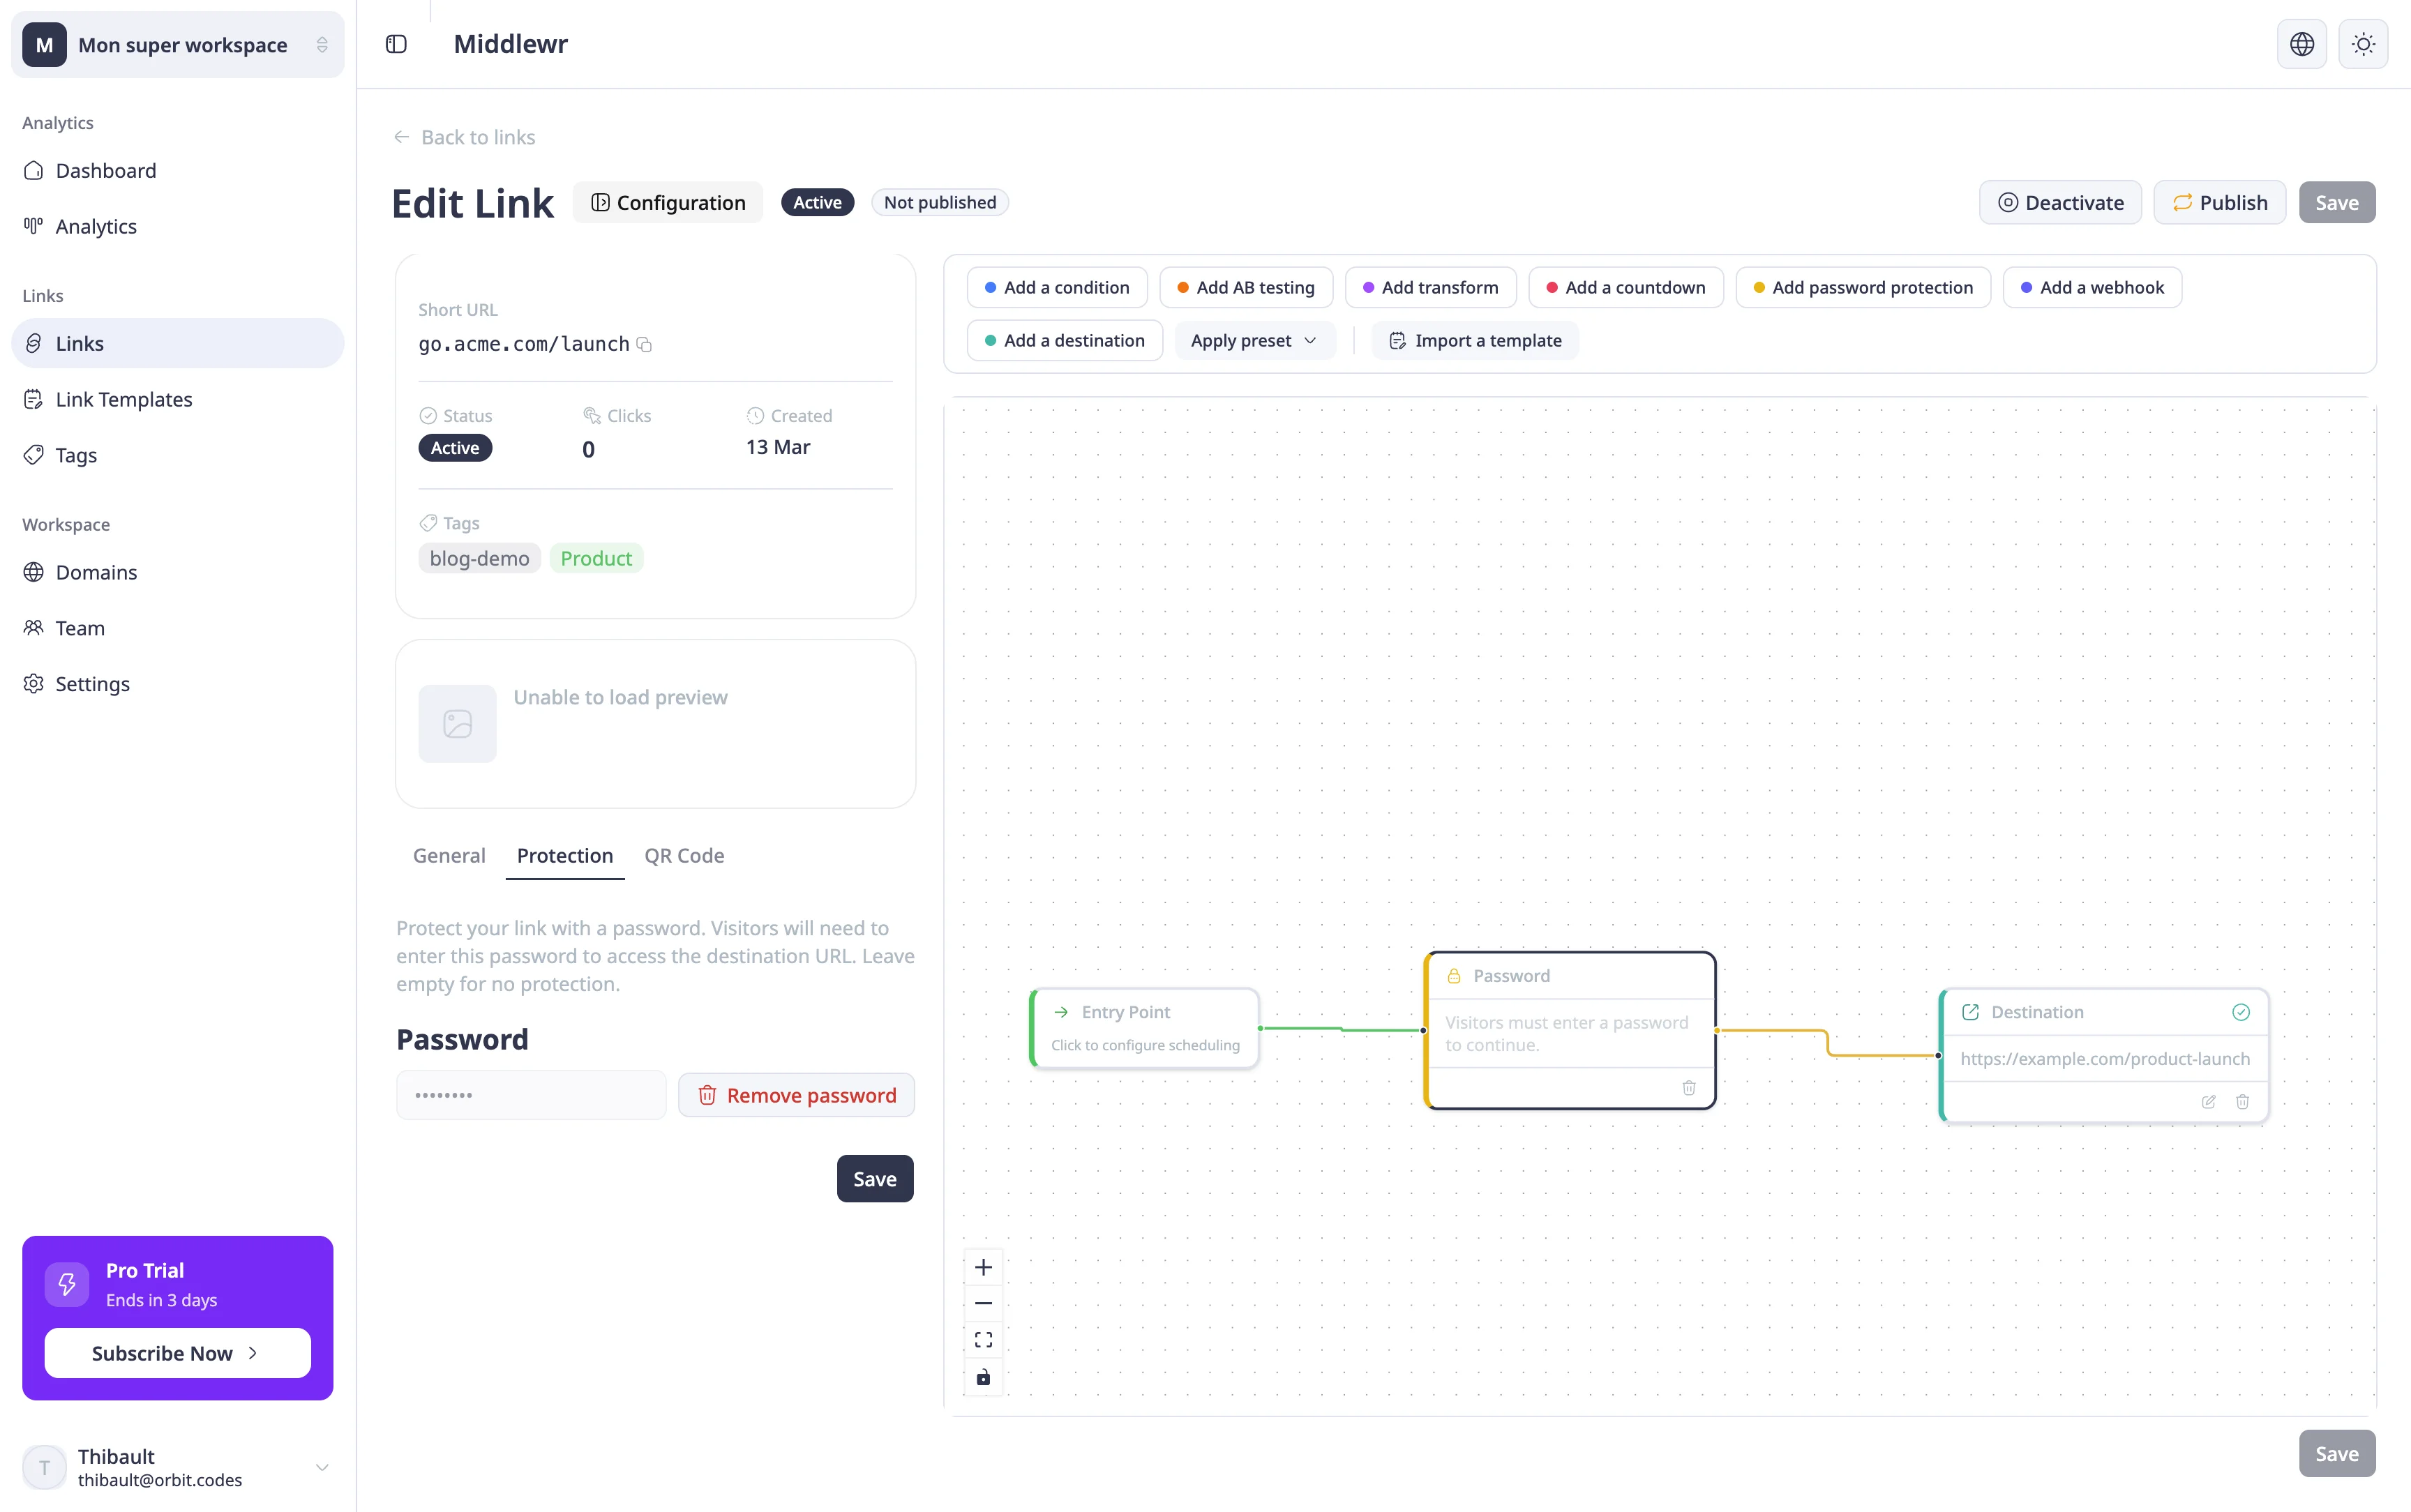
Step 3: What visitors see
When someone clicks your short link, instead of being redirected directly to the destination, they'll see a password gate page. This clean, branded page asks them to enter the password before proceeding.
Once they enter the correct password, the redirect happens as normal — they land on the destination URL. If they enter the wrong password, they're asked to try again.
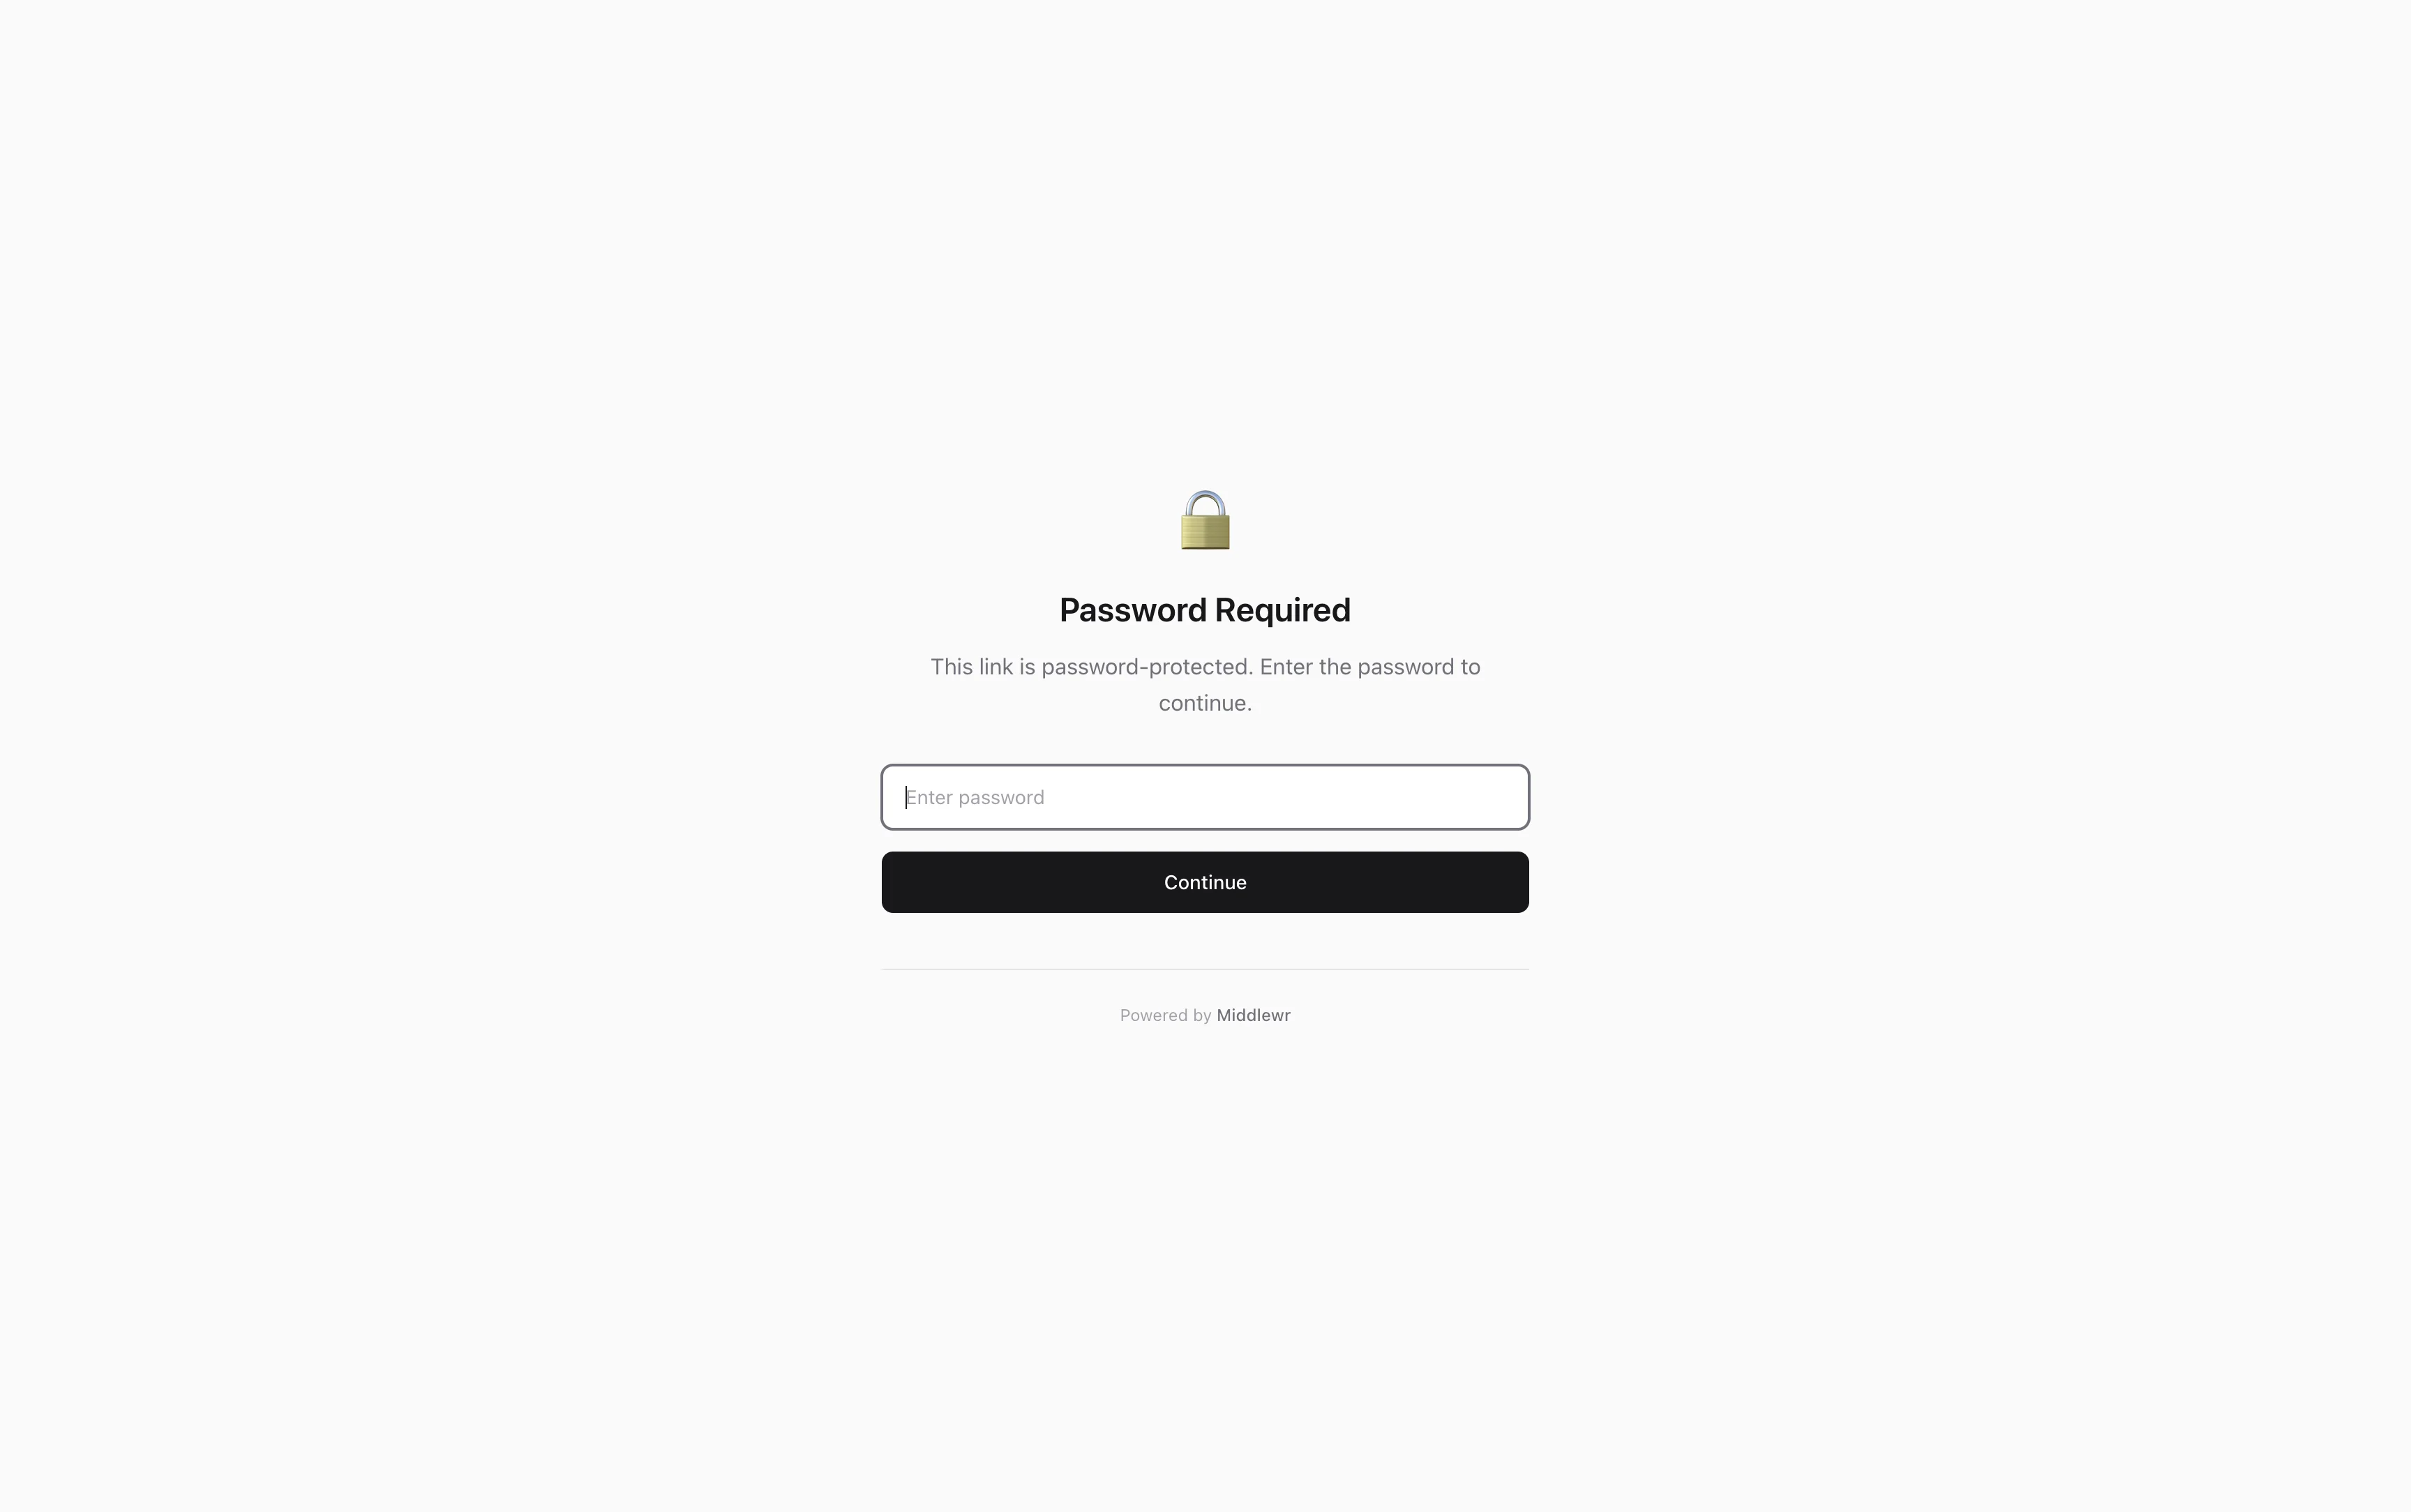
Removing a password
To remove password protection, go back to the Protection tab and click the delete icon next to the masked password field. If your link's routing flow includes a password node, you'll see a confirmation warning that the node will become inactive. Confirm the removal and save — the link returns to unrestricted access.
Going further
- Set up conditional routing — combine password protection with device or geo routing for advanced access control
- Create and use link templates — save a password-protected configuration as a template for reuse
- Manage billing and plans — password protection availability depends on your workspace plan