Conditional Routing: How to Set Up Smart Redirects

Not every visitor to your short link is the same — and your redirects don't have to be either. Conditional routing lets you send different users to different destinations based on rules you define: their device type, country, browser language, time of day, and more. This opens the door to powerful use cases like directing mobile users to your app store page, showing region-specific landing pages, or running A/B tests without touching your marketing materials.
In this guide, you'll learn how to use Middlewr's visual rule graph editor to build smart, multi-path redirects step by step.
Prerequisites
Before you begin, make sure you have:
- A Middlewr account
- At least one short link already created in your workspace — if you haven't created one yet, check out Create your first short link first
- The Editor role or above on the workspace
Step 1: Open the Rule Graph Editor
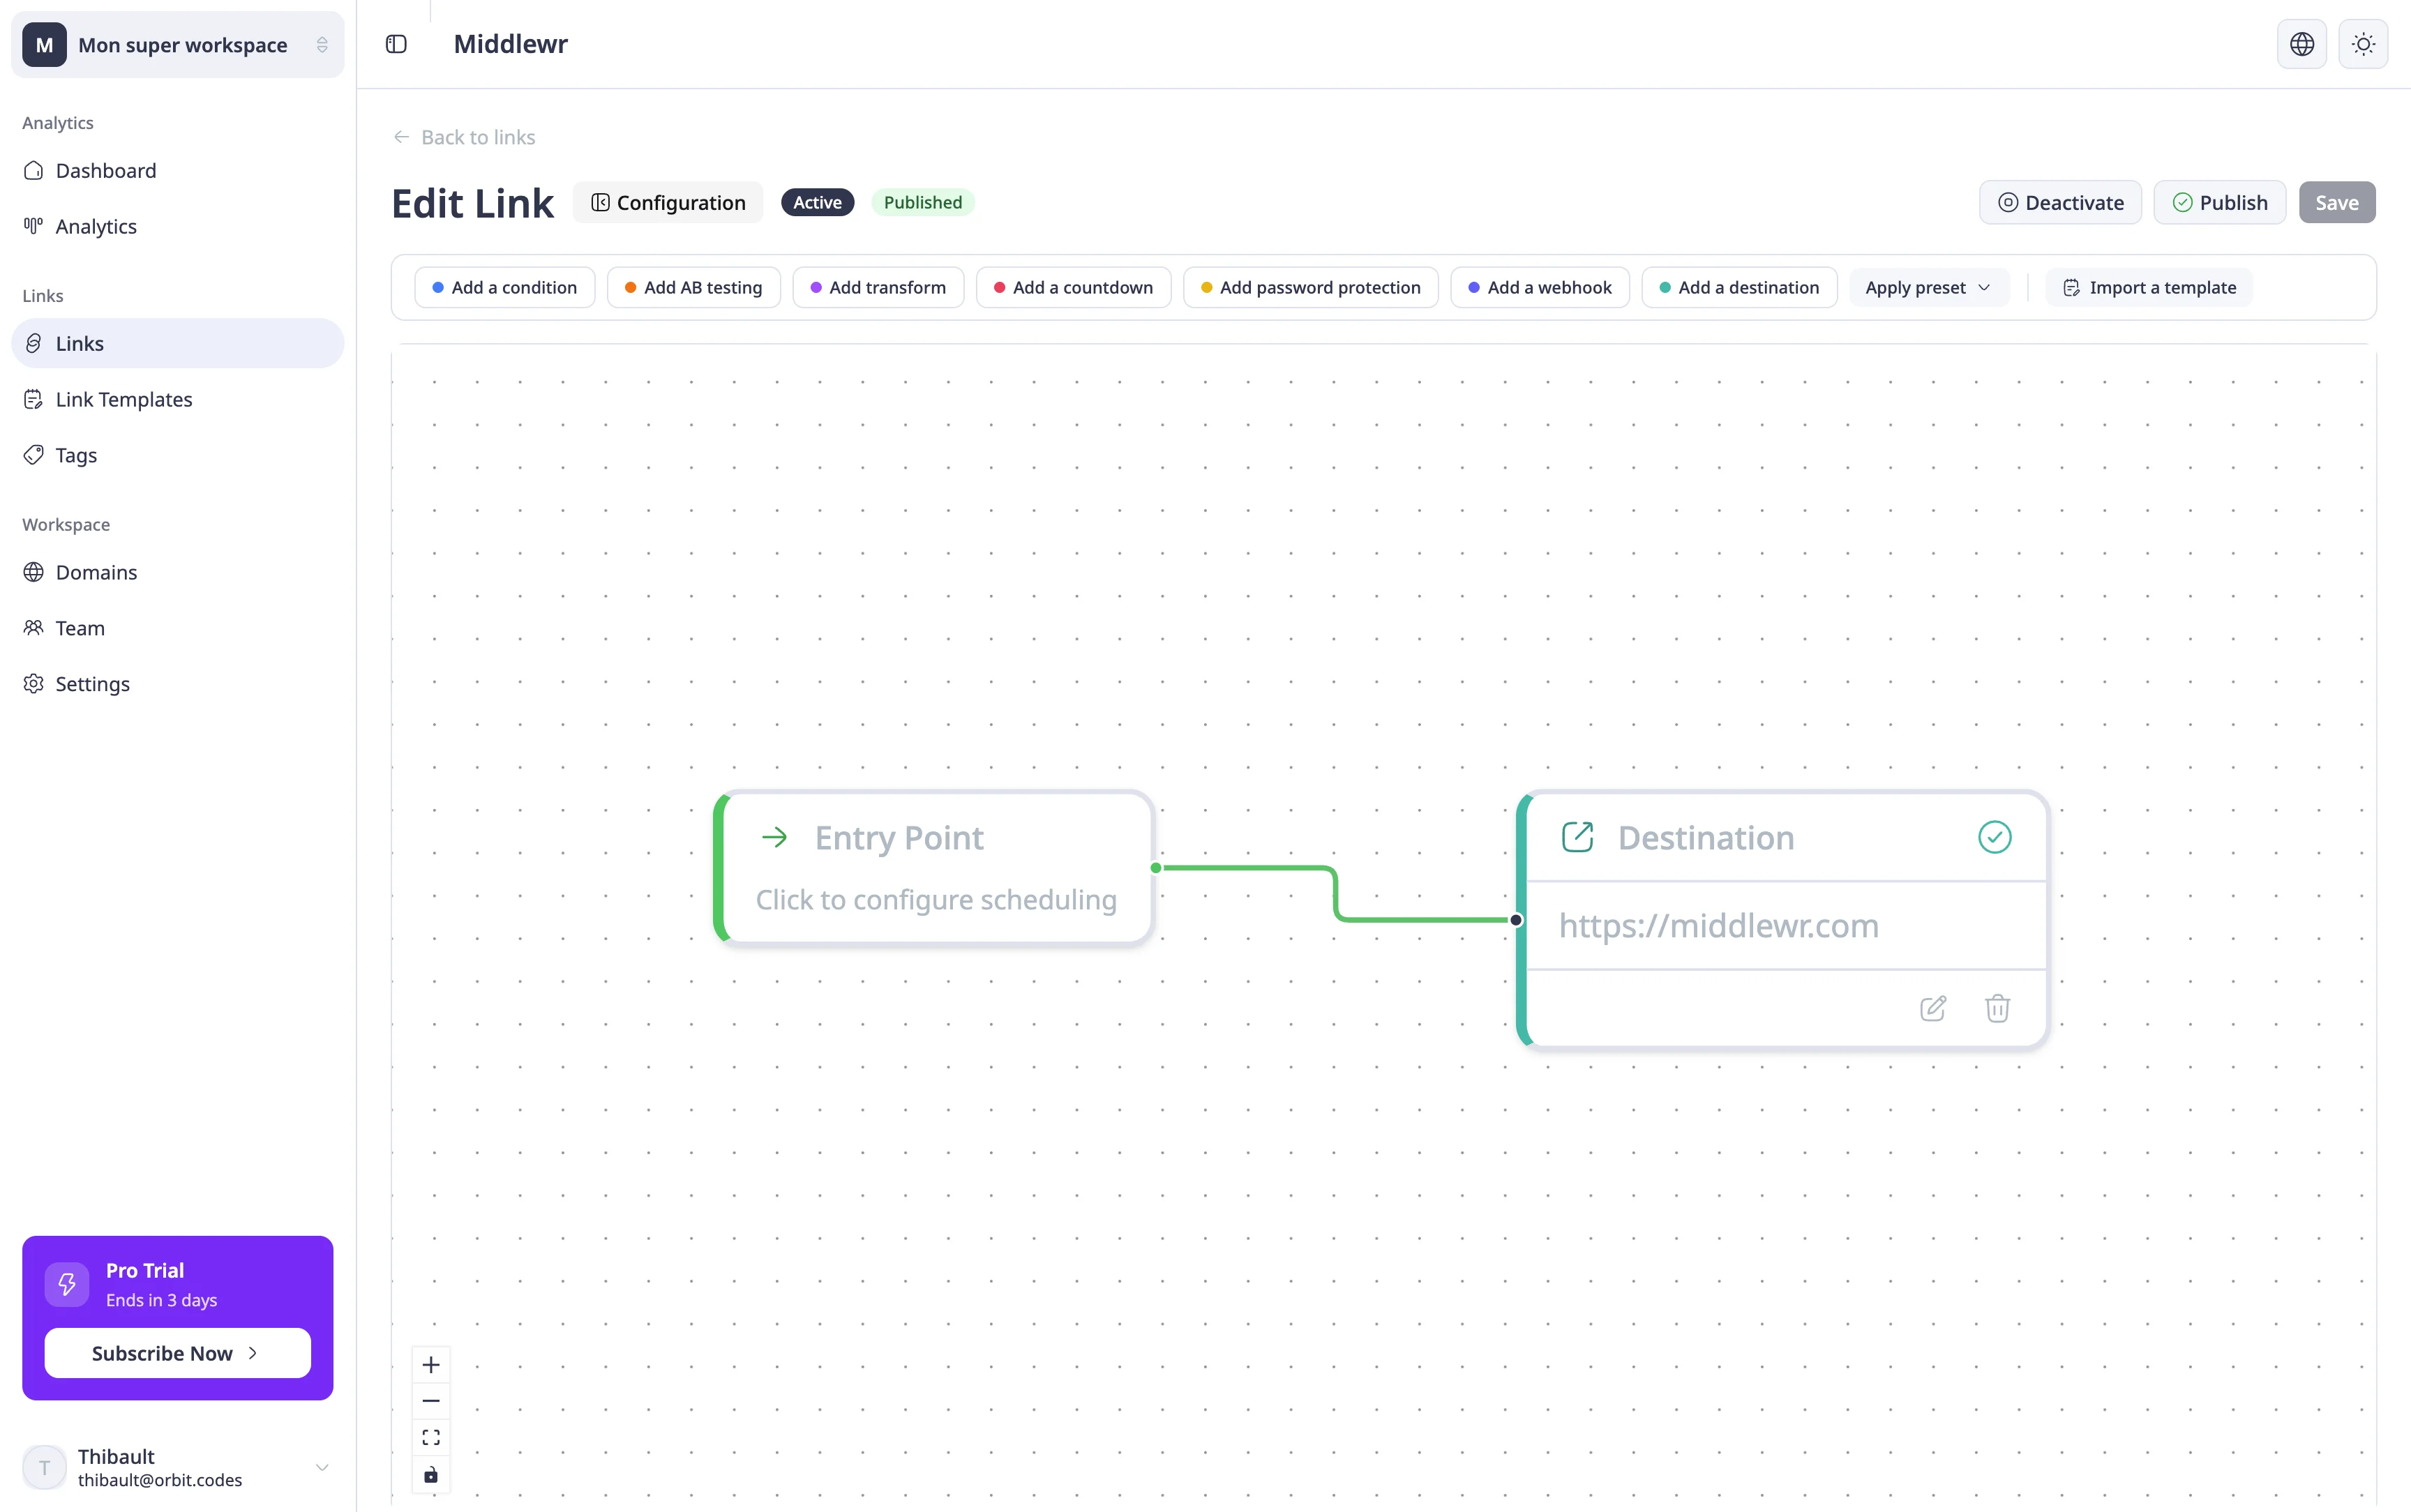
Navigate to the Links page and click on the link you want to configure. This opens the link detail page. The rule graph editor takes up the main area of the page. The toolbar at the top lists all available node types. If this is a new link, you'll see just the Entry node.
Step 2: Understand the Node Types
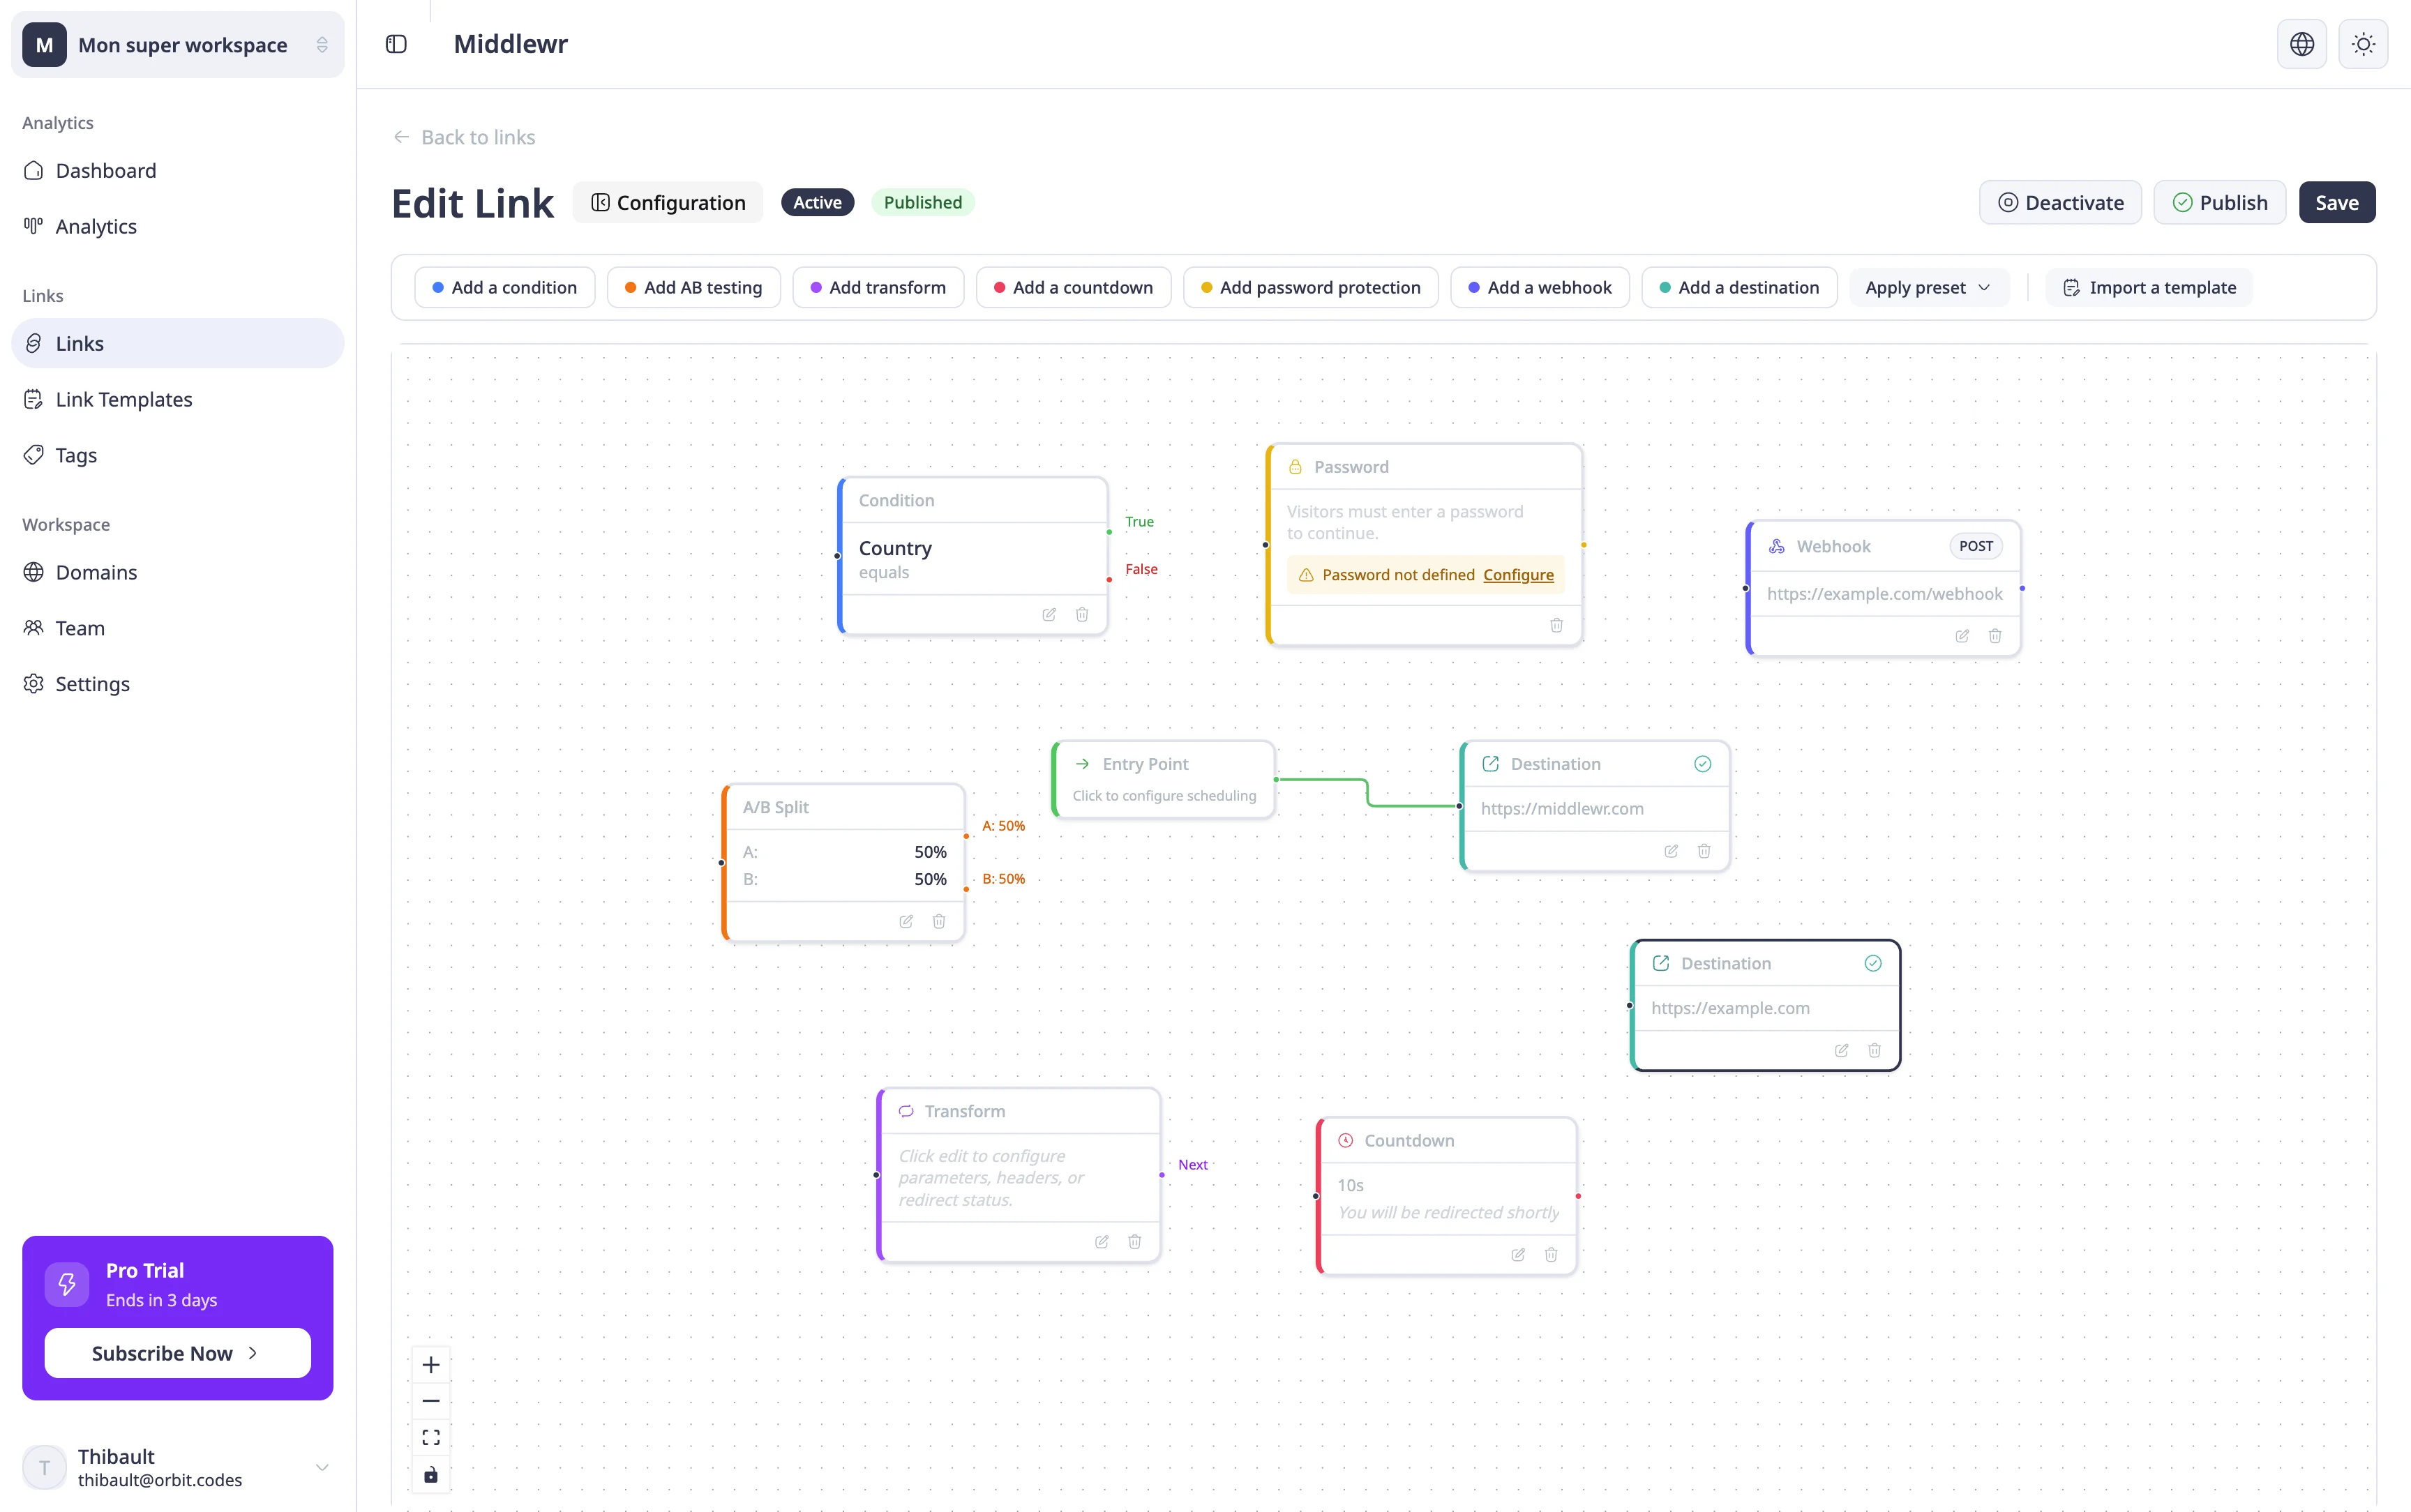
Before wiring up your first rule, take a moment to understand what each type of node does. The toolbar at the top of the rule graph editor lists all eight node types.
Entry (green) Starting point of every graph. There is exactly one per graph. Configure an optional scheduling window (start and end dates) to control when the link is active, and a fallback URL that is used when no rule matches or the link is outside its schedule.
Condition (blue) Branch traffic based on a visitor's properties. Pick a field, an operator, and a value. If the condition matches, traffic follows the True branch; otherwise it follows the False branch.
Available fields are grouped into three categories:
- Geo / Network — Country, Continent, Region, City, Timezone, Postal code, AS Organization, EU country (boolean)
- Request — Device type (mobile/tablet/desktop), Browser, OS, Referrer, Language, Is bot (boolean), Return visitor (boolean), IP address
- Time — Hour (0-23), Day of week (0-6), Minute (0-59)
Operators depend on the field type: equals, not equals, in list, not in list, contains, not contains, greater than, less than, greater/less than or equal, regex.
Split (orange) Distribute traffic randomly across multiple variants for A/B testing. Each variant has a weight (percentage). Weights must sum to 100. Middlewr uses deterministic hashing so the same visitor always sees the same variant. Minimum 2 variants.
Transform (purple) Modify the request before it reaches the destination. Three capabilities:
- Query parameters — append or overwrite URL parameters (e.g., UTM tags)
- Redirect status — set the HTTP status code (301, 302, 307, or 308)
- Response headers — inject custom HTTP headers
Transforms accumulate through the graph and are applied at the final destination.
Destination (teal) Terminal node — the final URL where visitors are redirected. Every path in the graph must end at a Destination node. Any transforms accumulated upstream are applied to this URL.
Password (yellow) Require visitors to enter a password before continuing. The password itself is defined in the link's Protection tab. Once entered correctly, the flow continues to the next node.
Countdown (rose) Display a countdown timer page before redirecting. Configure a duration (1-300 seconds) and an optional message. After the timer expires, visitors are automatically redirected to the next node.
Webhook (indigo) Send an HTTP request (POST or GET) to an external URL when the link is clicked. Non-blocking — the redirect continues regardless of the webhook response. Useful for triggering automations or logging events.
Step 3: Build a Routing Rule
Let's build a concrete example: redirect mobile users to a different page.
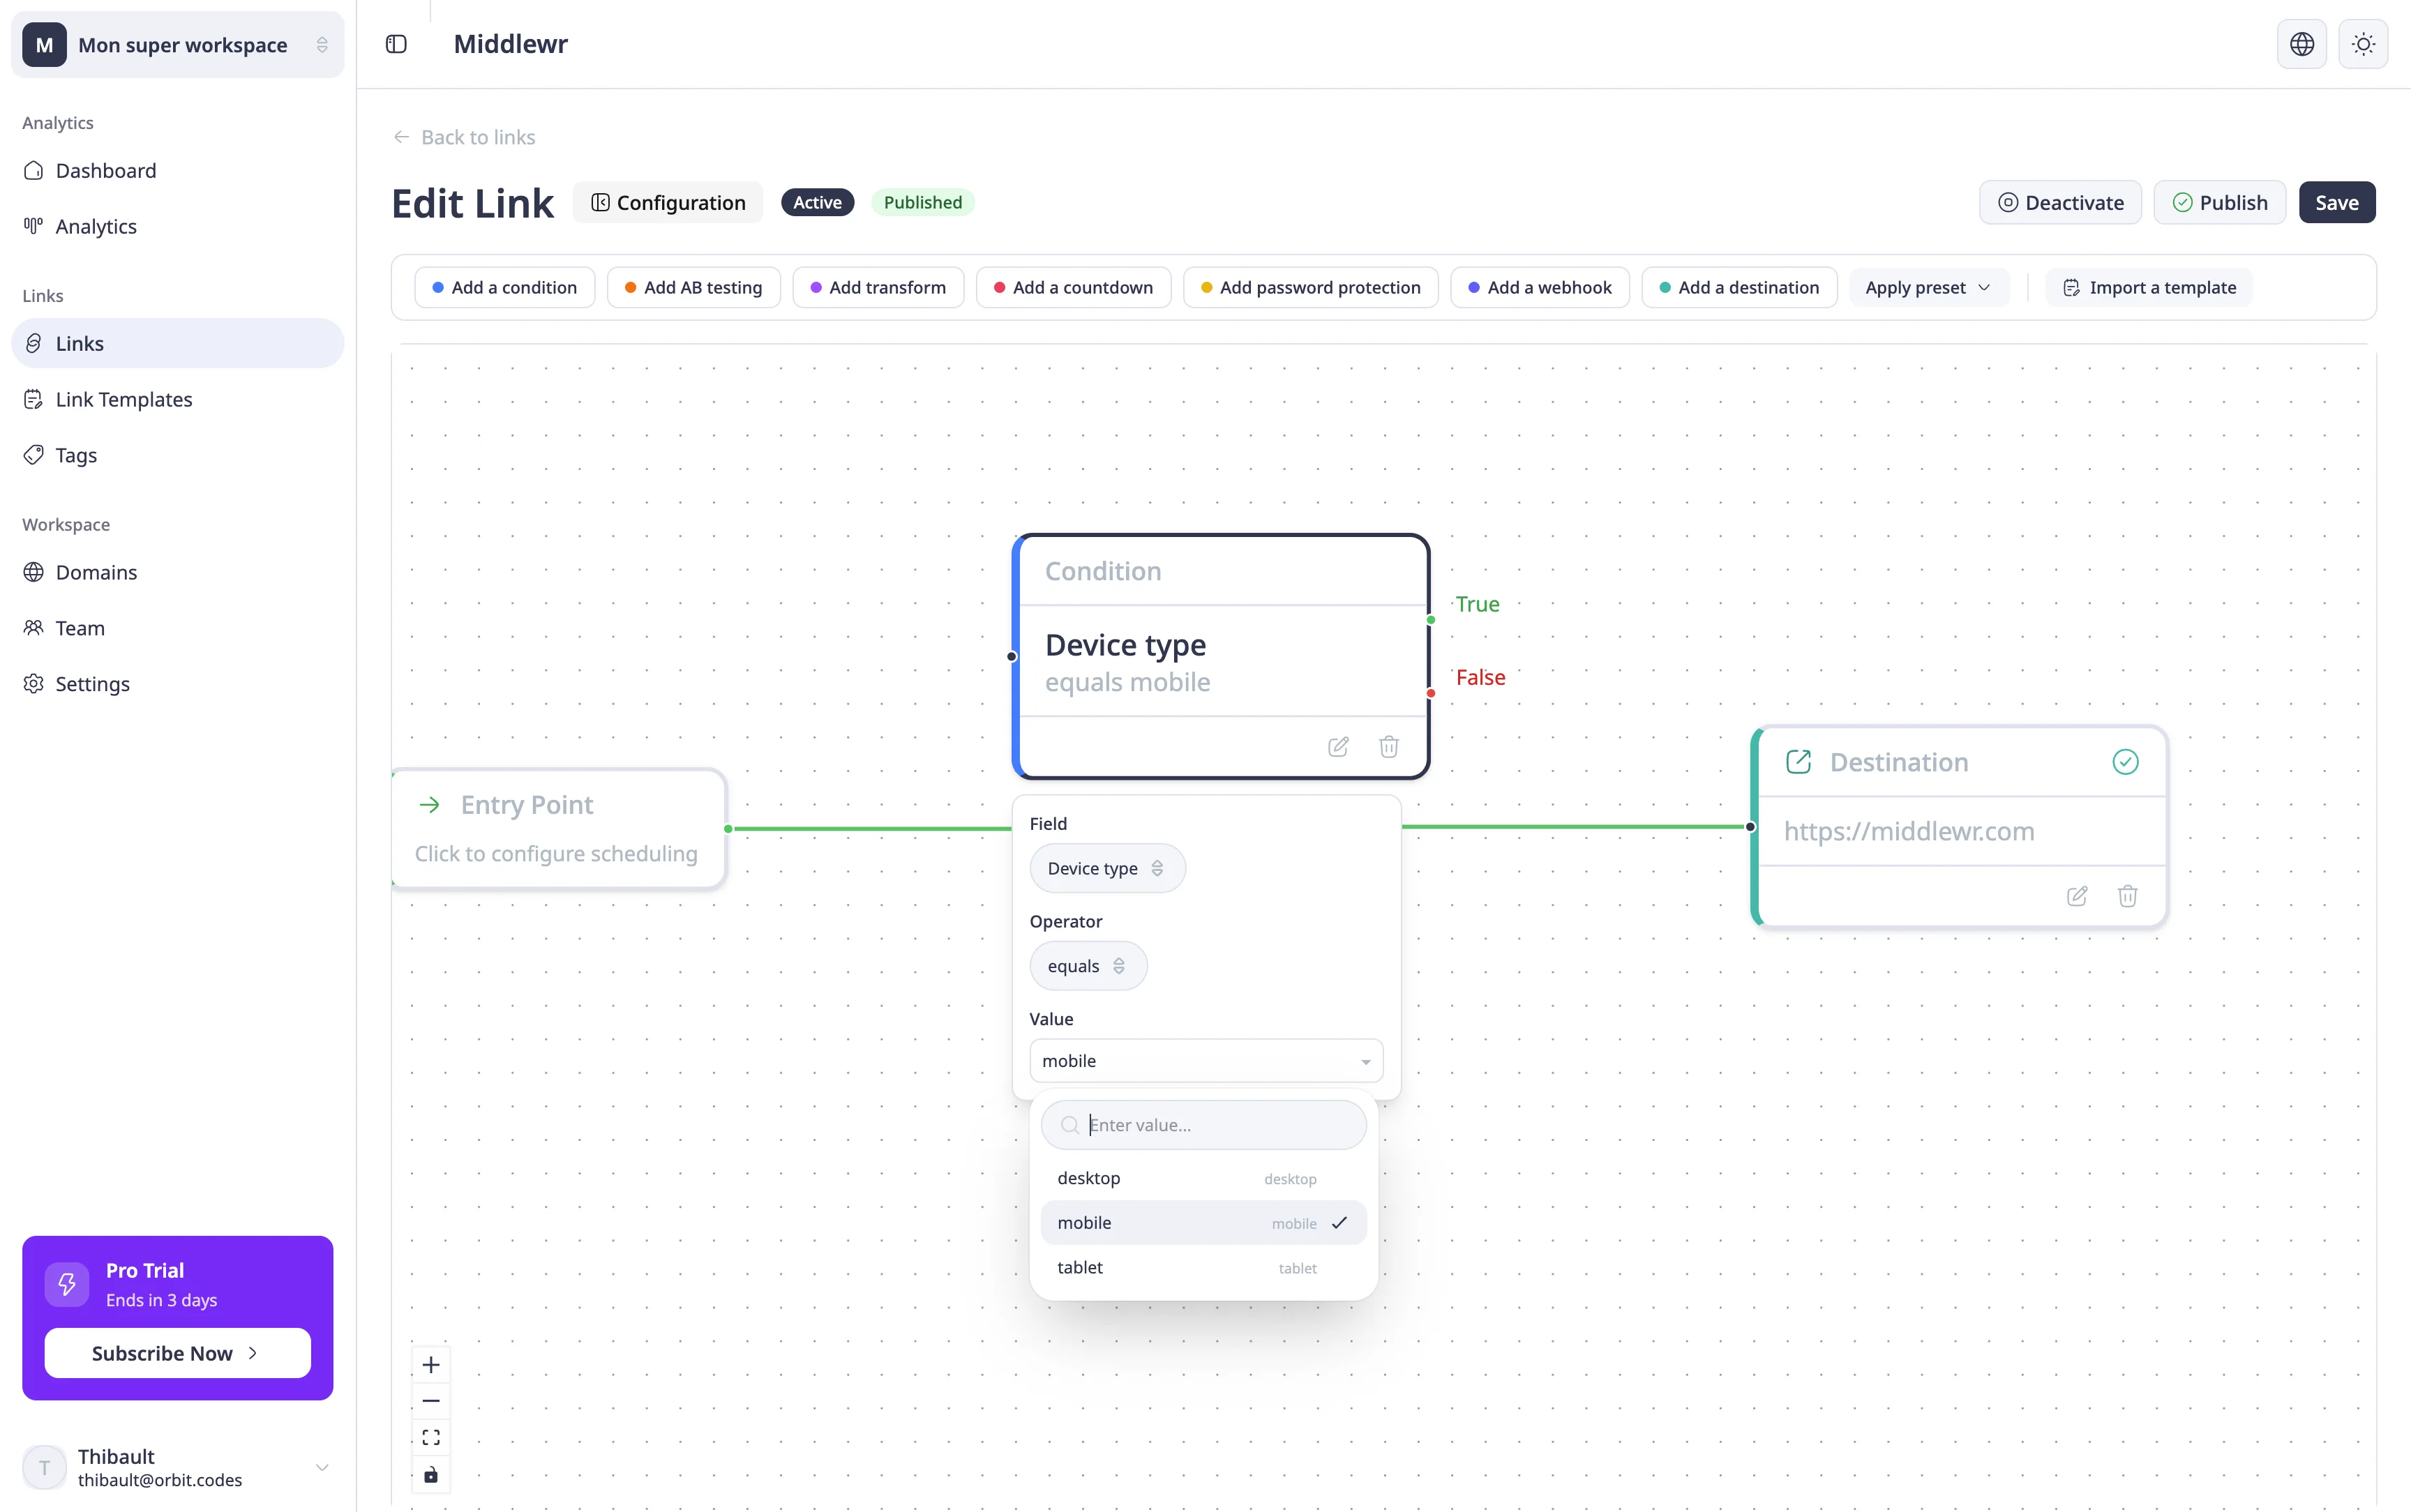
- Click Condition in the toolbar to add a Condition node to the canvas
- Configure it: Field = Device type, Operator =
equals, Value =mobile - Add two Destination nodes — one for mobile visitors and one for desktop visitors
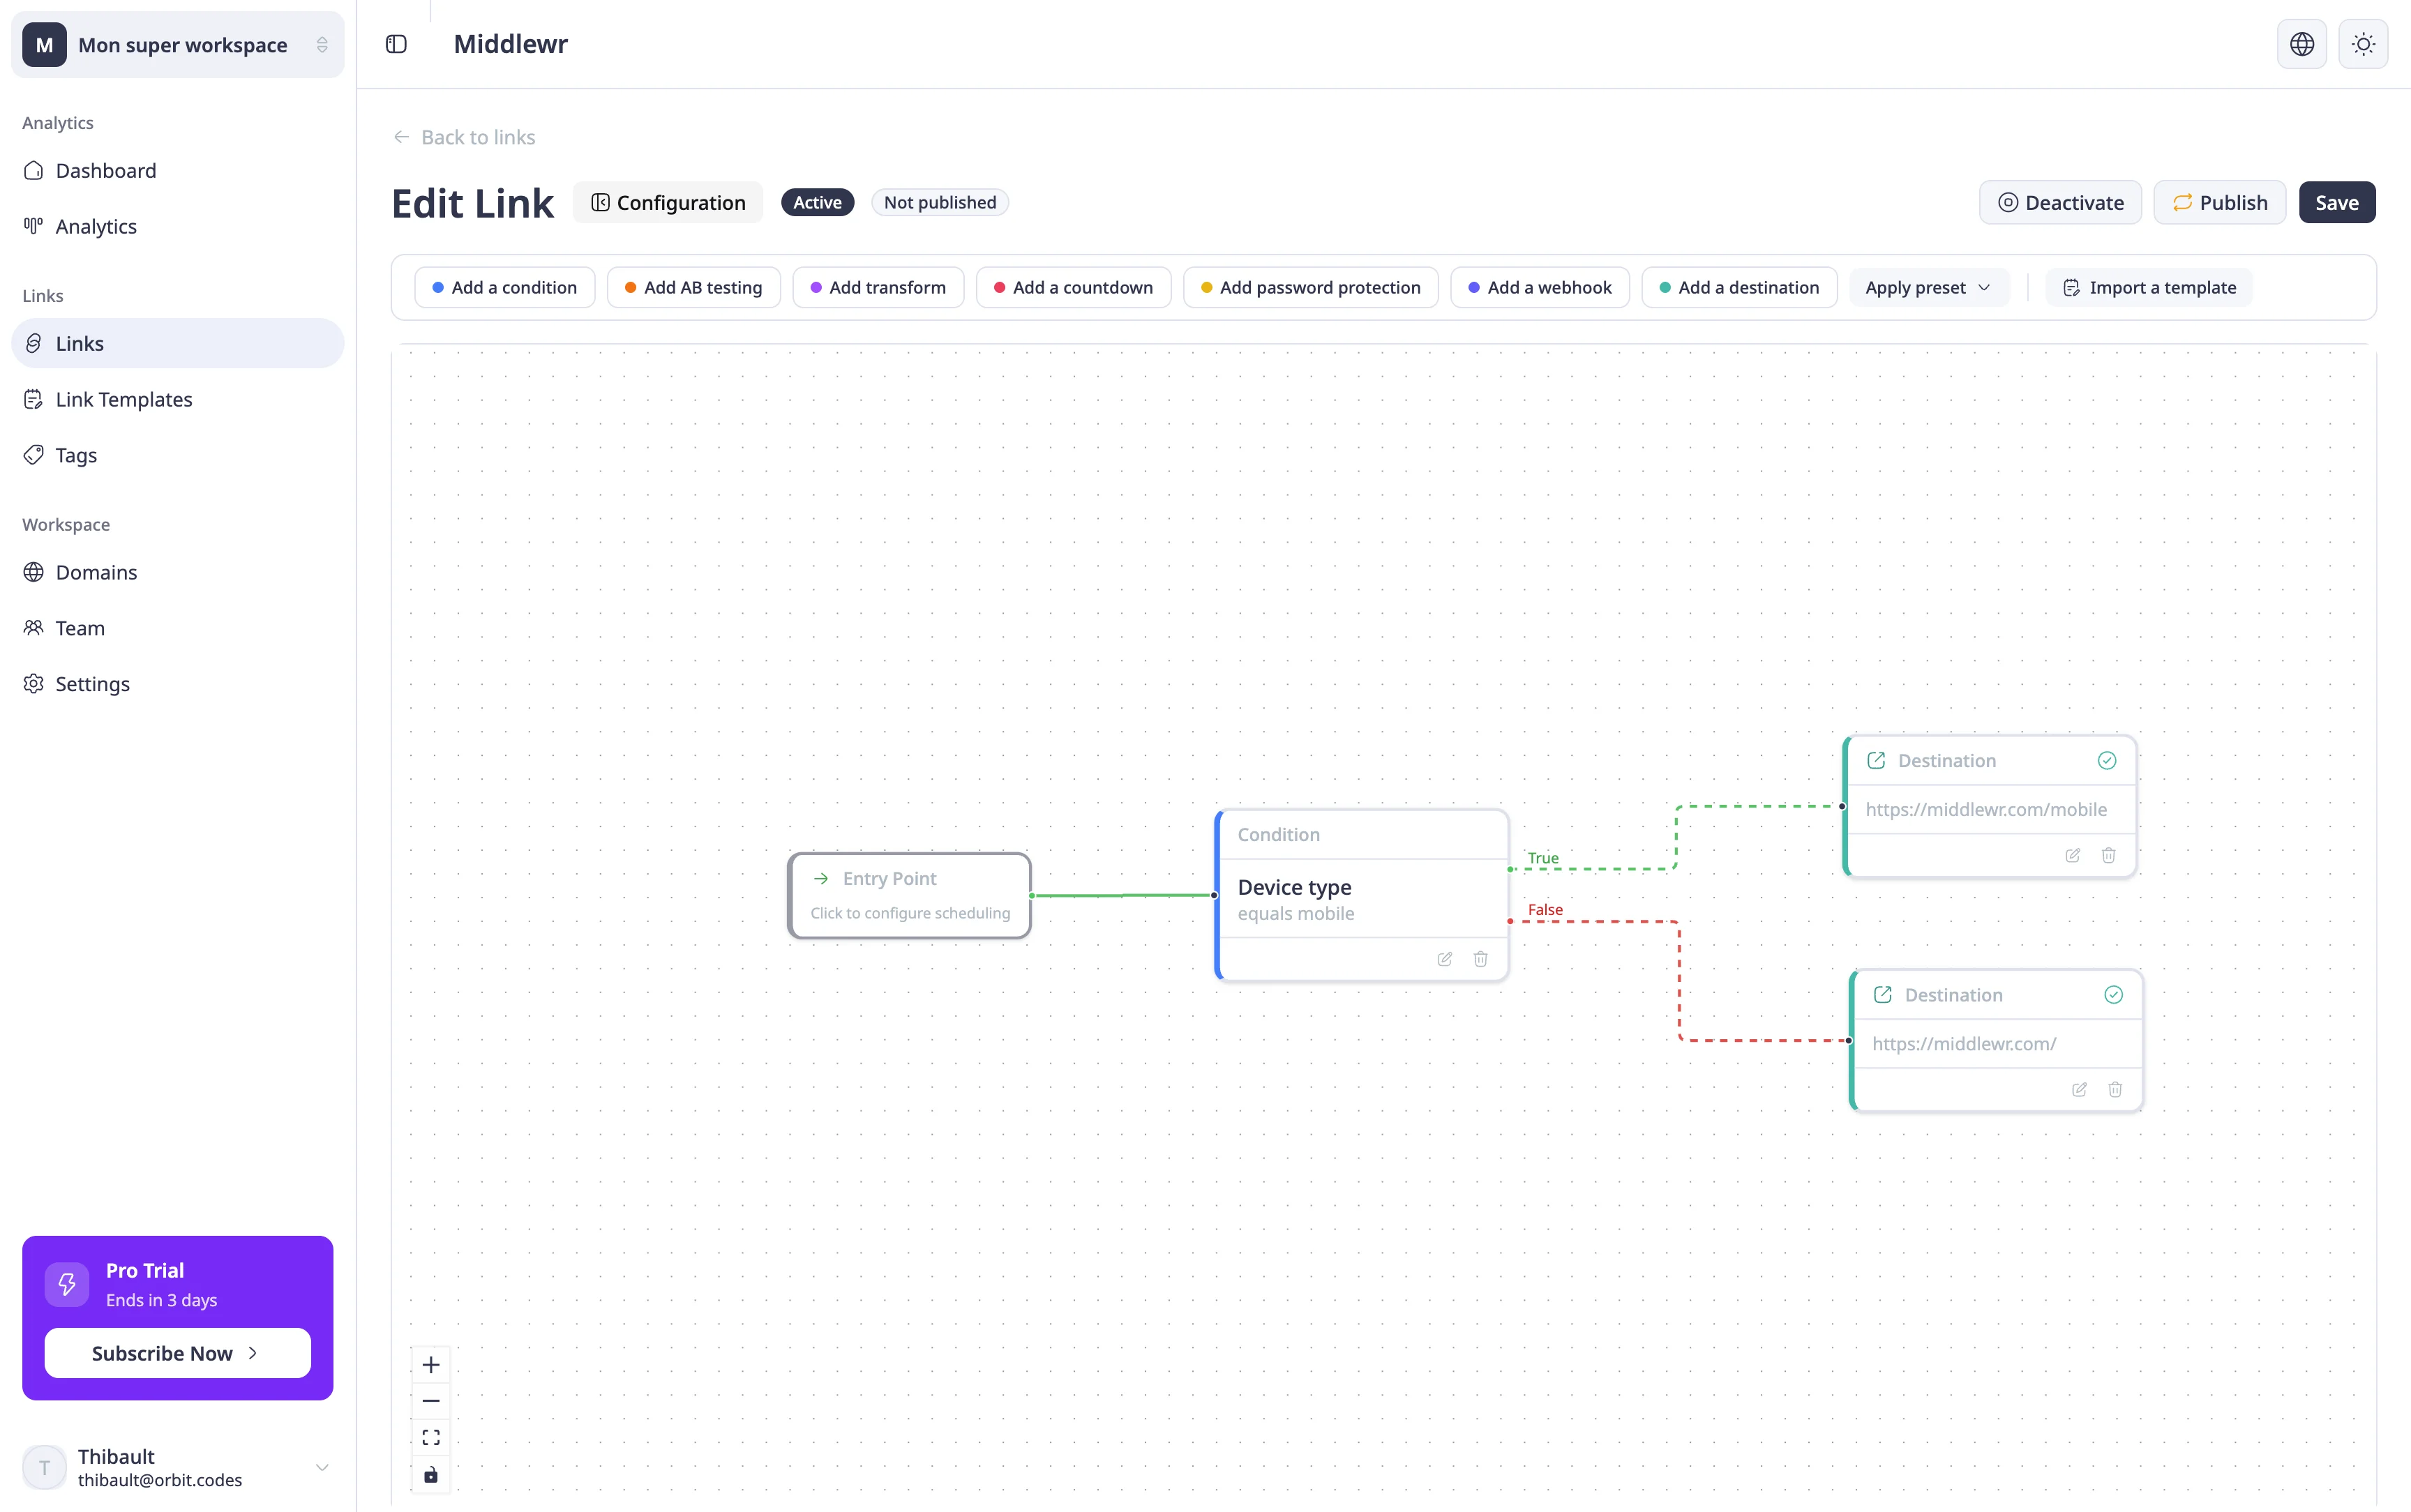
- Connect the Entry node to the Condition node, the Condition's True output to the mobile Destination, and the Condition's False output to the desktop Destination
Enter the appropriate destination URLs in each Destination node. You can chain multiple conditions for more complex logic — for example, first check device type, then check the visitor's country to serve region-specific mobile pages.
Step 4: Save and Test
Once the graph is complete and all nodes are valid (no red indicators), click Save. Then Publish the link. The graph is evaluated at the edge on every click — updates are reflected instantly for all new visitors.
To test your setup:
- On a real device: open your short link on a mobile phone and confirm you land on the mobile destination. Repeat on a desktop browser.
Going Further
Now that you've built your first conditional rule, here are some natural next steps:
- A/B testing with split routing — distribute traffic across multiple destinations with weighted splits
- Protect a link with a password — restrict access to sensitive links with a password gate