How to Create Your First Short Link

Short links are at the heart of everything you do in Middlewr. In this guide, you'll learn how to create your very first one — from entering a title and destination URL all the way through saving and testing the redirect. We'll also cover the optional settings available to you, like custom short codes and tags, so you can get the most out of every link from day one.
Prerequisites
Before you begin, make sure you have:
- A Middlewr account — if you haven't signed up yet, head to middlewr.com and create a free account. A default workspace is created automatically when you sign up.
Once you're logged in and inside your workspace, you're ready to go.
Step 1: Navigate to the Links page
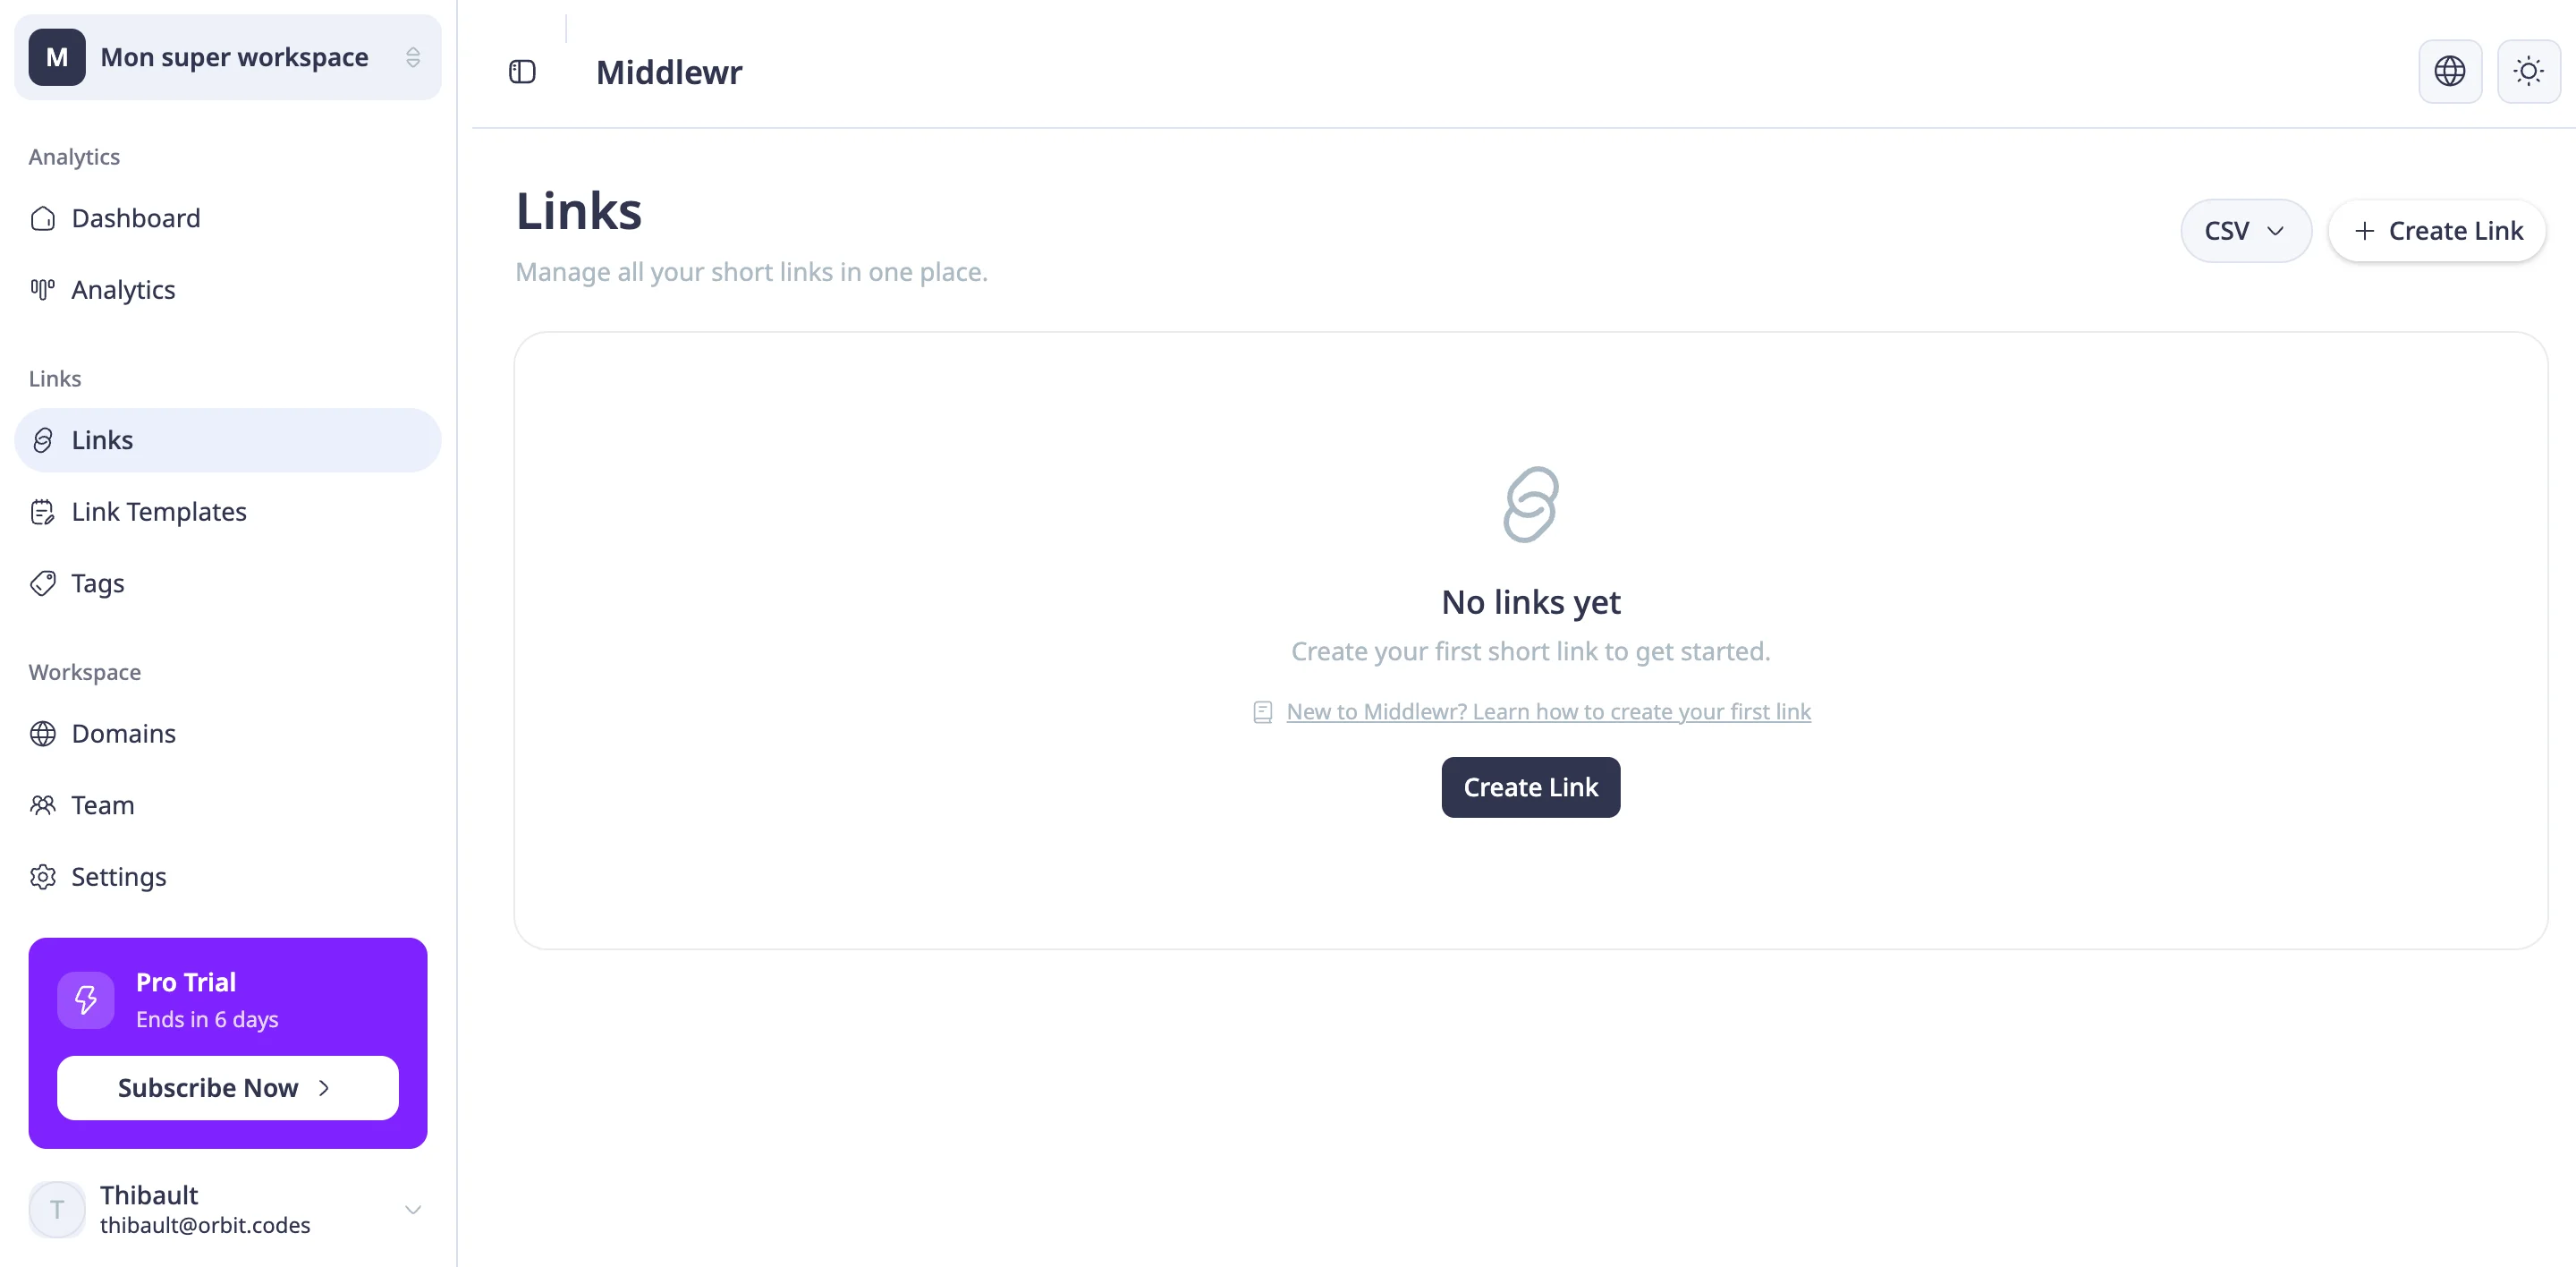
In the left sidebar, click Links. This is your main link management hub — it's where all your short links live and where you'll spend most of your time.
If this is your first time, you'll see an empty state with a brief description and a prominent Create Link button in the center. Don't worry — that won't last long.
Step 2: Open the link creation form
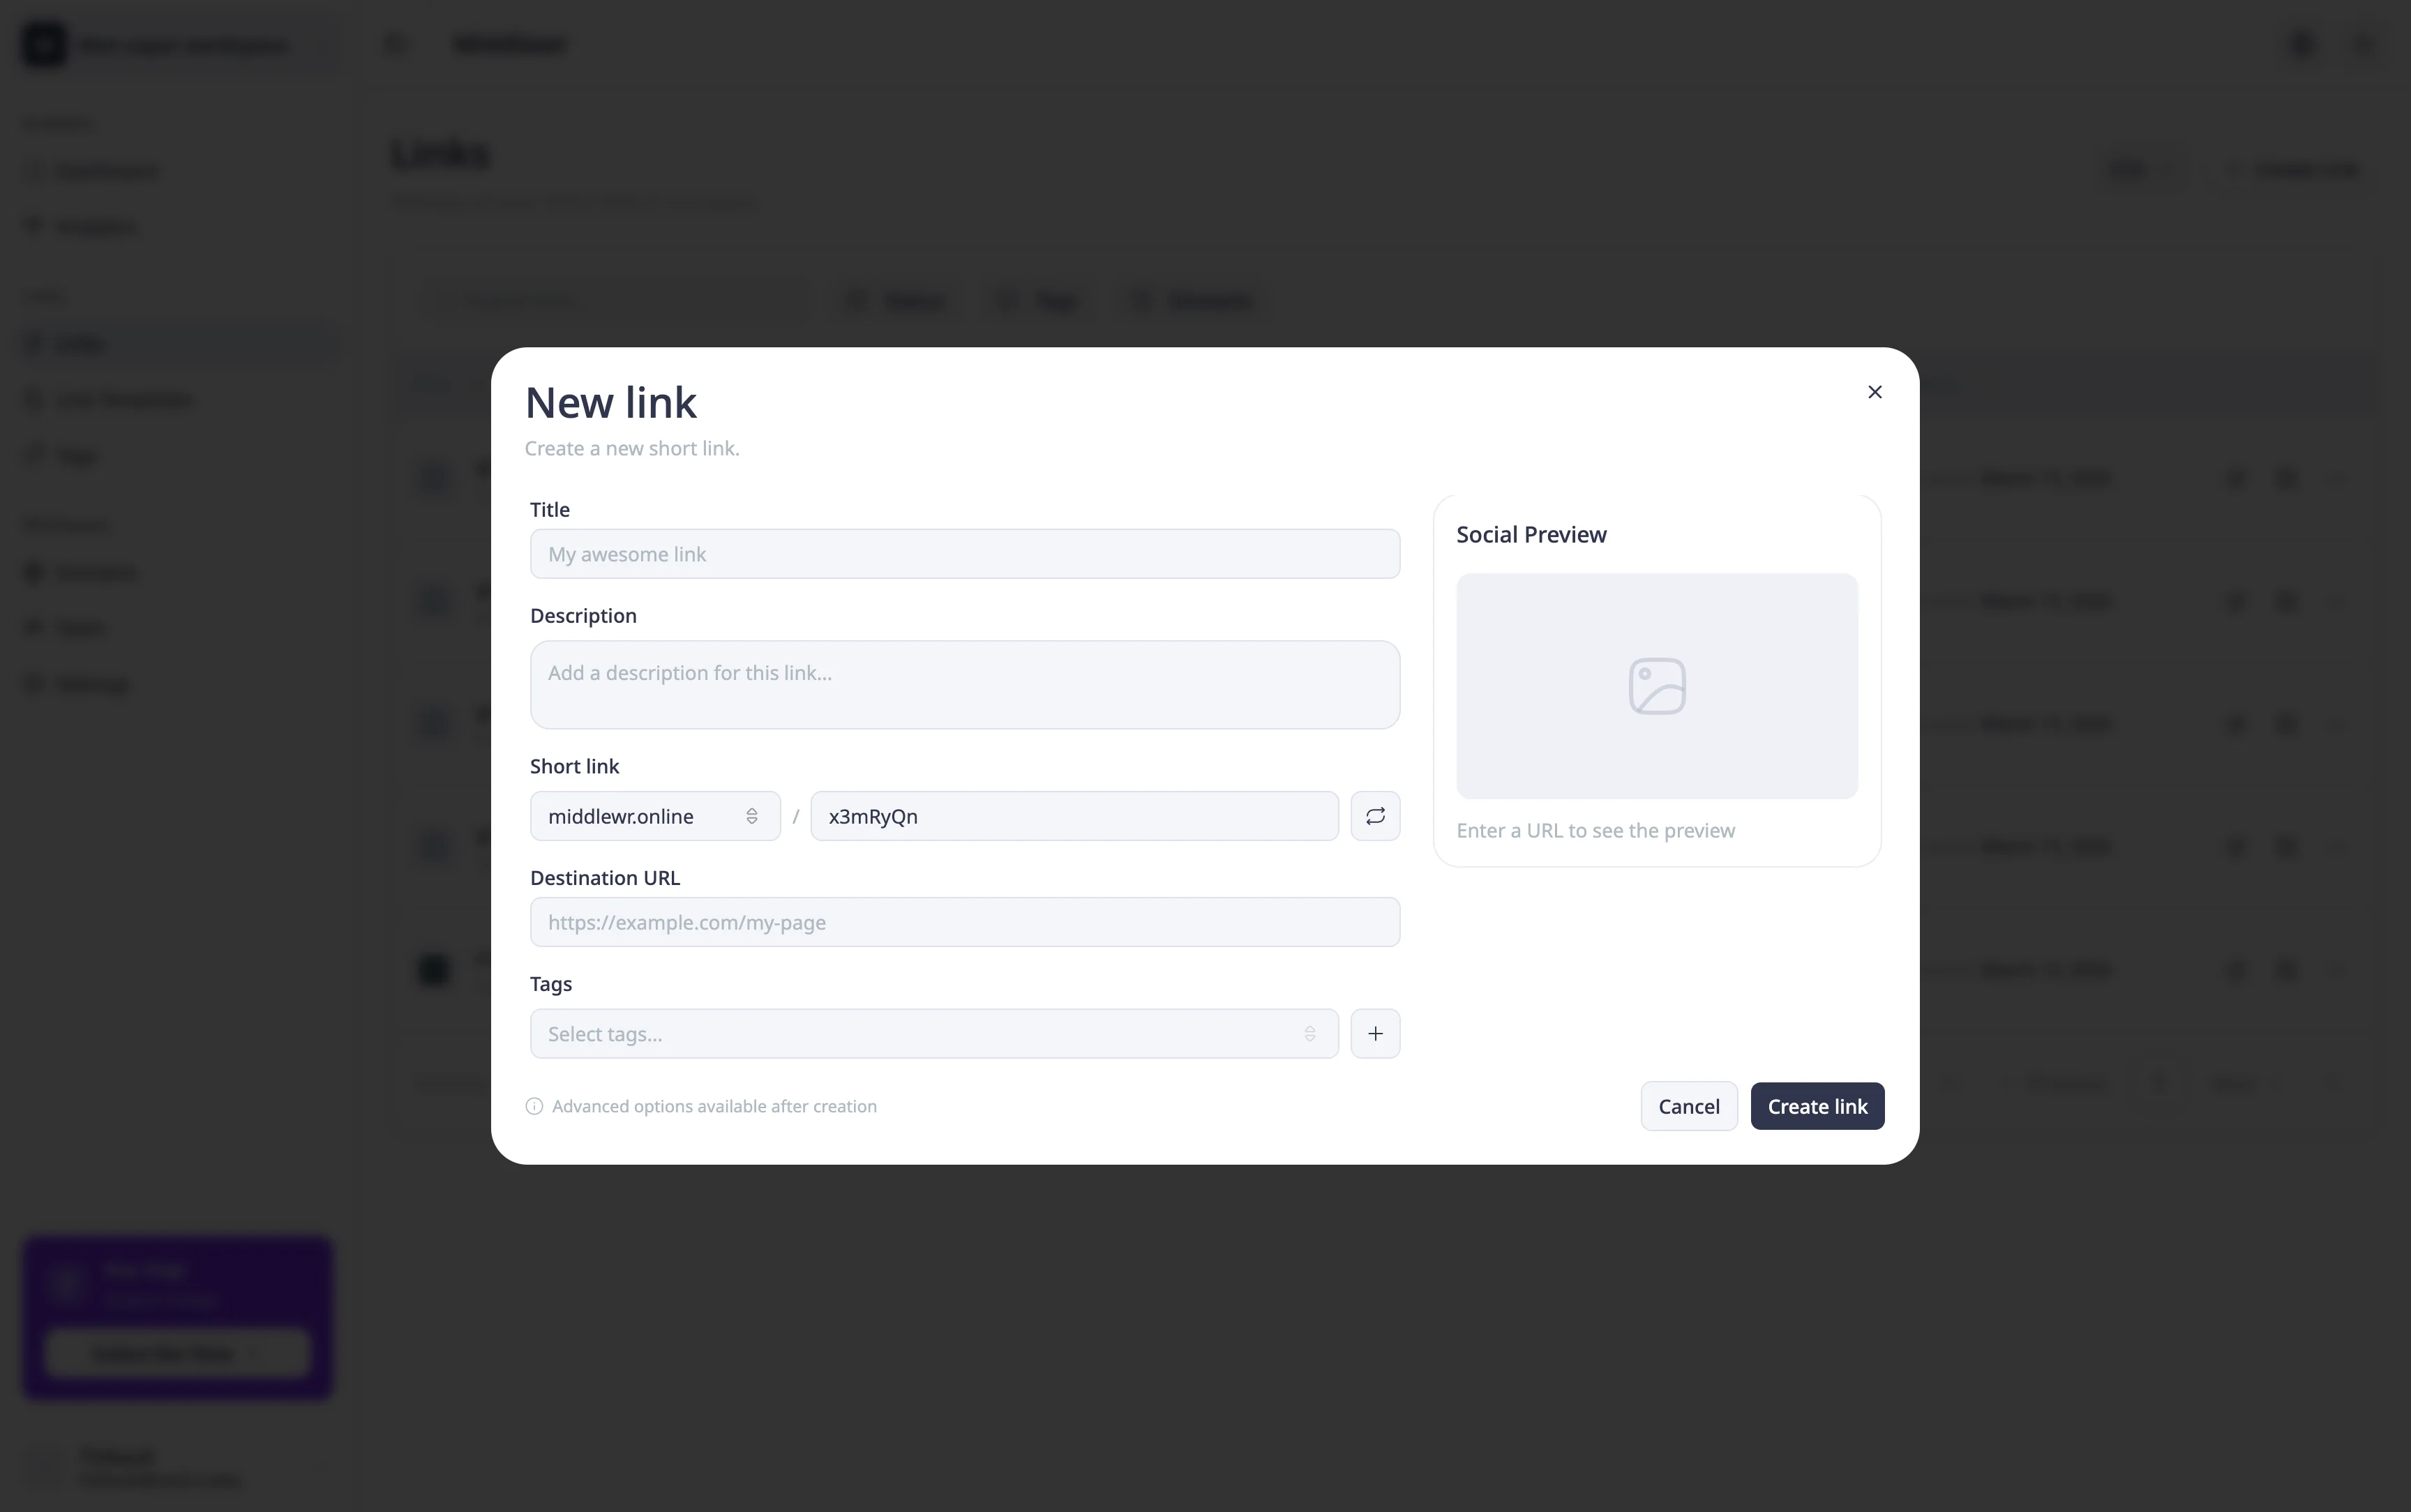
Click the Create Link button. A modal dialog will appear with a clean form containing three main fields:
- Title (optional) — a human-readable label to help you identify the link in your dashboard.
- Description (optional) — a longer note for context, useful when you're managing dozens of links and need a reminder of what each one is for.
- Destination URL — the full URL you want your short link to point to.
Step 3: Configure your link
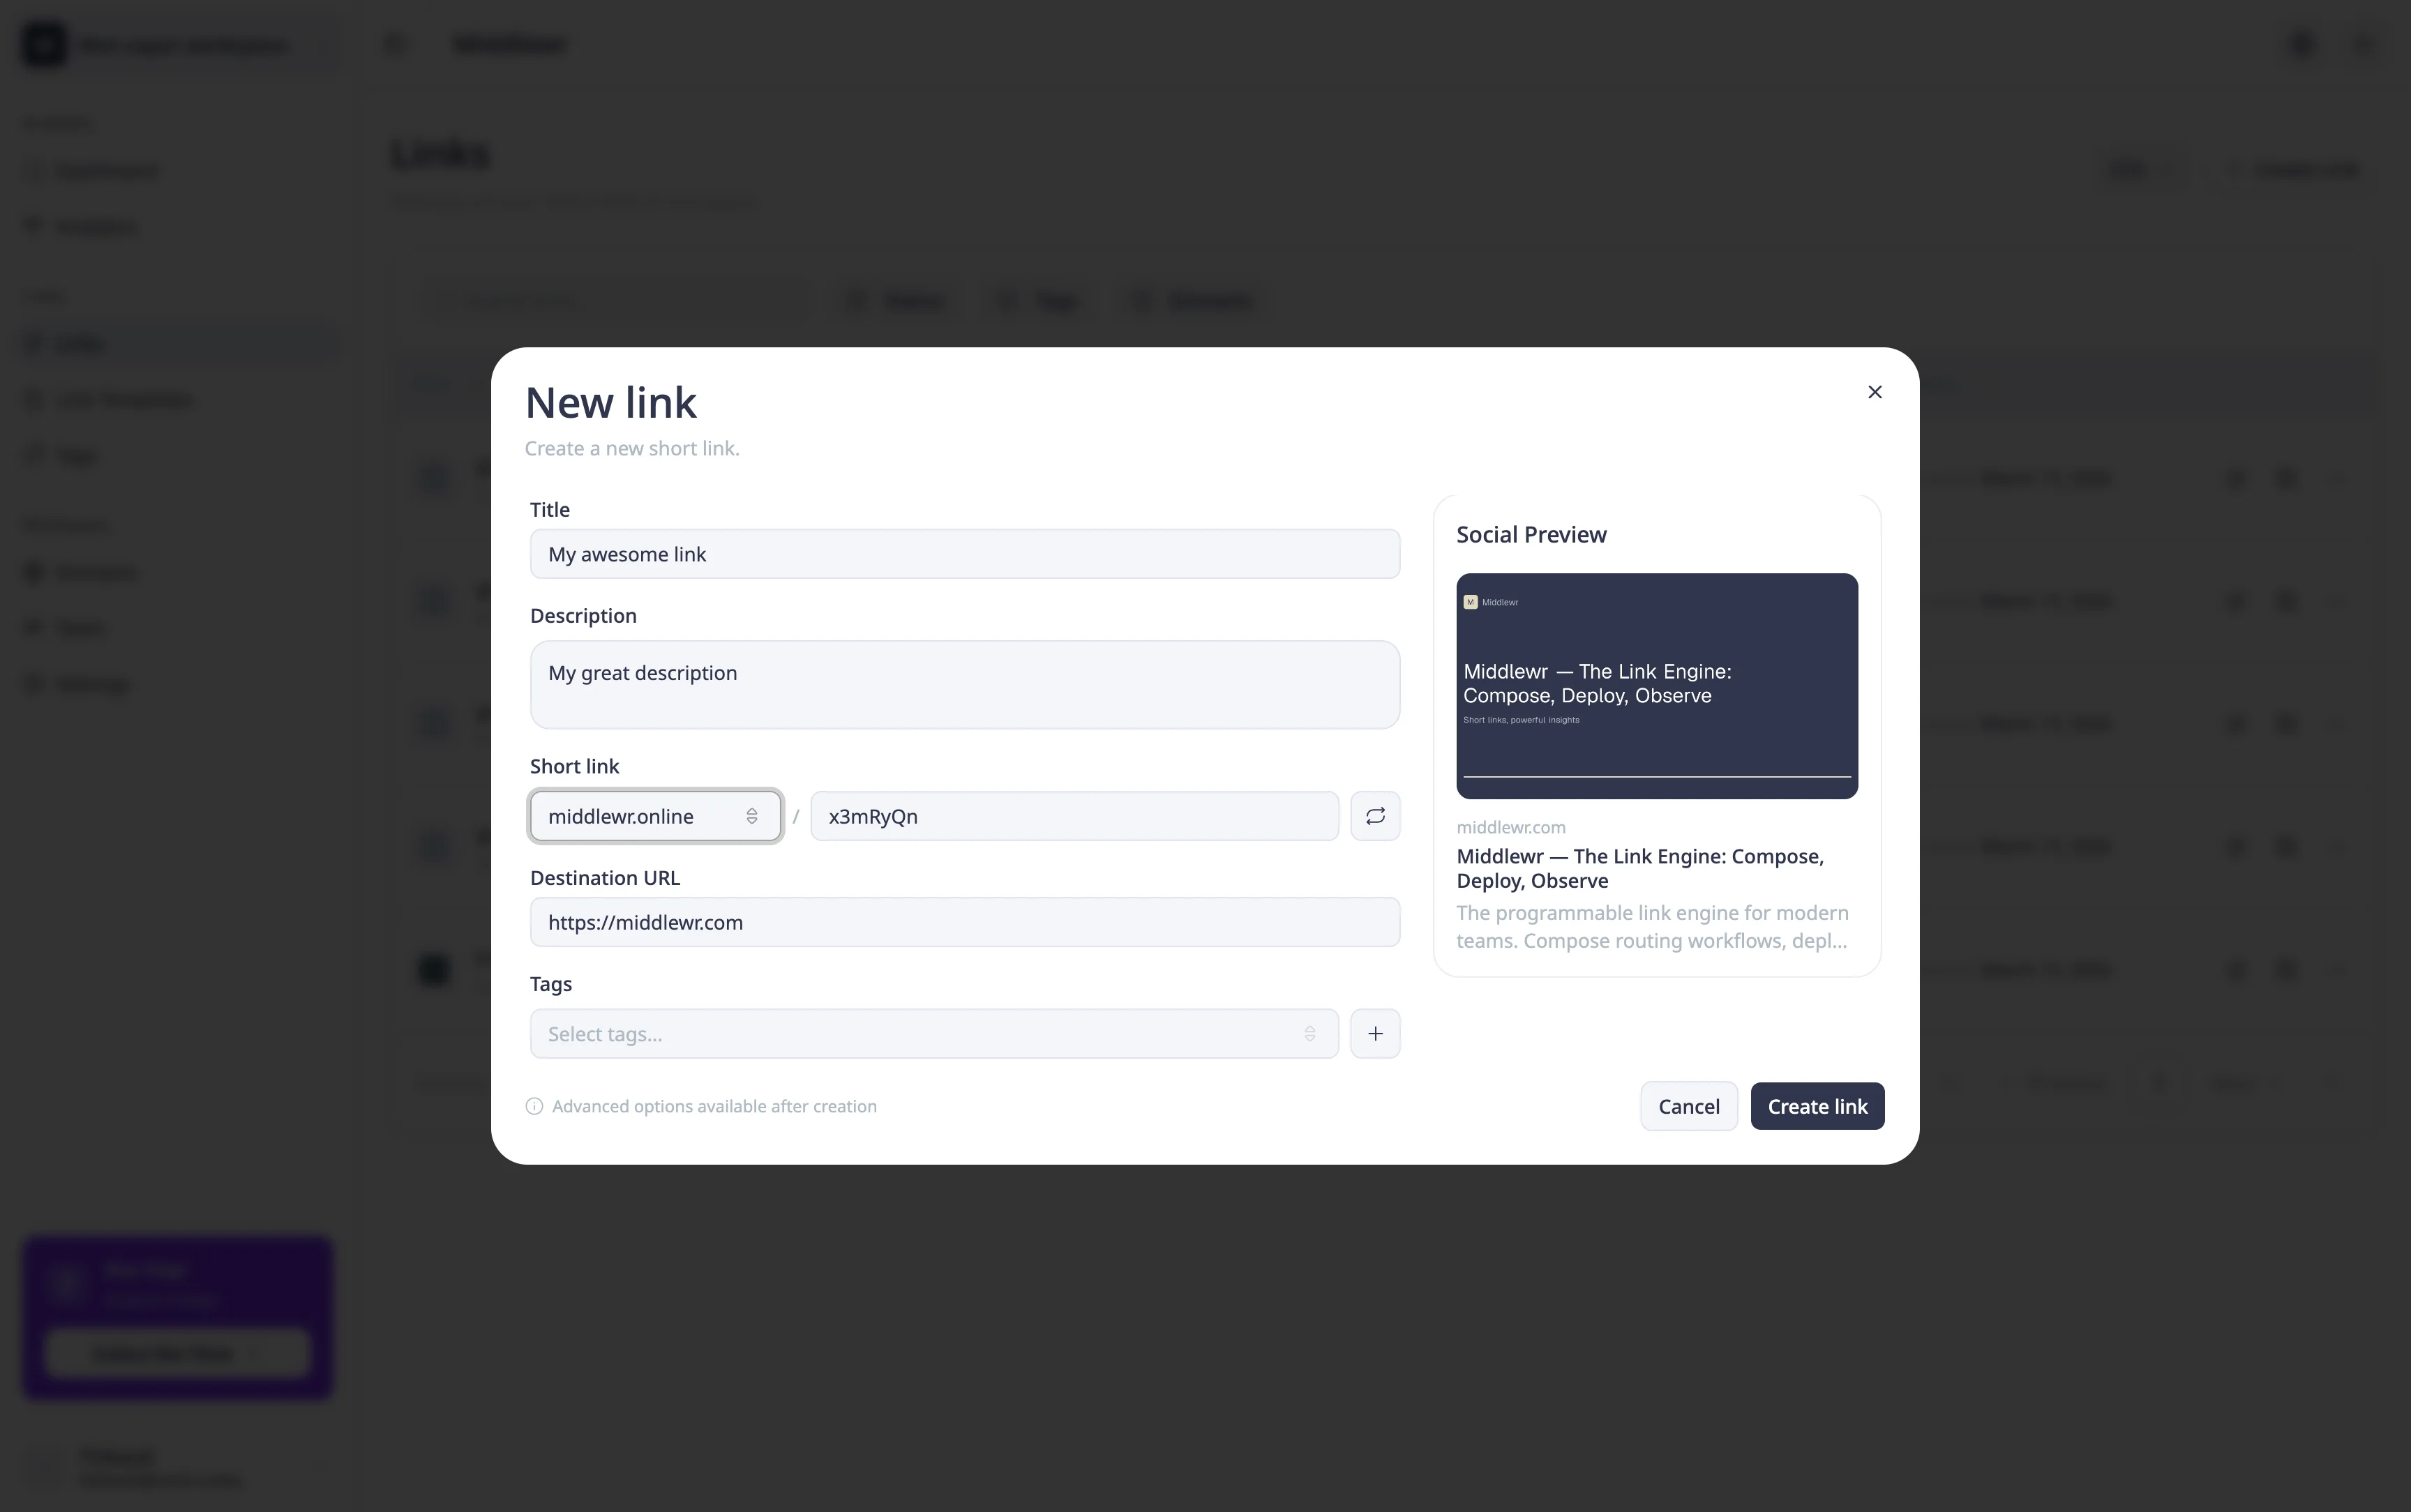
Start by giving your link a title — something like "My Website" — so it's easy to find later. Then enter the destination URL — for this example, let's use https://example.com.
Below the main fields, you'll also find a few additional options:
- Custom short code — by default, Middlewr generates a random short code (e.g.,
mwdr.co/xK3p). If you'd prefer something memorable, you can set your own, likemwdr.co/landing. Custom codes must be unique per domain. - Tags — assign one or more tags to categorize your link. Tags make it easy to filter and organize links later, especially once your library grows. You can create new tags on the fly or pick from existing ones.
Step 4: Create the link
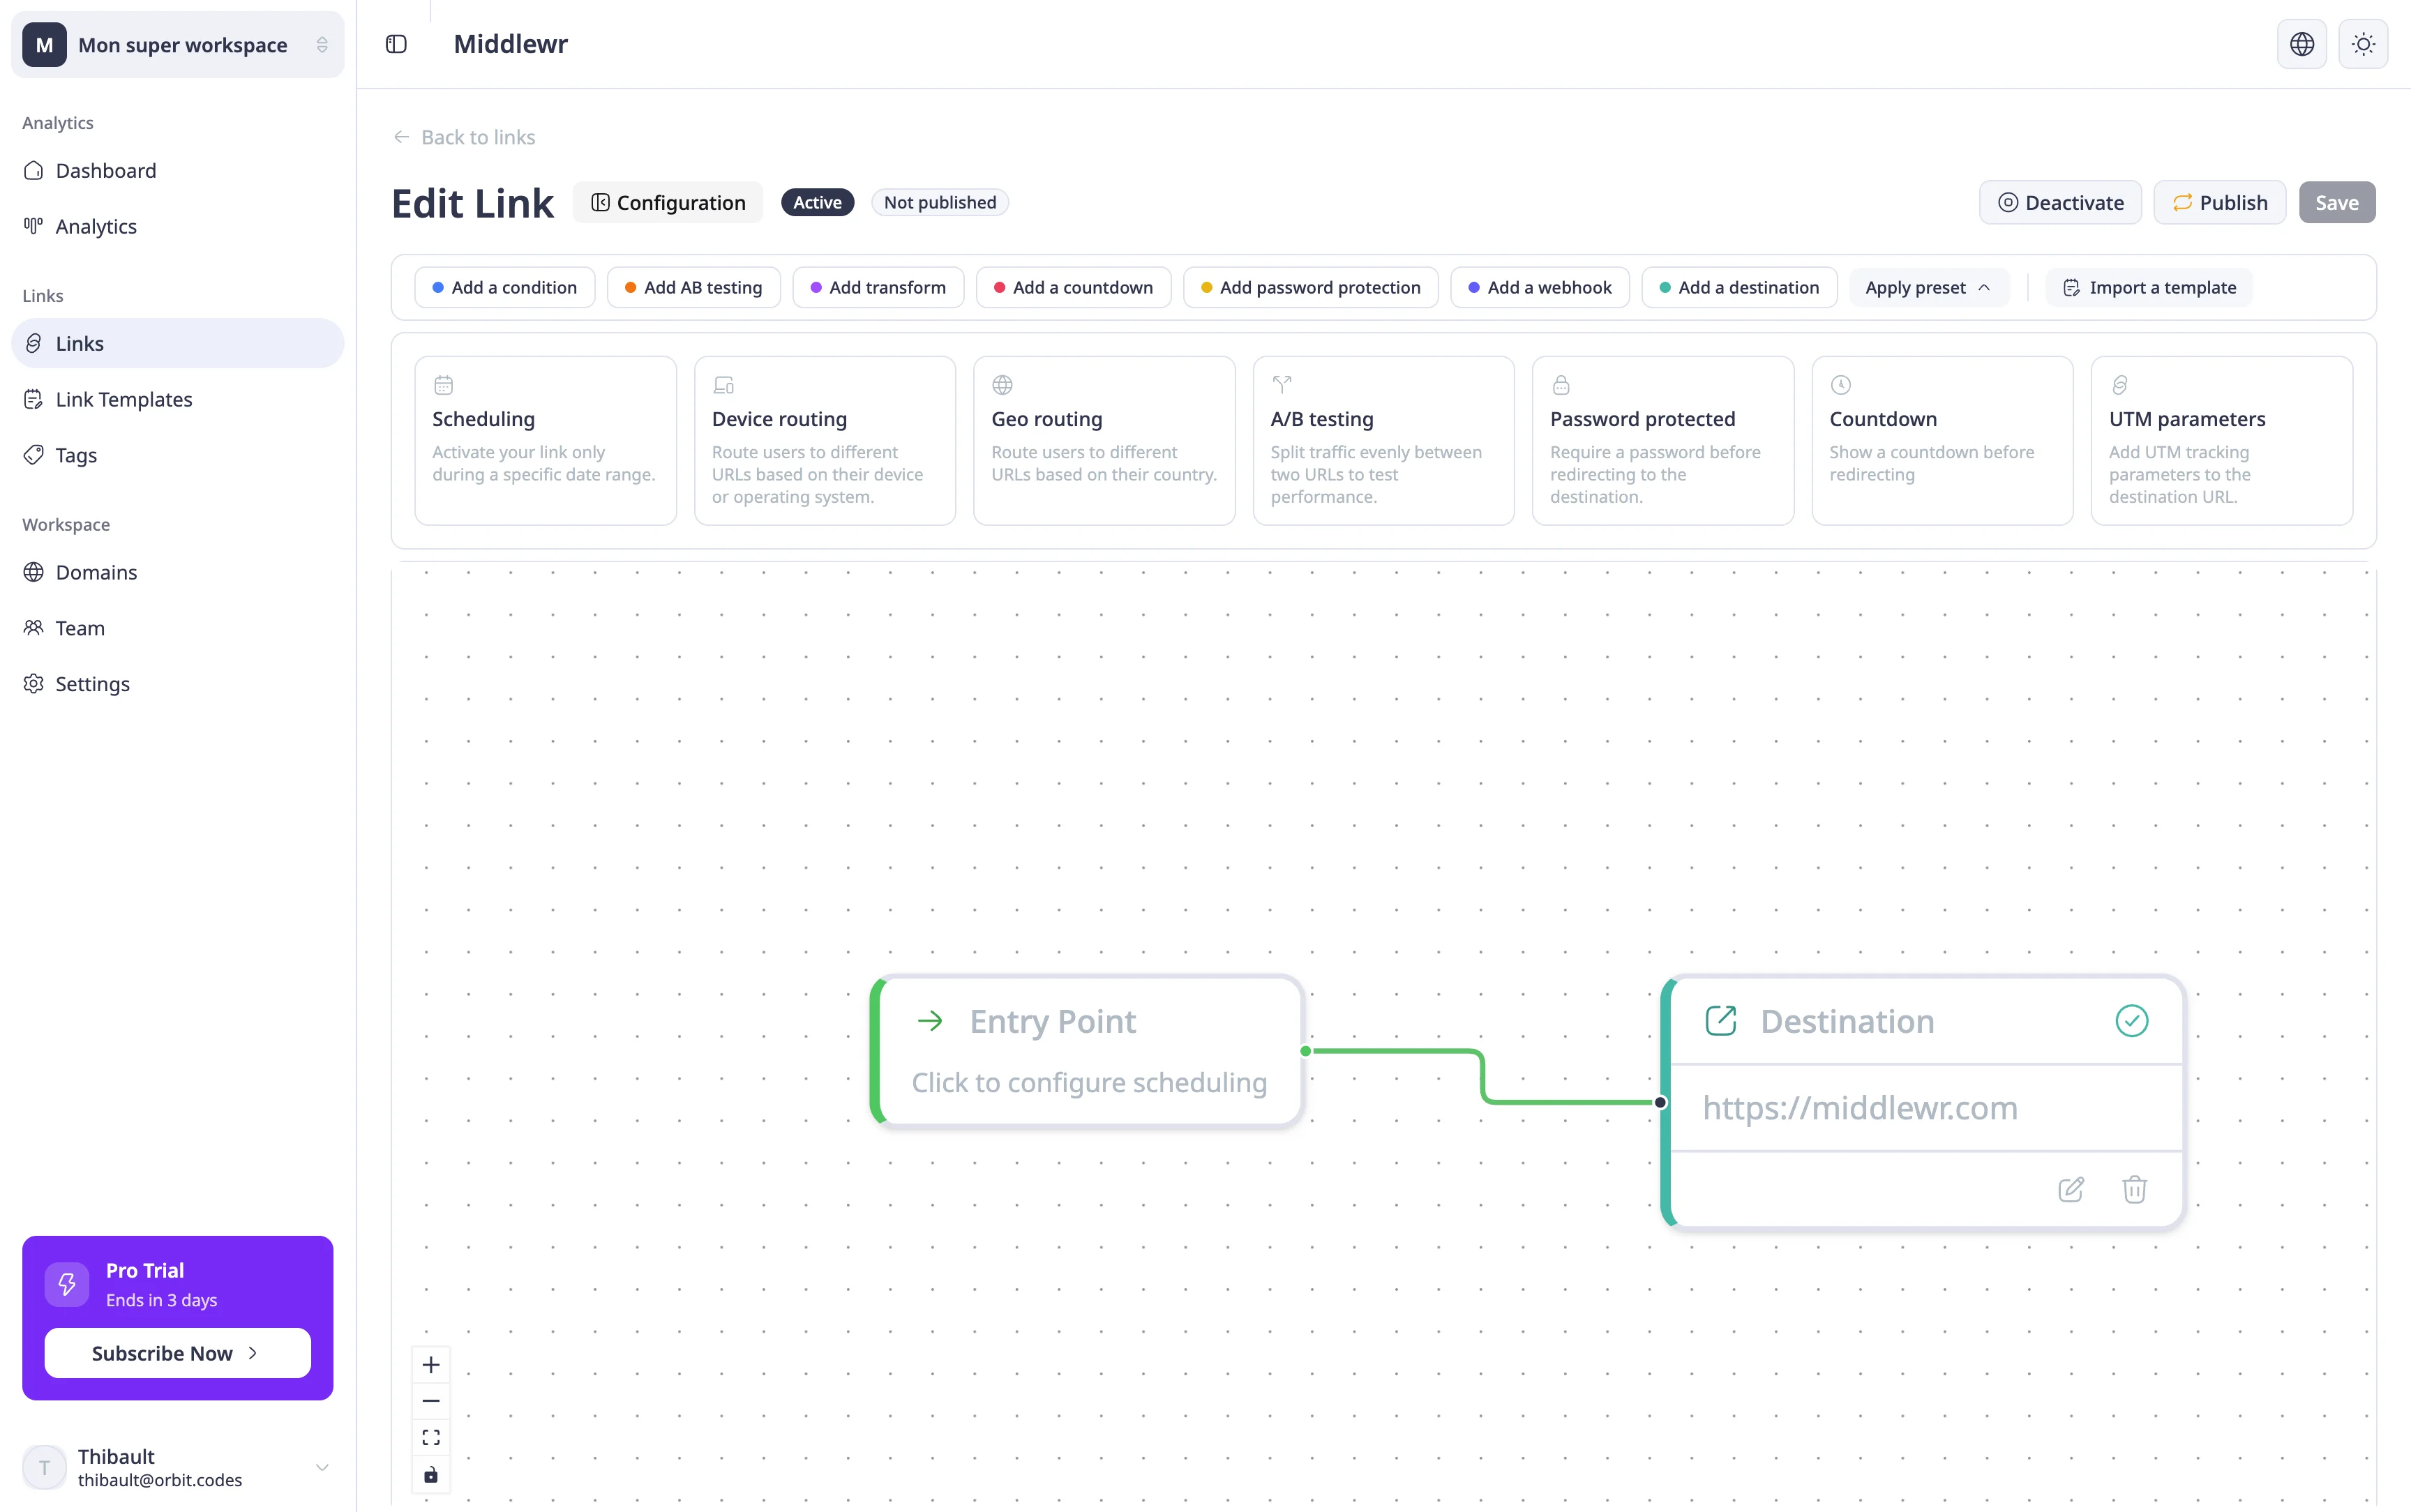
Once you're happy with your configuration, click Create link. You'll be taken directly to the link's detail page. At this point, your link is in draft mode — it's not live yet and won't redirect anyone.
Step 5: Publish and verify
To make your link active, click the Publish button. Once published, the link is live and will start redirecting visitors to the destination URL.
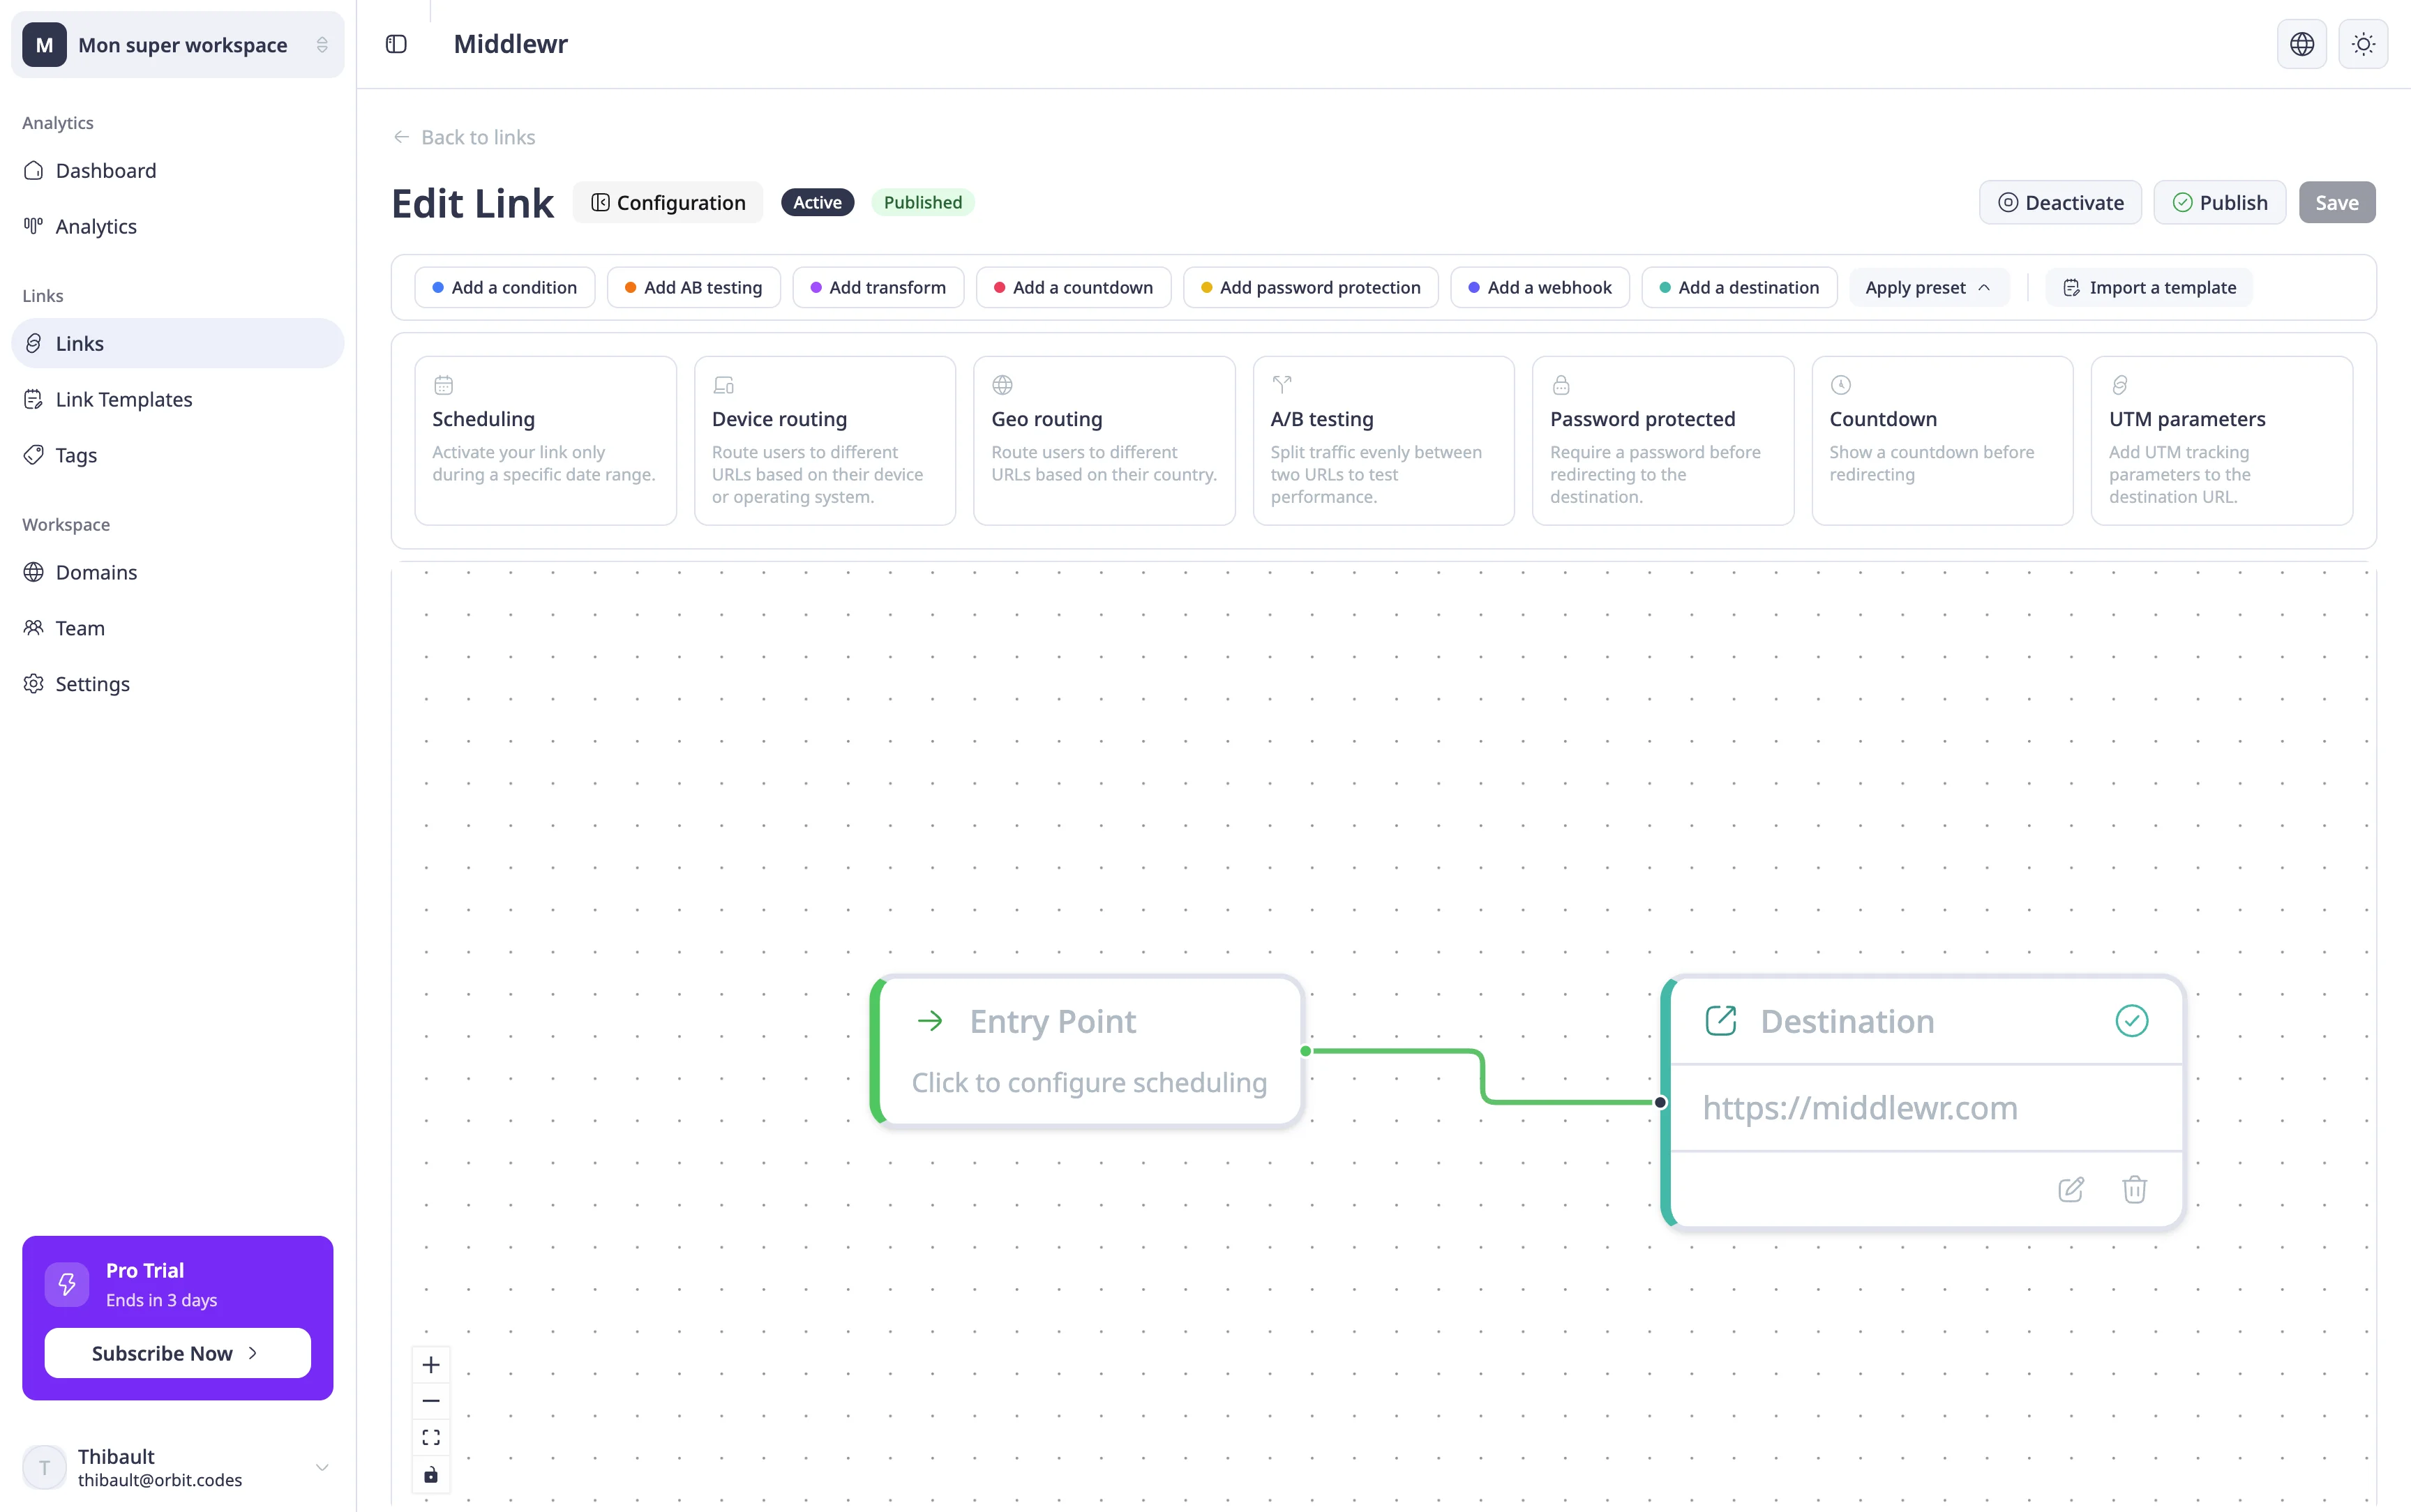
To verify everything works, open the configuration side panel to copy your short URL, then paste it into a new browser tab. It should redirect you to the destination URL you entered. If the redirect lands correctly, your link is ready to share.
Congratulations — you've just created and published your first short link in Middlewr!
Going Further
Now that you know how to create a link, here are a few things to explore next:
- Set up conditional routing — redirect visitors to different destinations based on their country, device, or other criteria.
- Configure UTM tracking — append UTM parameters to your links automatically and measure campaign performance in your analytics tools.
- Generate QR codes — turn any short link into a scannable QR code for print, events, or offline campaigns.
- Set up a custom domain — connect your own domain so every short link carries your brand.