Set Up UTM Tracking

UTM parameters are the standard way to track where your traffic comes from. When you add UTM tags to a short link, every click carries campaign metadata through to your analytics tools — Google Analytics, Plausible, Mixpanel, or whichever platform you use. Middlewr lets you attach UTM parameters directly to your links through the visual graph editor, so the parameters are appended automatically at redirect time without cluttering your original destination URL. This guide walks you through the process.
Prerequisites
Before you begin, make sure you have:
- A Middlewr account
- A workspace with the Manage Links permission
- At least one existing link (or create one — see How to Create Your First Short Link)
A quick refresher on UTM parameters
UTM parameters are query string tags appended to a URL. There are five standard ones:
| Parameter | Purpose | Example |
|---|---|---|
| utm_source | Where the traffic comes from | newsletter, google, facebook |
| utm_medium | The marketing channel | email, cpc, social |
| utm_campaign | The specific campaign name | spring_promo_2026, product_launch |
| utm_term | Paid search keywords (optional) | running+shoes |
| utm_content | Differentiates ad variants (optional) | header_link, cta_button |
At minimum, fill in source and medium — those two give you the most actionable data. Campaign, term, and content add extra granularity when you need it.
Step 1: Open the link editor and apply a UTM preset
Navigate to your Links page and click the edit icon on the link you want to track. This opens the link detail view with the visual graph editor.
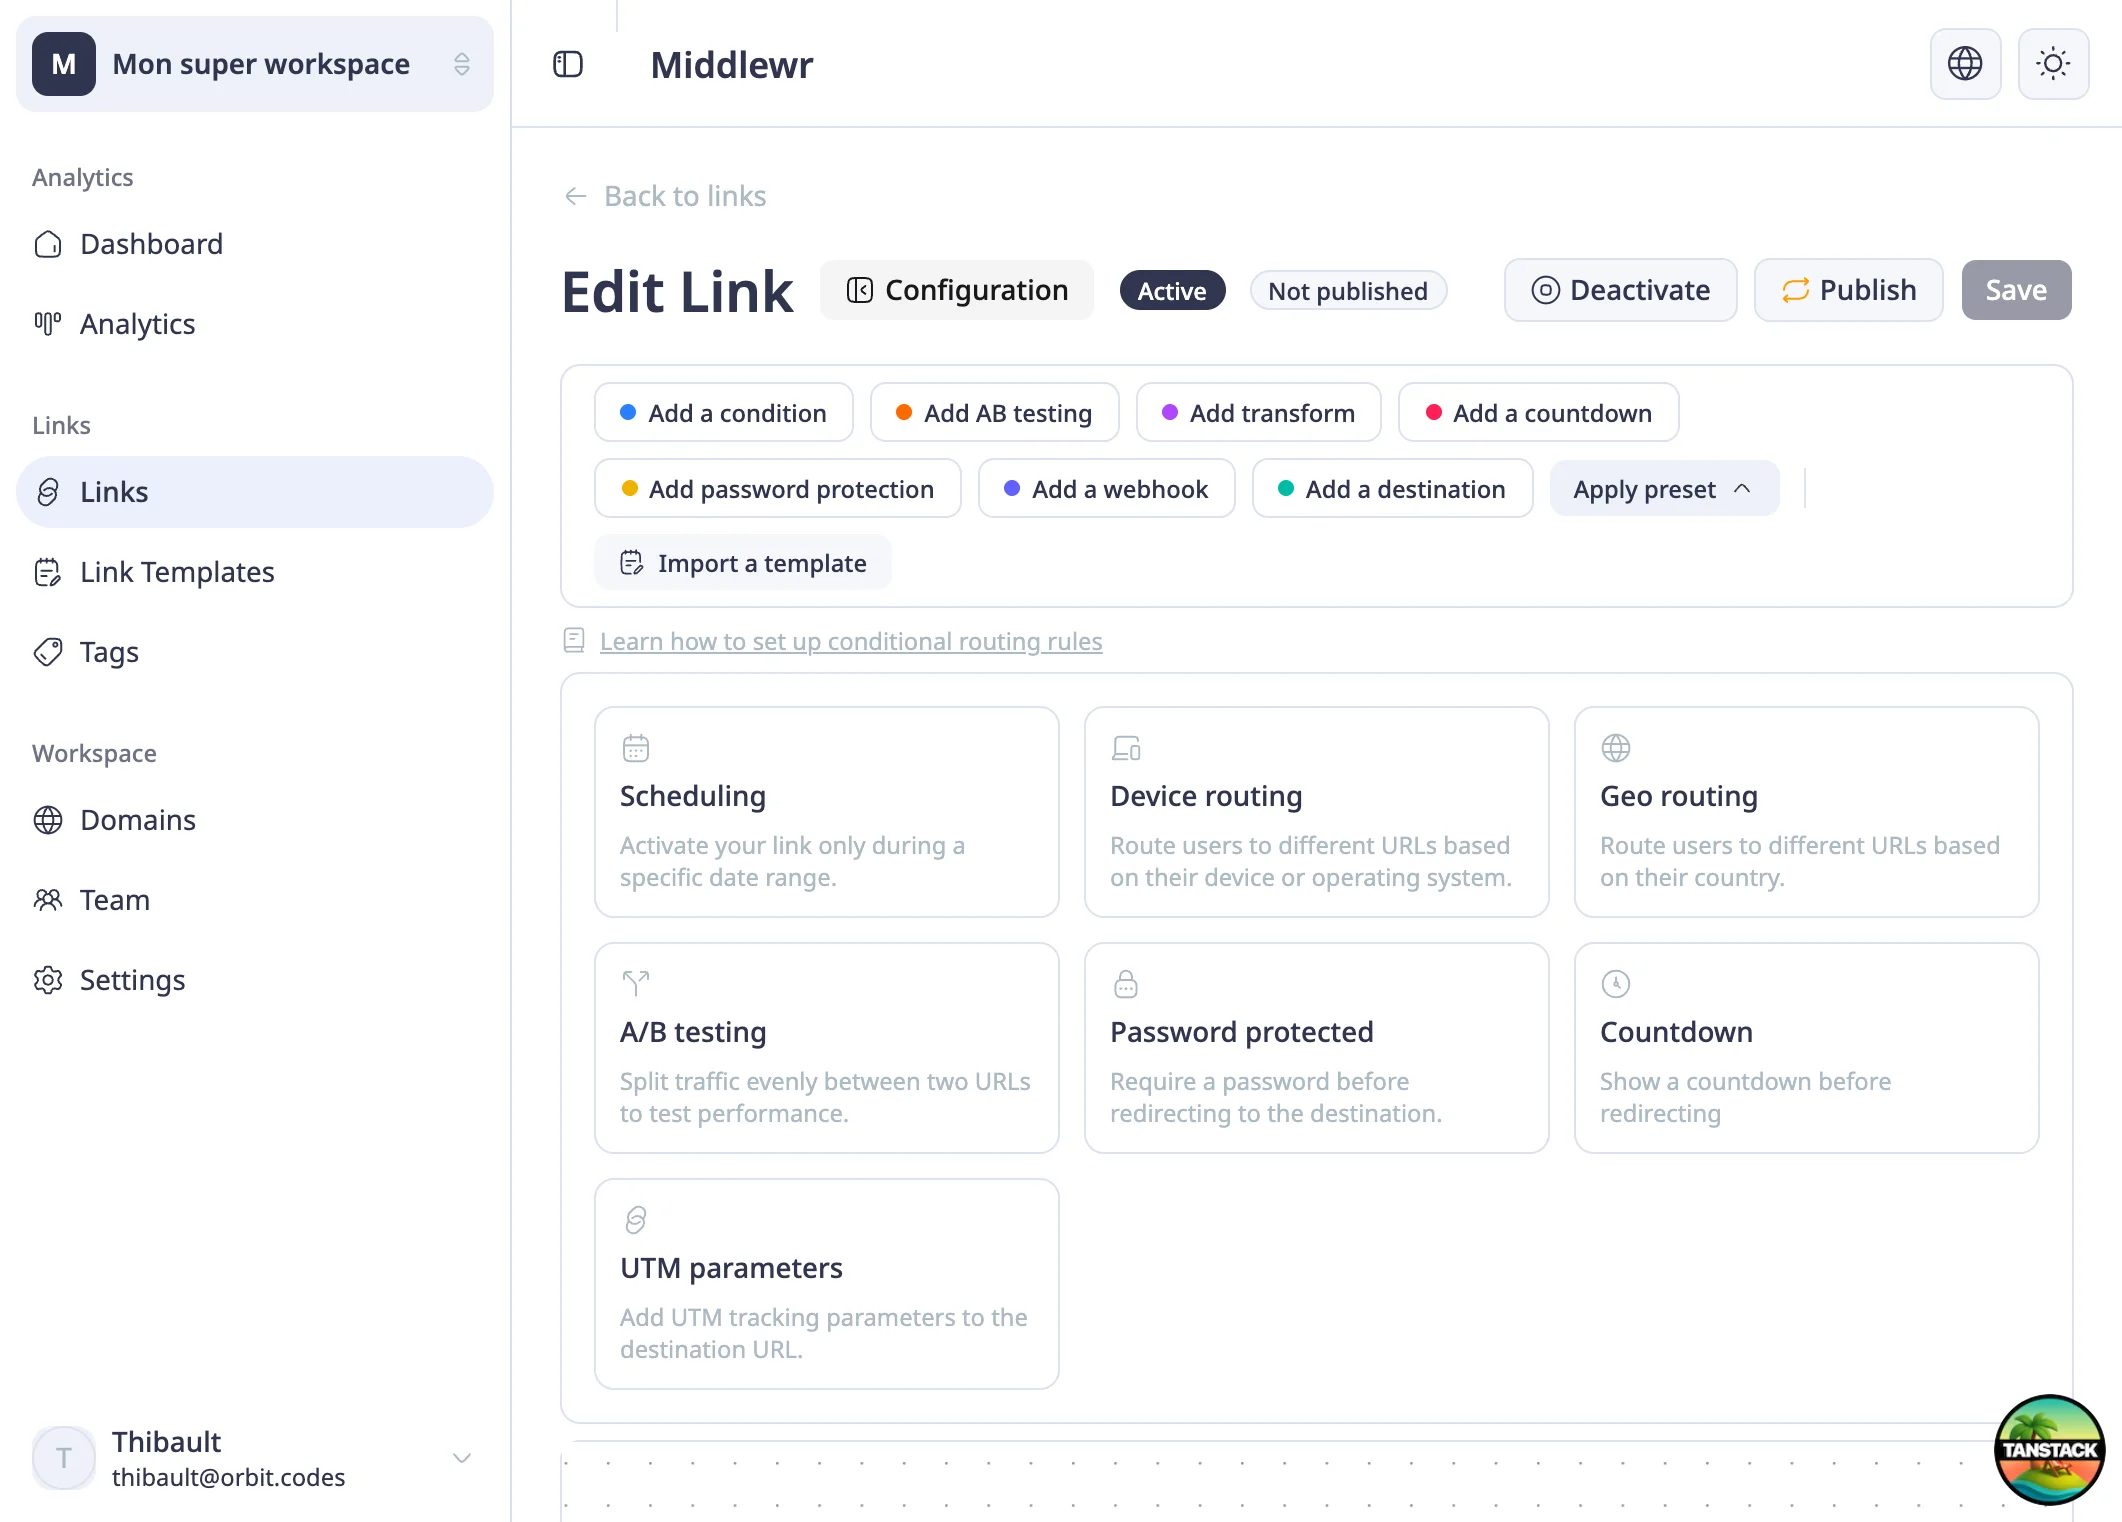
In the toolbar, click Apply preset to reveal the available preset cards. You'll see options like Scheduling, Device routing, Geo routing, and more. Click the UTM parameters card.
Step 2: Fill in your UTM values
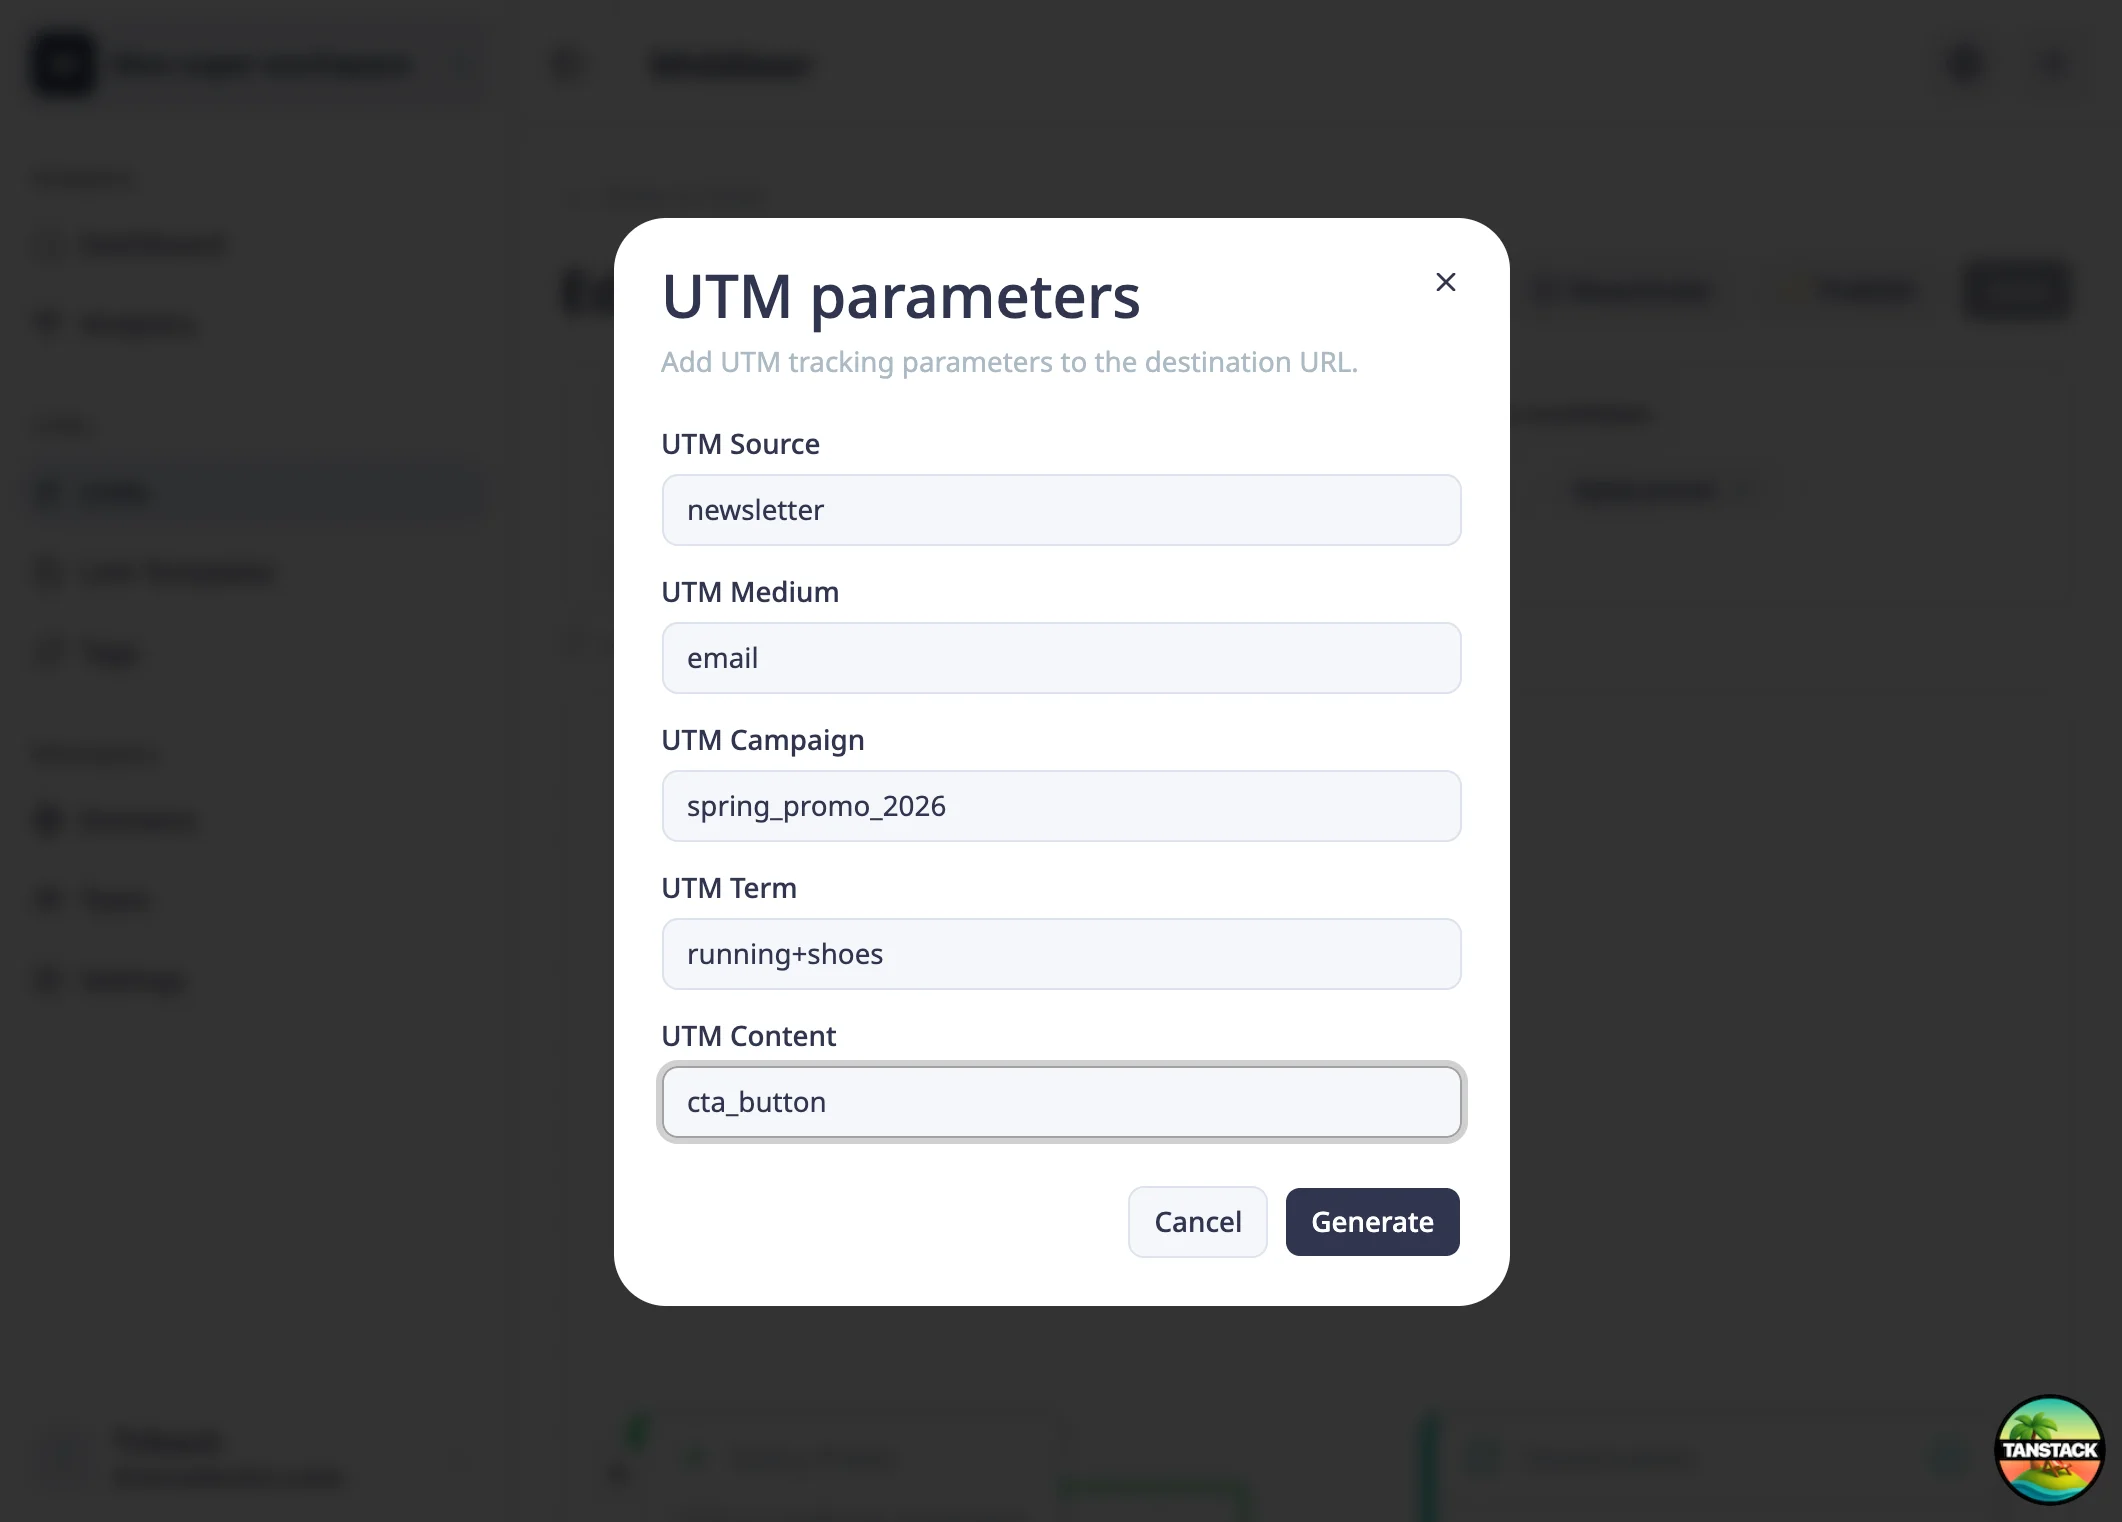
A modal appears with five fields — one for each UTM parameter. Fill in at least the Source or Medium field (at least one is required), then add as many of the others as you need.
For example, if you're sharing this link in an email newsletter promoting a spring campaign:
- UTM Source:
newsletter - UTM Medium:
email - UTM Campaign:
spring_promo_2026 - UTM Content:
cta_button
Once you're happy with the values, click Generate.
Step 3: Review and save the graph
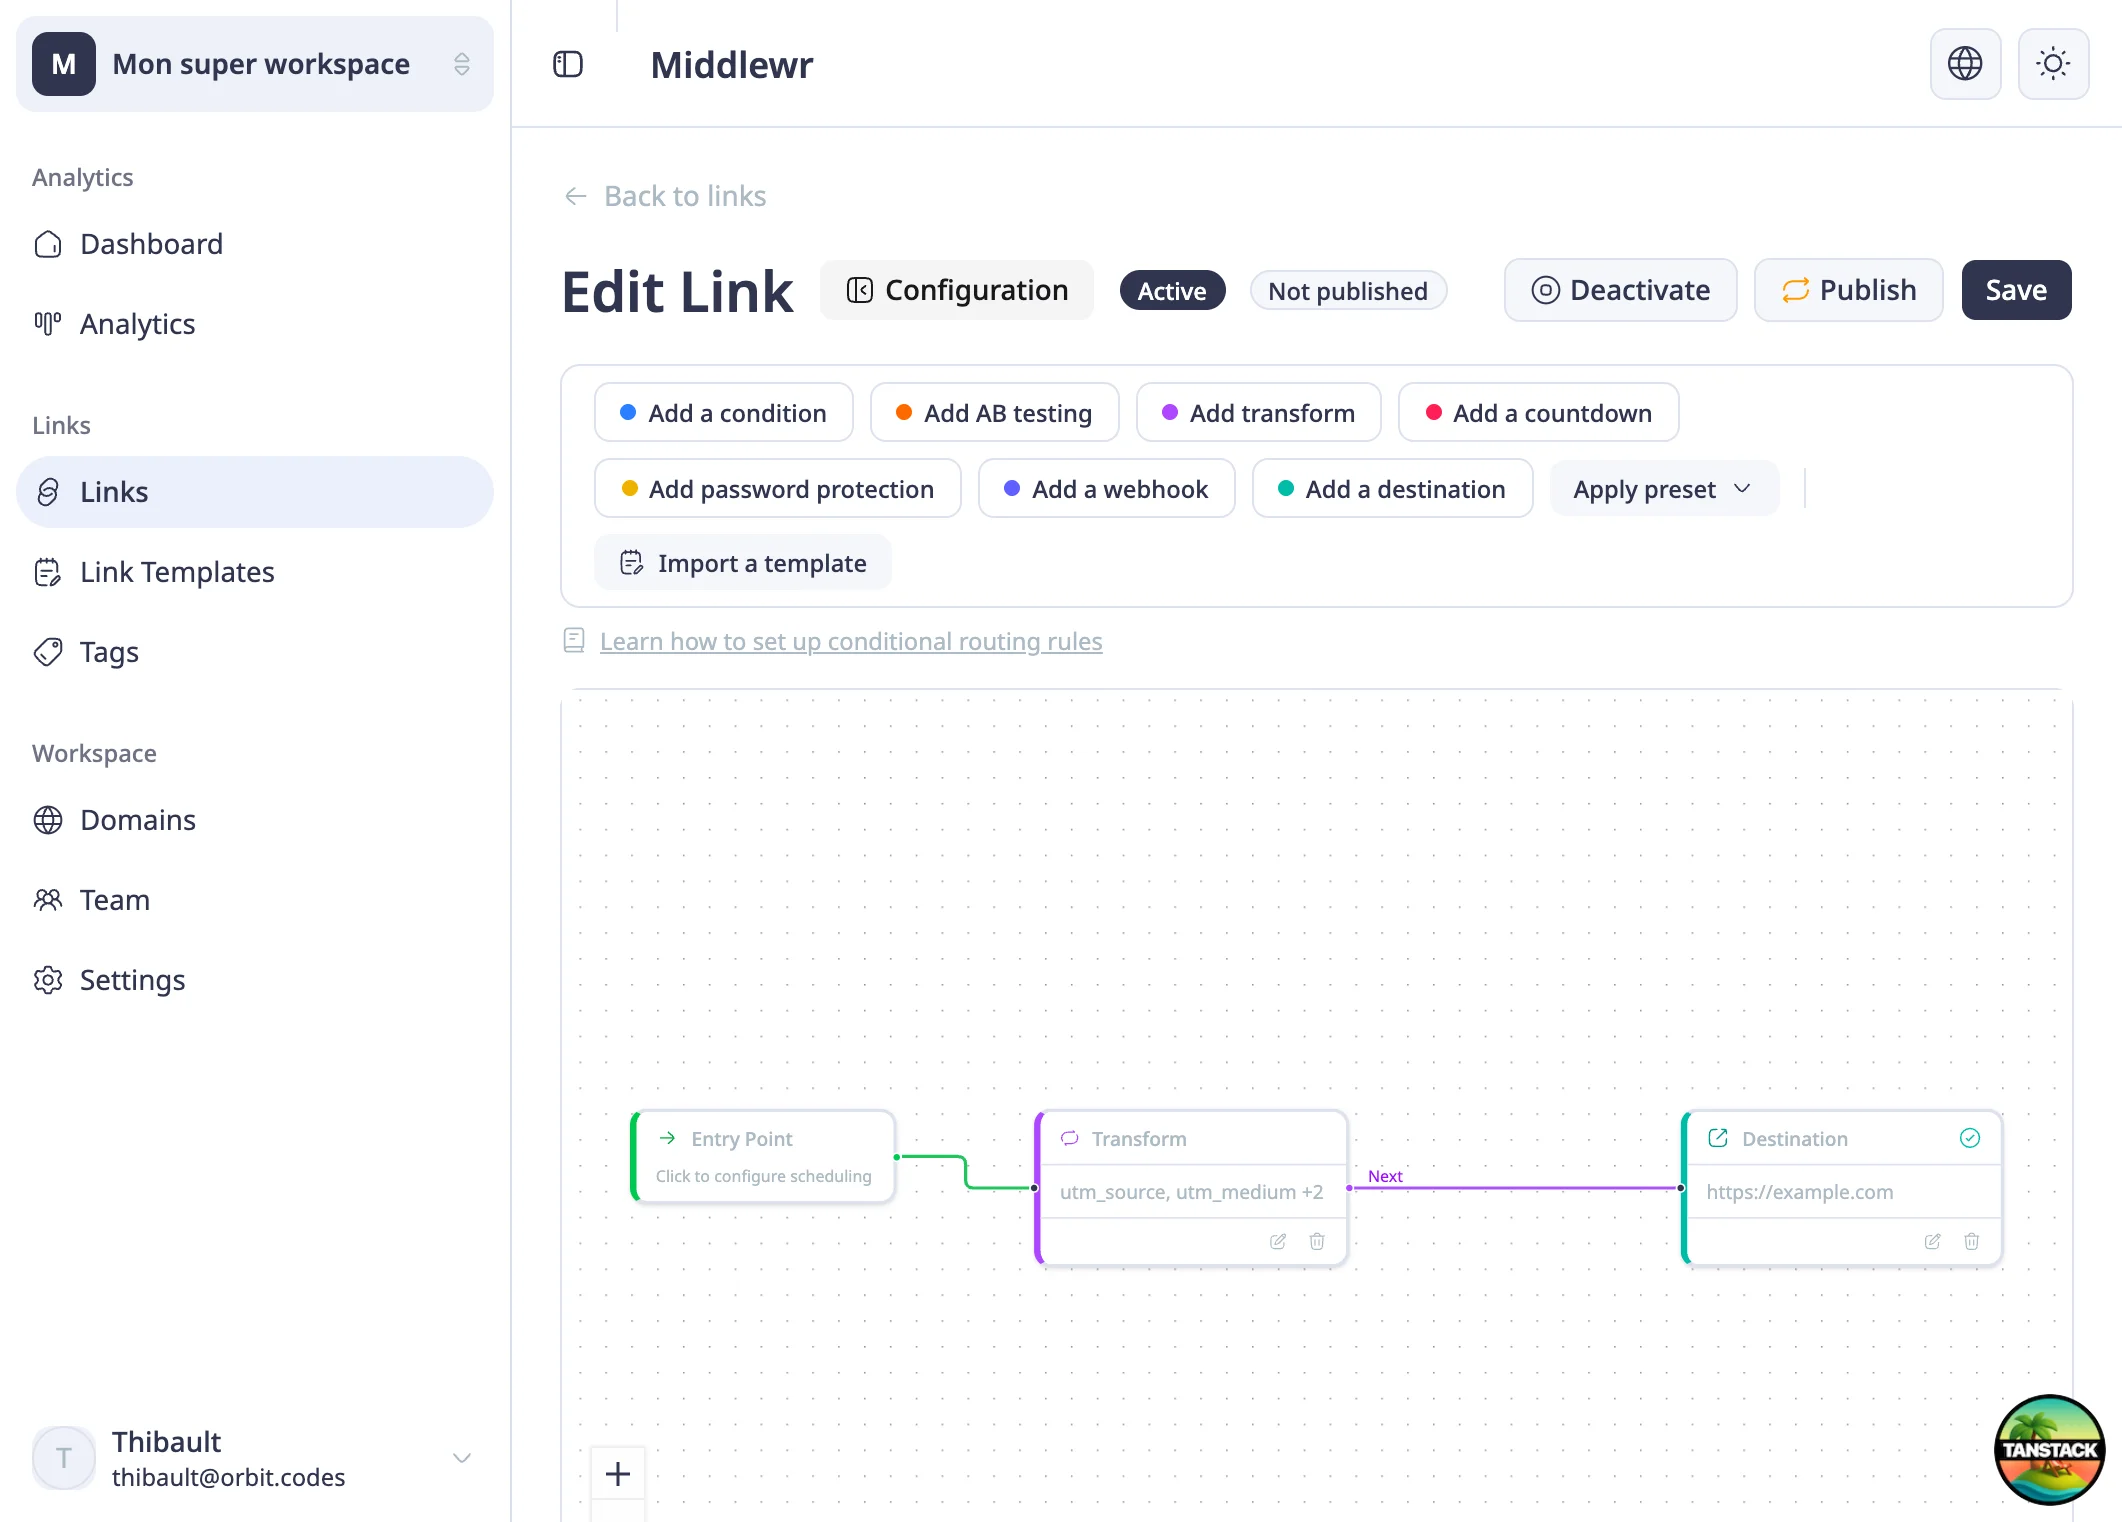
After clicking Generate, Middlewr creates a Transform node in your link's graph. This node sits between the Entry Point and the Destination, and it appends your UTM parameters to the destination URL at redirect time.
You can see the parameters summarized on the node — for example, "utm_source, utm_medium +2" means four UTM parameters are configured. Click Save in the top-right to persist the graph, then Publish to push the changes live.
From now on, every click on this short link will land on the destination URL with your UTM parameters attached automatically.
Tips for consistent UTM tracking
- Use lowercase consistently —
Newsletterandnewsletterare treated as different sources in most analytics tools. - Use underscores instead of spaces —
spring_promois cleaner and more portable thanspring promo. - Document your naming conventions — agree on standard source and medium values across your team so reports are consistent.
- Don't UTM internal links — UTM parameters are designed for external traffic. Using them on internal links can overwrite the original referrer in your analytics.
Going further
- Understand your analytics dashboard — see how UTM-tagged clicks appear in Middlewr's built-in analytics
- Set up conditional routing — combine UTM tracking with device or geo routing for targeted campaigns
- A/B testing with split routing — test different destinations while keeping UTM tracking consistent