Generate and Customize QR Codes

QR codes bridge the gap between offline and online. Whether you're adding one to a poster, a product label, or a conference badge, Middlewr lets you generate a fully customizable QR code for any short link — and track every scan through the same analytics dashboard you already use. In this guide, you'll learn how to open the QR Code Studio, tailor the design to match your brand, and export the result for print or digital use.
Prerequisites
Before you begin, make sure you have:
- A Middlewr account
- A workspace where you have the Editor role or above
- At least one existing short link — if you haven't created one yet, follow the Create your first short link guide
Step 1: Open the QR Code Studio
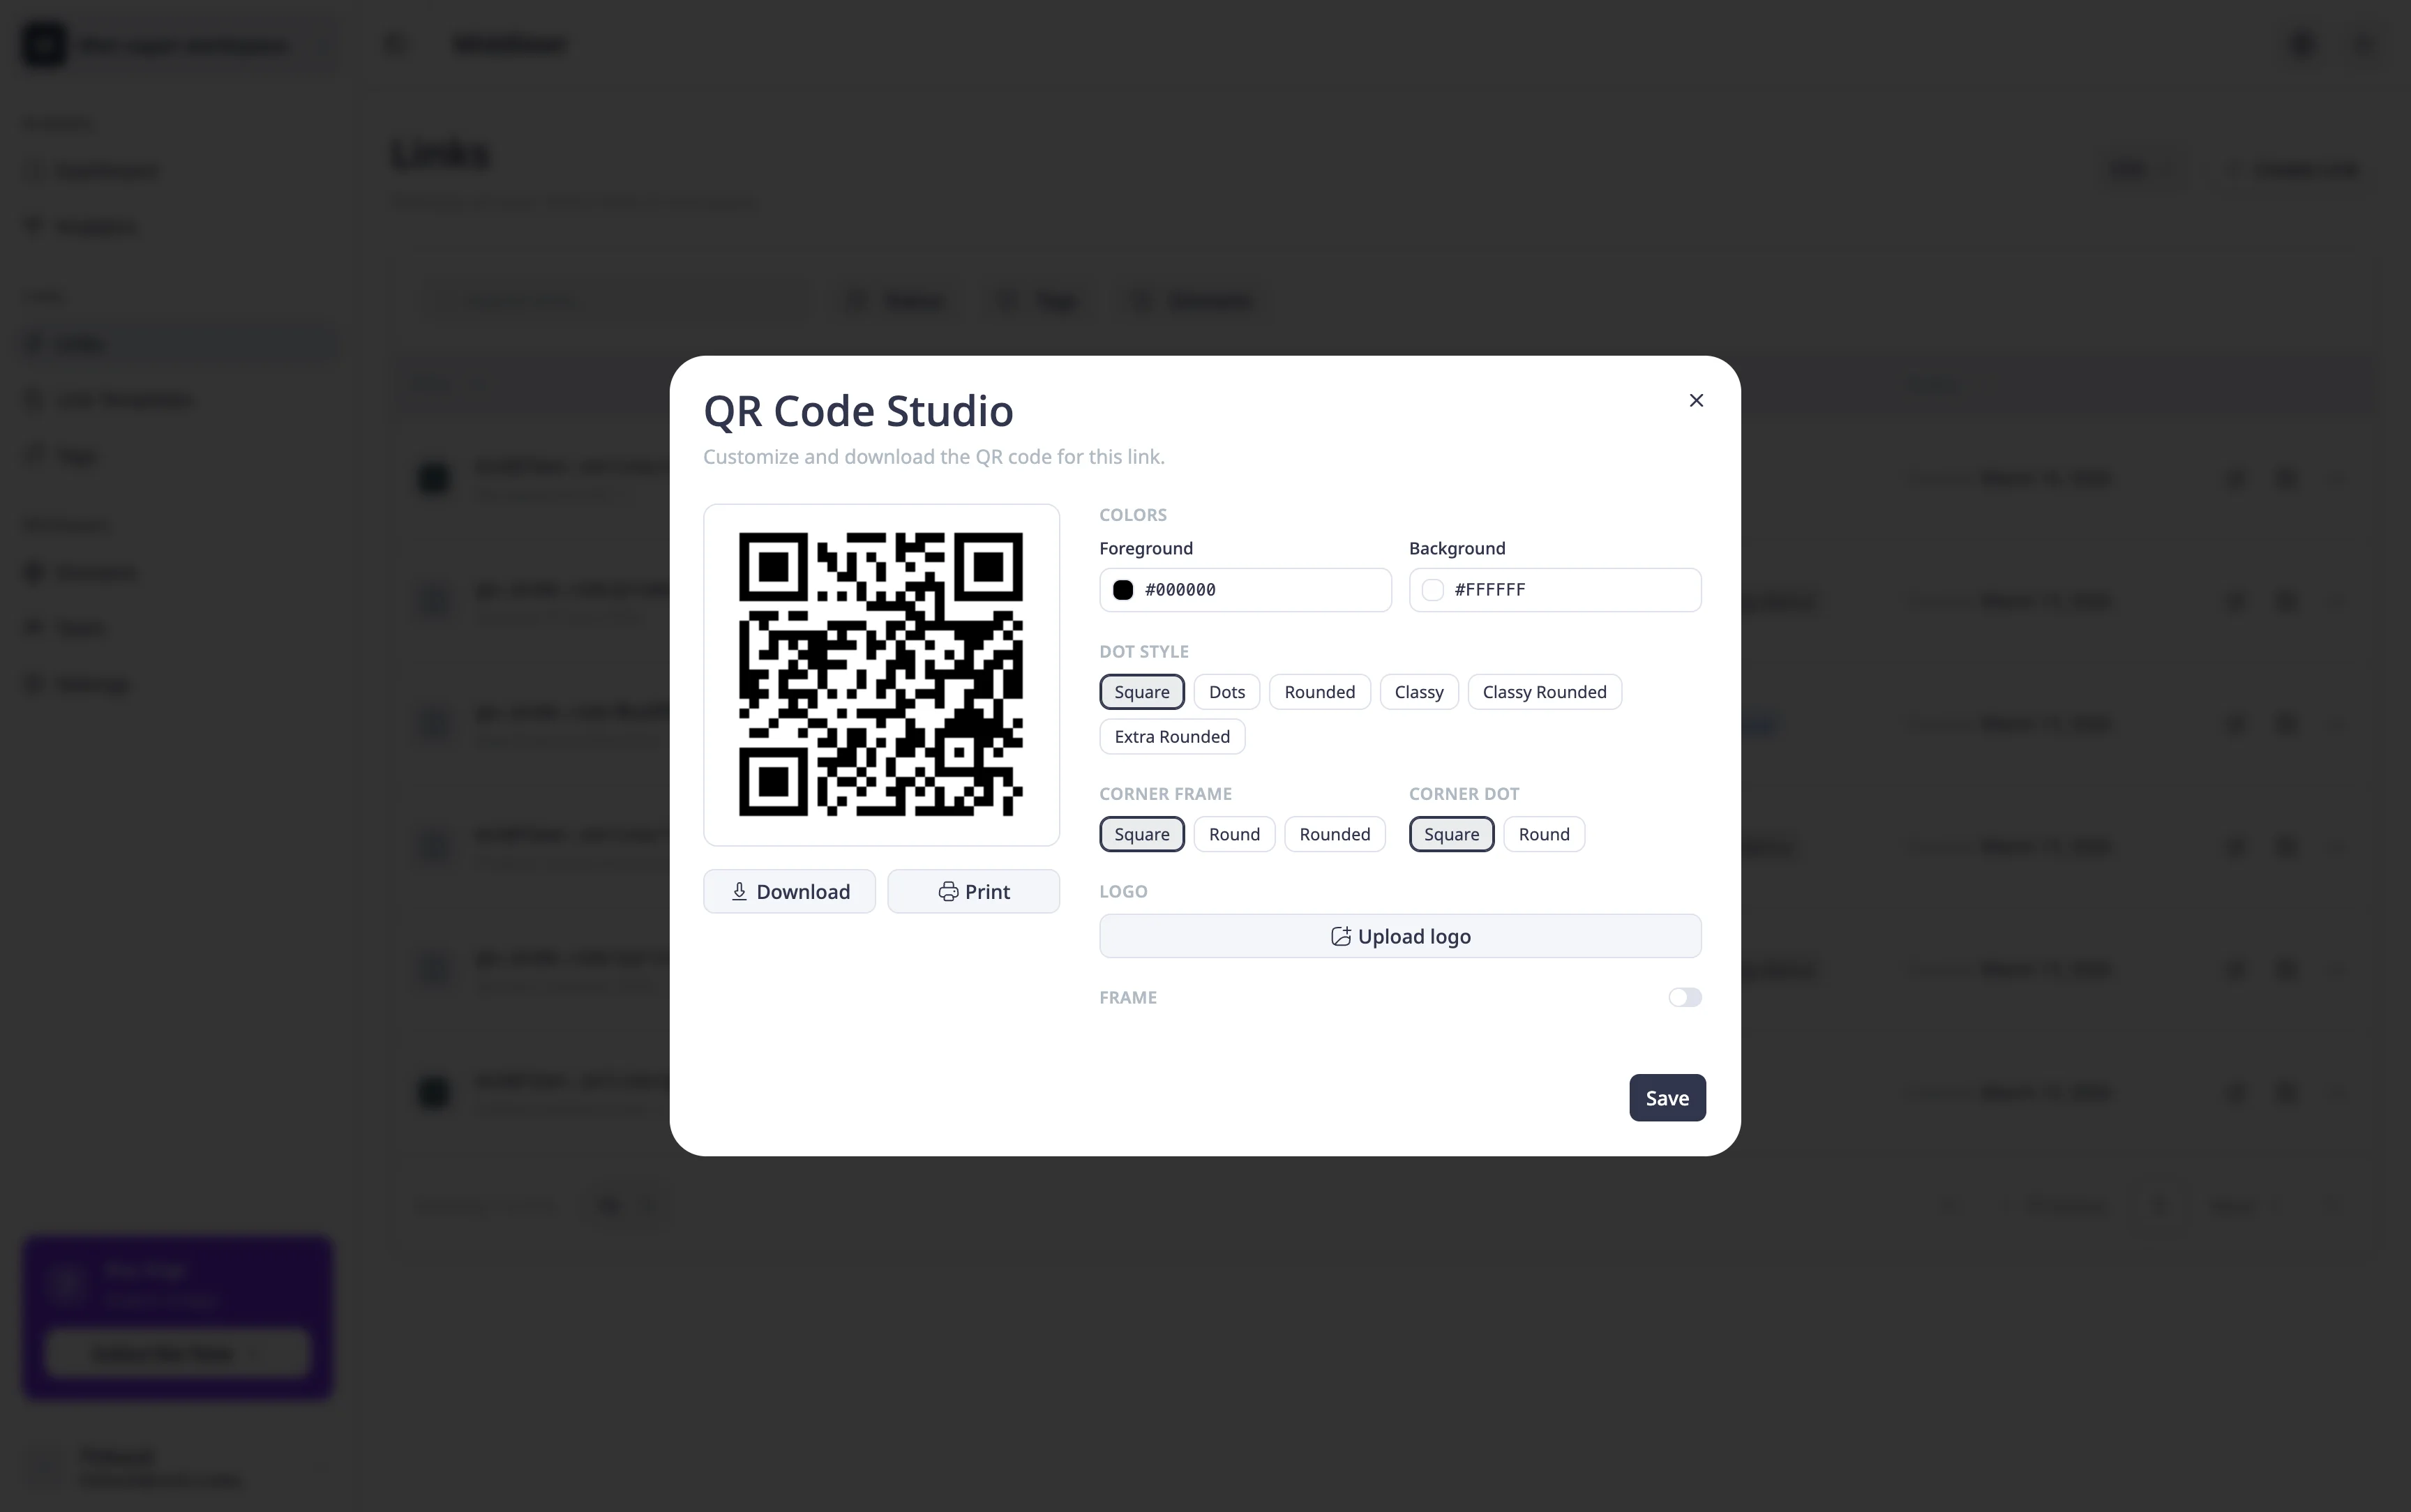
Navigate to the Links page and find the link you want to generate a QR code for. In the link's row, click the QR code icon in the action buttons. This opens the QR Code Studio modal.
The modal is split into two areas. On the left, a live preview shows the QR code as it will appear when exported. On the right, the customization panel gives you control over every visual aspect. Below the preview, you'll find Download and Print buttons for exporting the finished code.
Any change you make on the right is instantly reflected in the preview on the left, so you can experiment freely before committing to a download.
Step 2: Customize the appearance
The customization panel is organized into five sections that let you fine-tune every detail of your QR code.
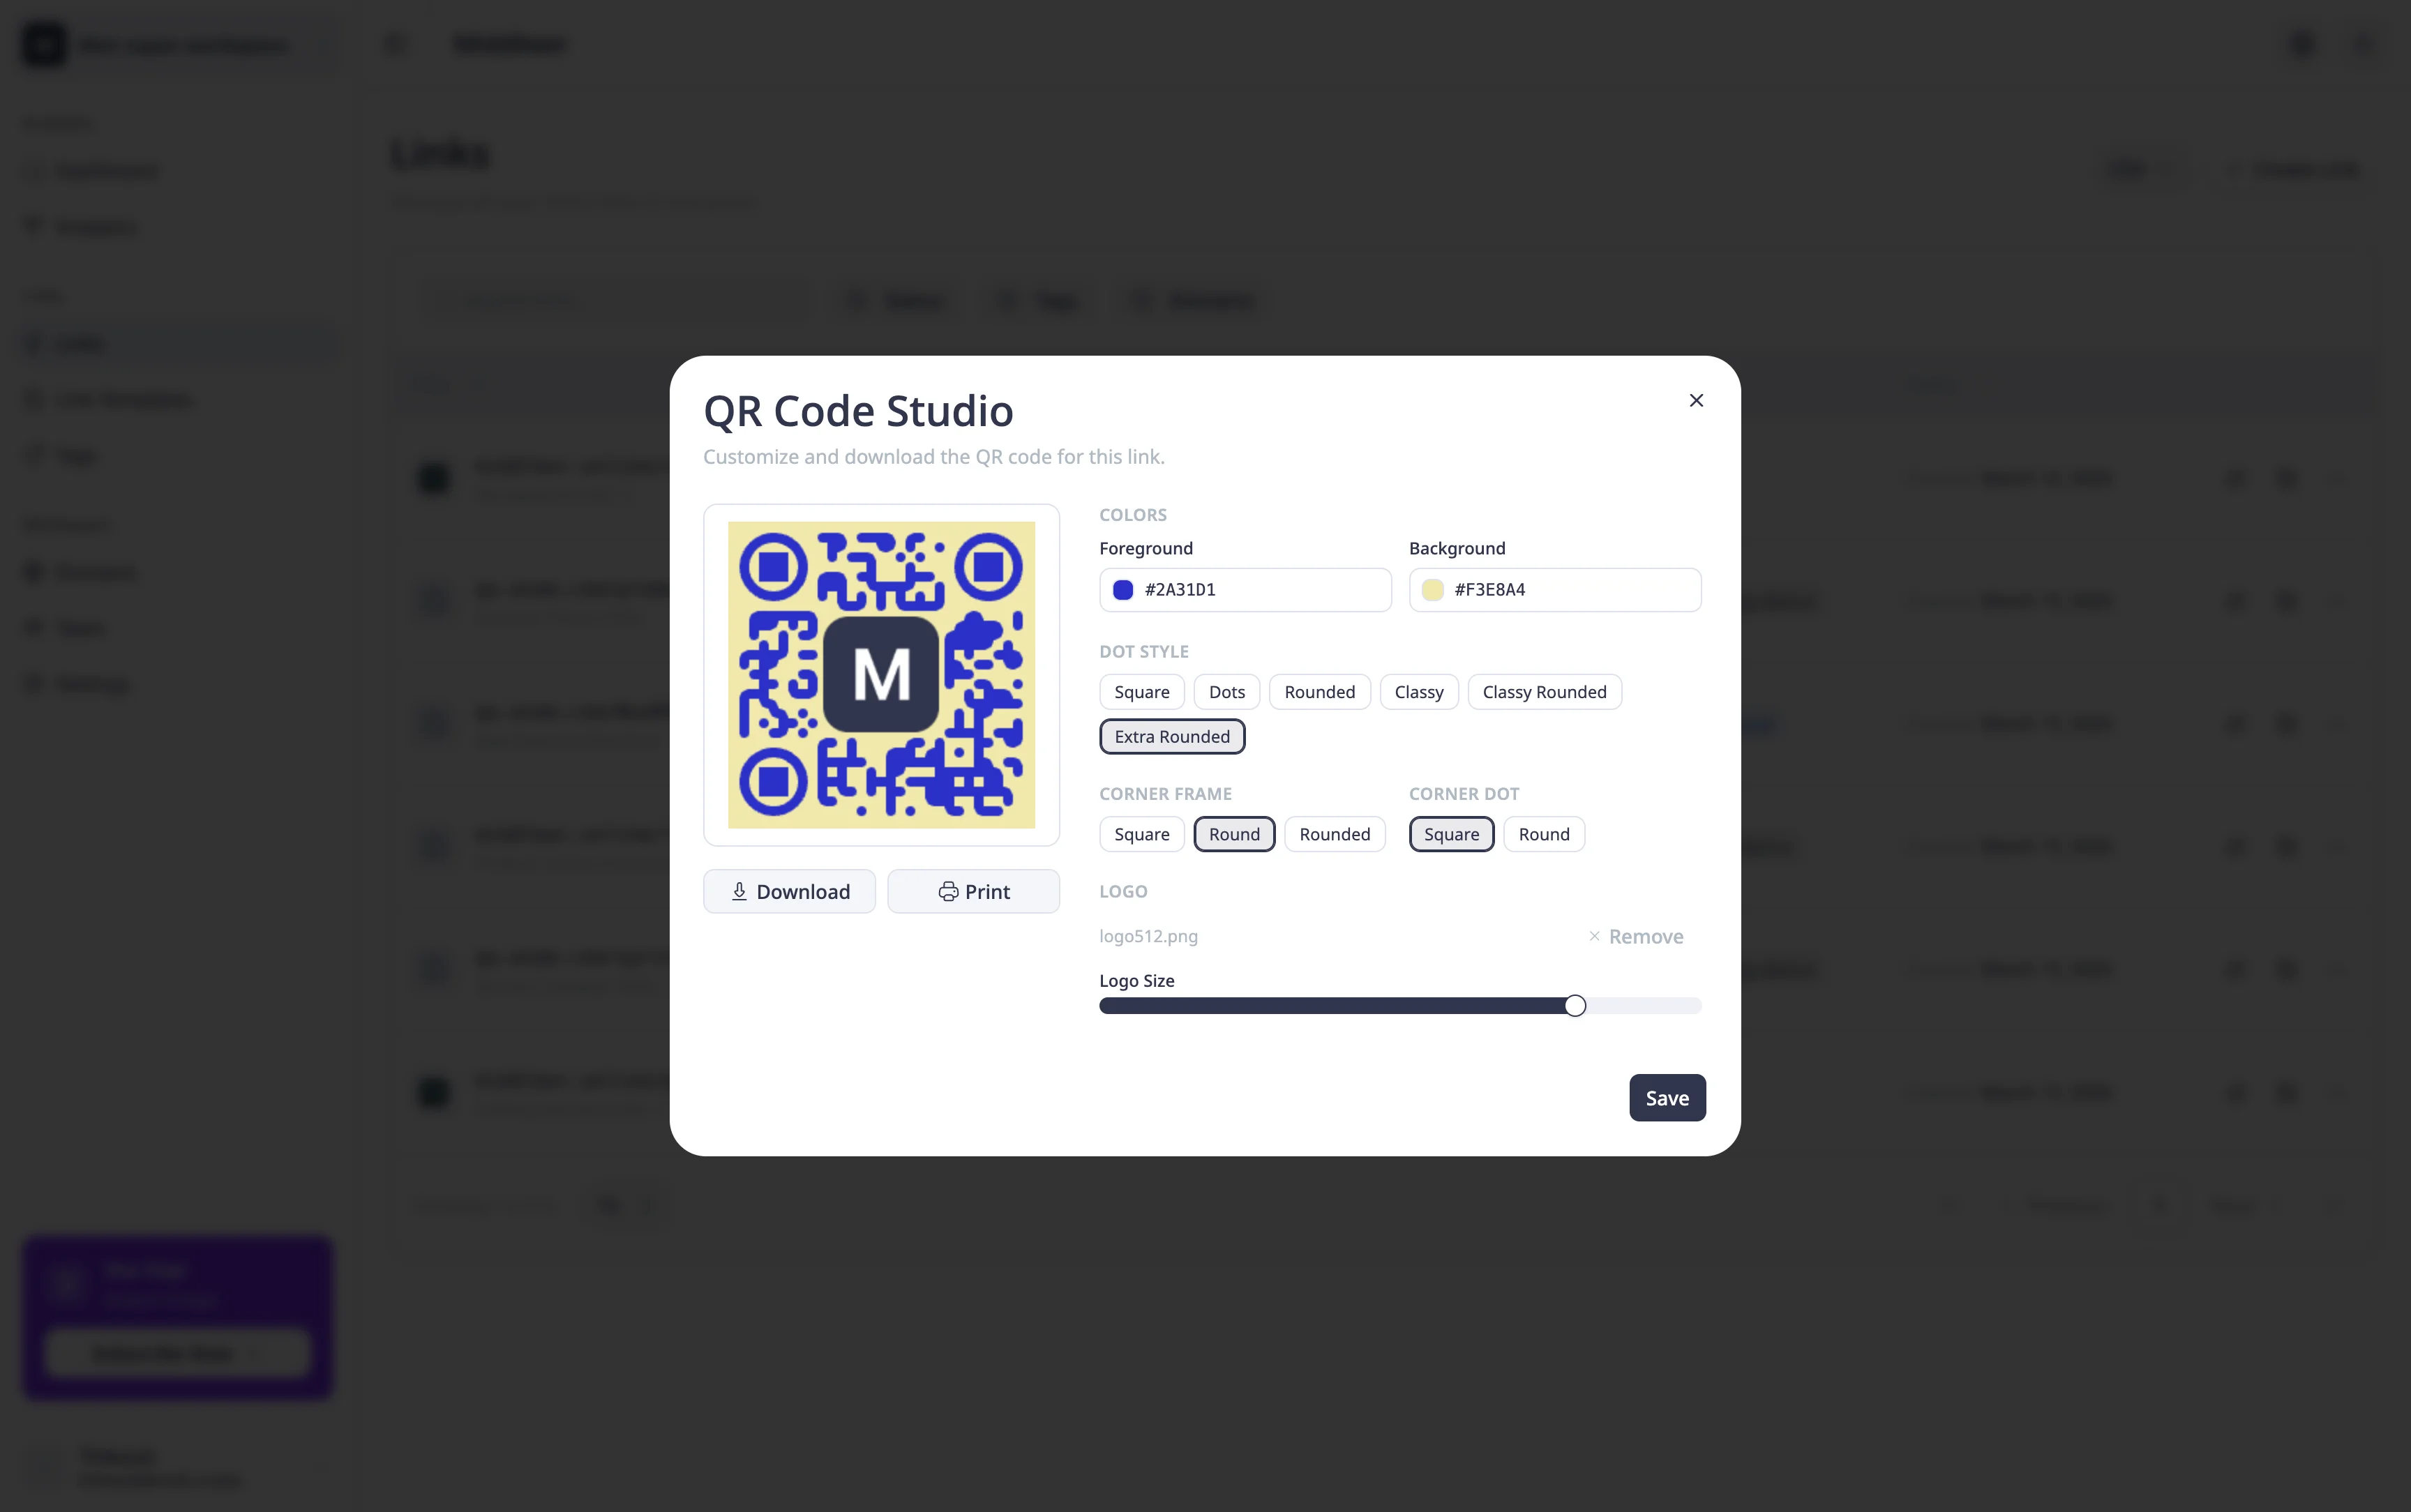
Colors — Pick a foreground and background color using the hex color pickers. The foreground color applies to the dots and corner elements, while the background fills the area behind them. Make sure there's enough contrast between the two for reliable scanning.
Dot Style — Choose the pattern used for the data modules (the small shapes that make up the code). Options include Square, Dots, Rounded, Classy, Classy Rounded, and Extra Rounded. Each gives the QR code a distinct visual character while remaining fully scannable.
Corner Styles — The three large squares in the corners of a QR code (called "eyes") can be styled independently from the dots. You can set the outer frame (Square, Dot, or Extra Rounded) and the inner dot (Square or Dot) separately, mixing and matching to create a unique look.
Logo — Upload an image to place in the center of the QR code. Once uploaded, a size slider (10%–100%) lets you control how much space the logo occupies. QR codes have built-in error correction, so a reasonably sized logo won't affect scannability. Click the remove button at any time to go back to a plain code.
Frame — Toggle the frame switch to wrap your QR code in a bordered container. When enabled, you can set a text label (e.g., "Scan me!"), a frame background color, and a text color. Frames are great for print materials where you want to add a clear call to action around the code.
Step 3: Save, download or print
Once you're satisfied with the design, click Save to persist your customization settings to the link. This ensures that the next time you open the QR Code Studio for this link, everything will be exactly as you left it.
To export, click the Download button below the preview. A dropdown lets you choose between two formats:
- PNG — a raster image at 1024 px, ideal for digital use: websites, emails, social media posts, or slide decks.
- SVG — a vector format that scales to any size without losing quality, perfect for print materials like business cards, flyers, or large banners.
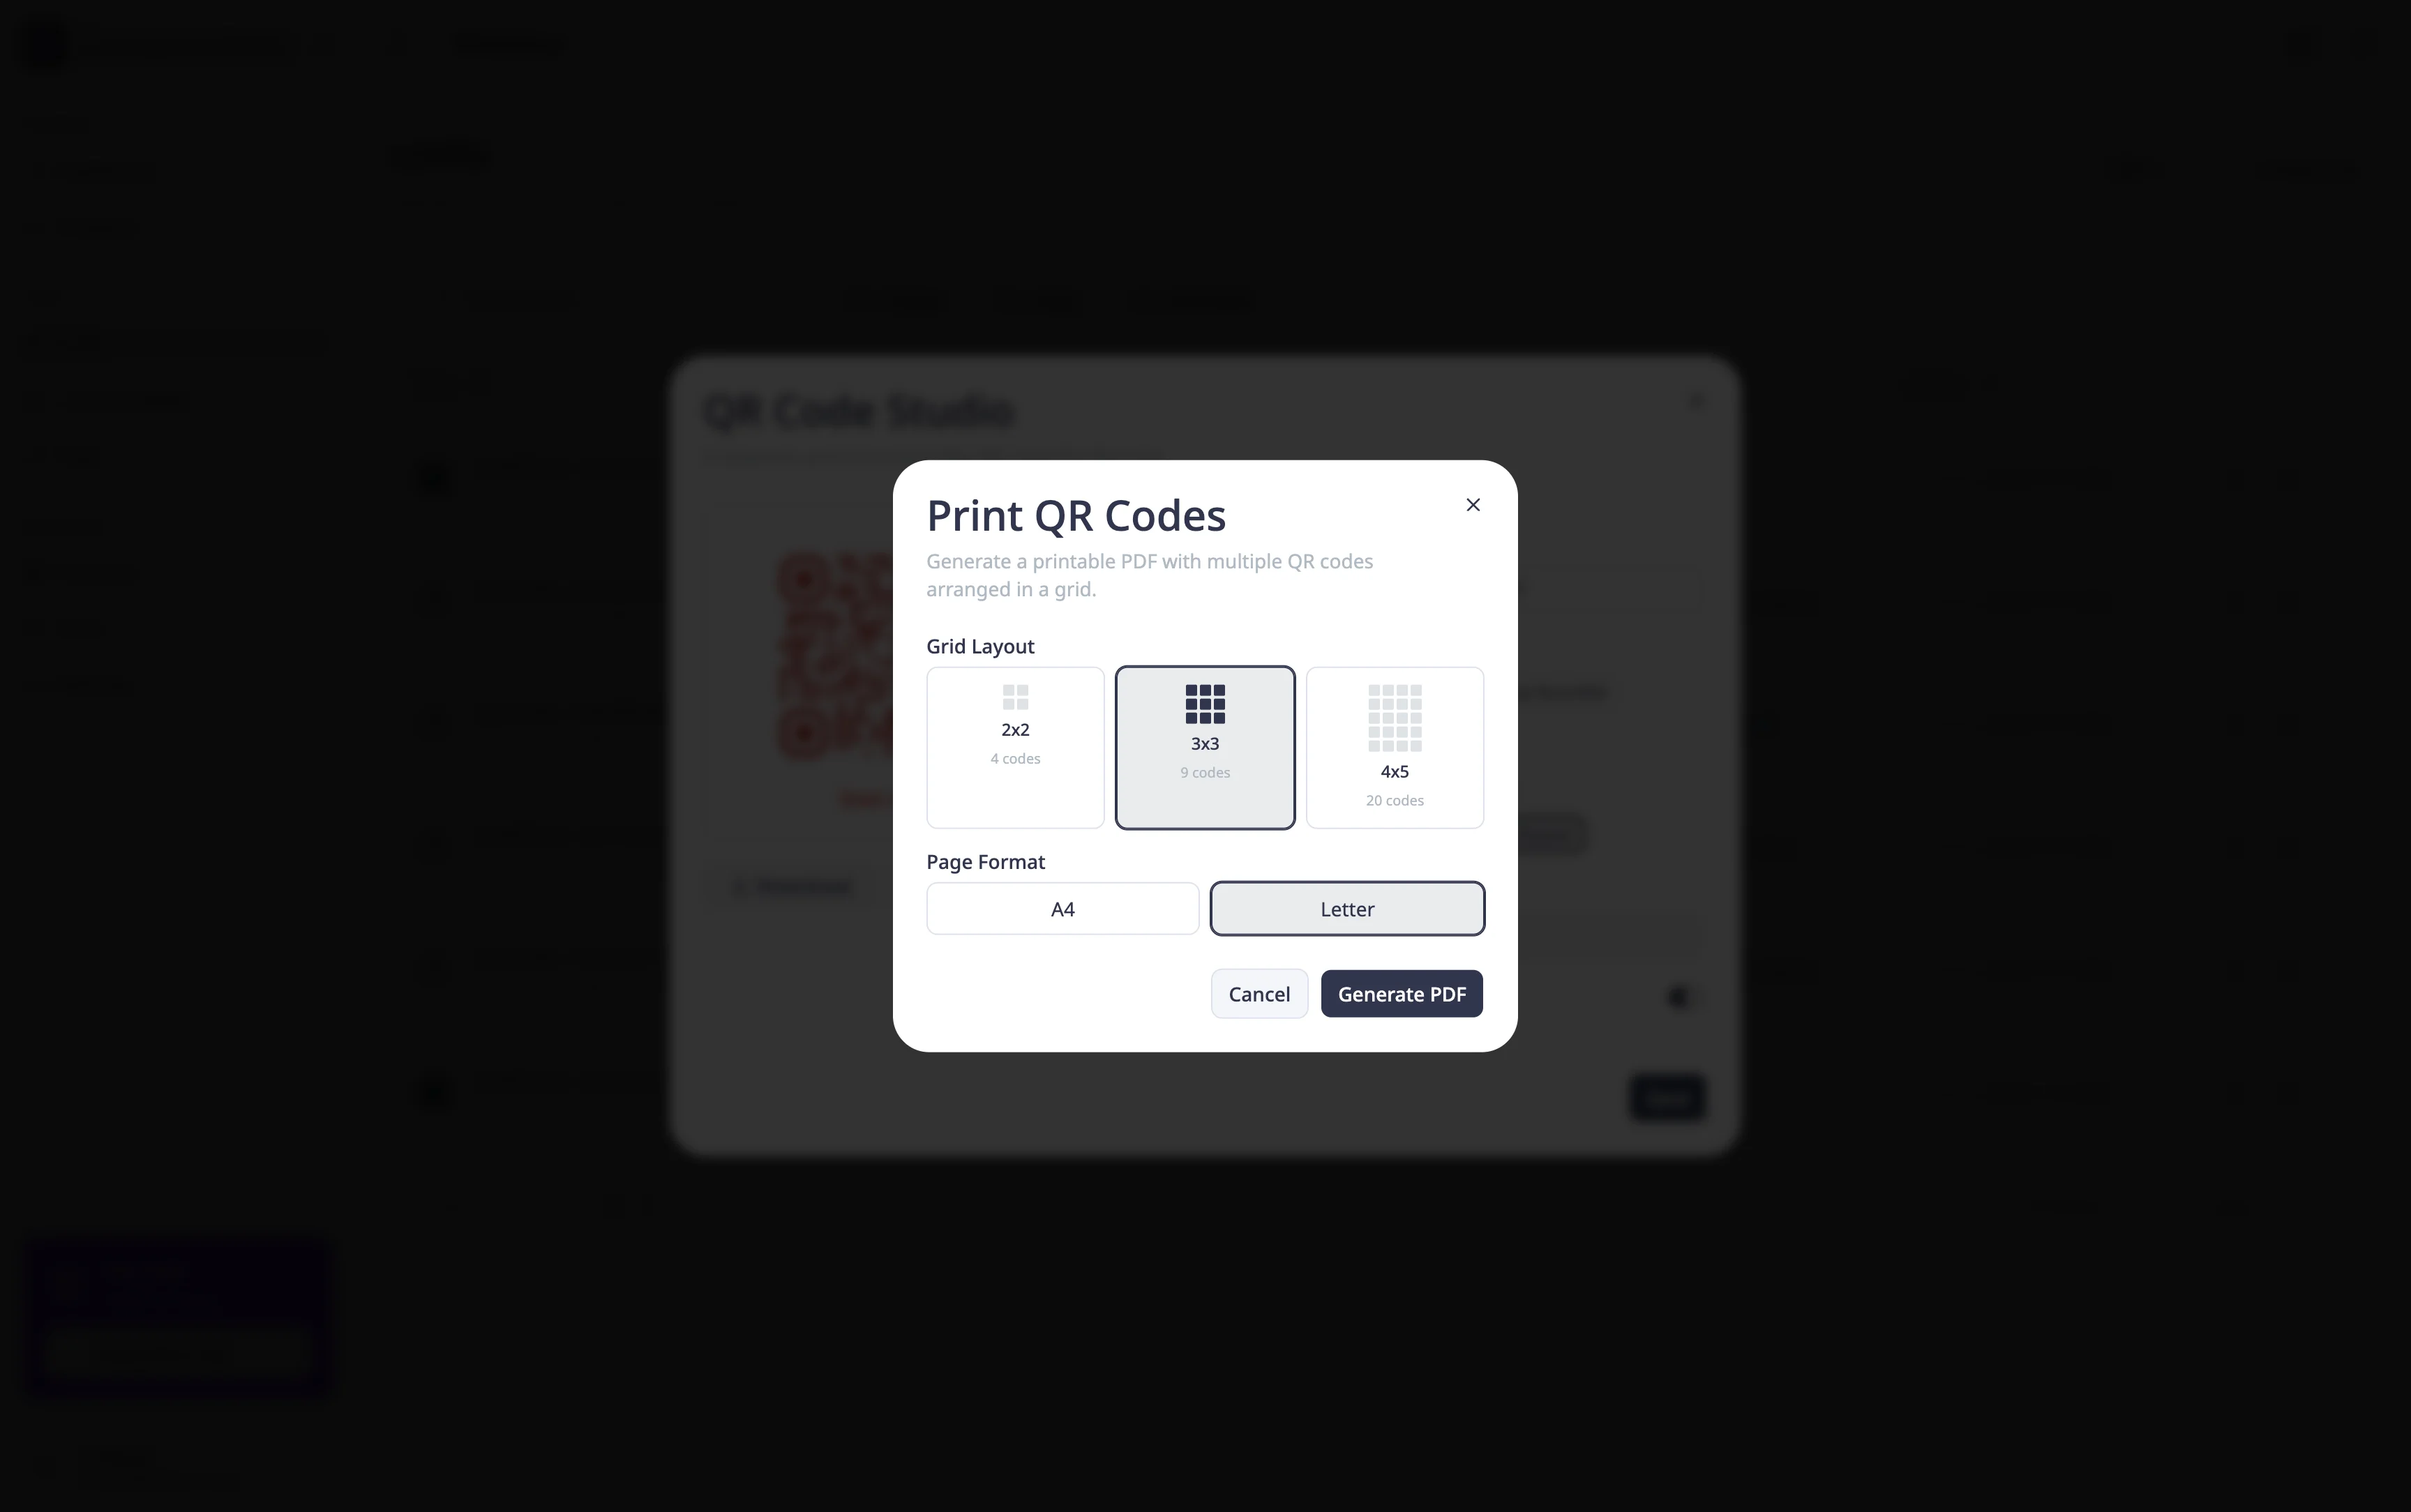
If you need a physical copy right away, click the Print button next to Download. A print dialog opens with a ready-to-print version of your QR code, frame and all.
Going further
- Create your first short link — learn how to create and configure the short links that power your QR codes
- Organize your links with tags — tag your links by campaign or channel so you can quickly find the right one to generate a QR code for
- Import and export links via CSV — manage links in bulk when you need QR codes for a large number of URLs