Organize Your Links with Tags

As your link library grows, finding the right link quickly becomes a challenge. Tags in Middlewr let you categorize your short links by campaign, channel, team, or any grouping that makes sense for your workflow. Once tagged, you can filter your links list in a single click to see exactly what you need. This guide walks you through creating tags, assigning them to links, and using them to keep your workspace organized.
Prerequisites
Before you begin, make sure you have:
- A Middlewr account
- A workspace where you have the Editor role or above
Step 1: Navigate to the Tags page
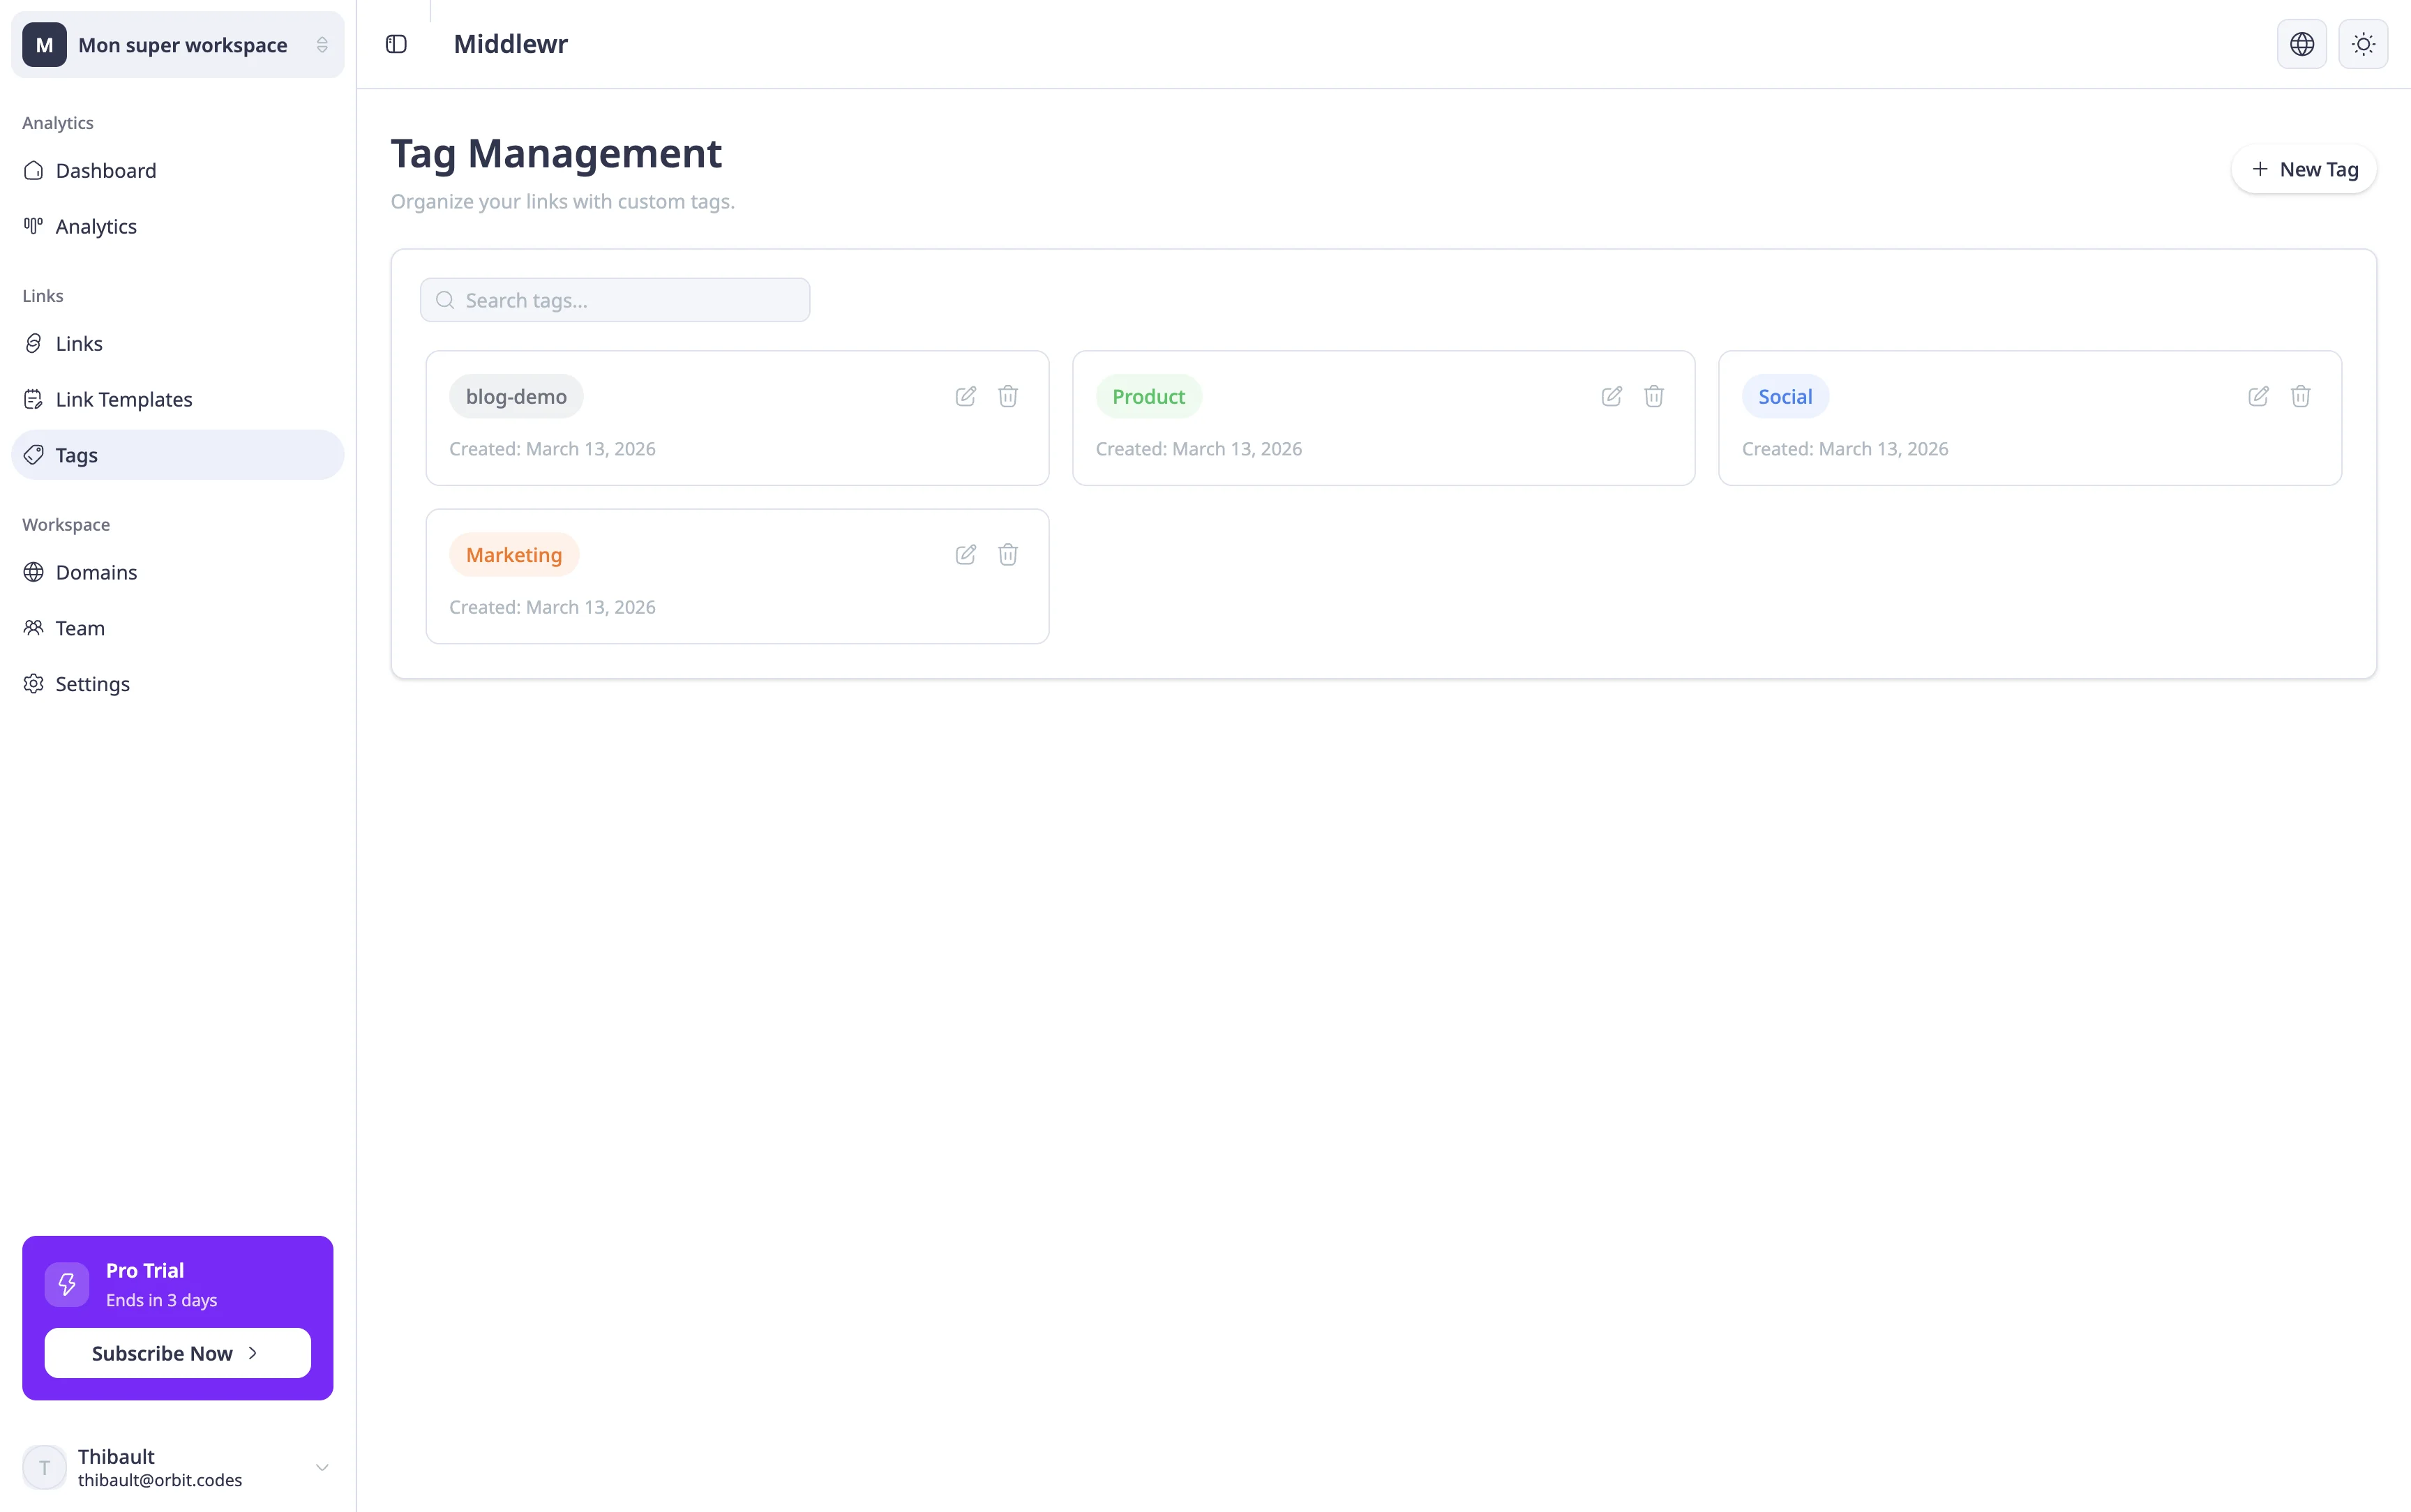
In the left sidebar, find the Links section and click Tags. This is where you manage all the tags available in your workspace.
If you haven't created any tags yet, you'll see an empty state inviting you to create your first one. If tags already exist, they appear in a grid showing each tag's name and color.
From this page, you can create new tags, edit existing ones (rename or change color), and delete tags you no longer need.
Step 2: Create a new tag
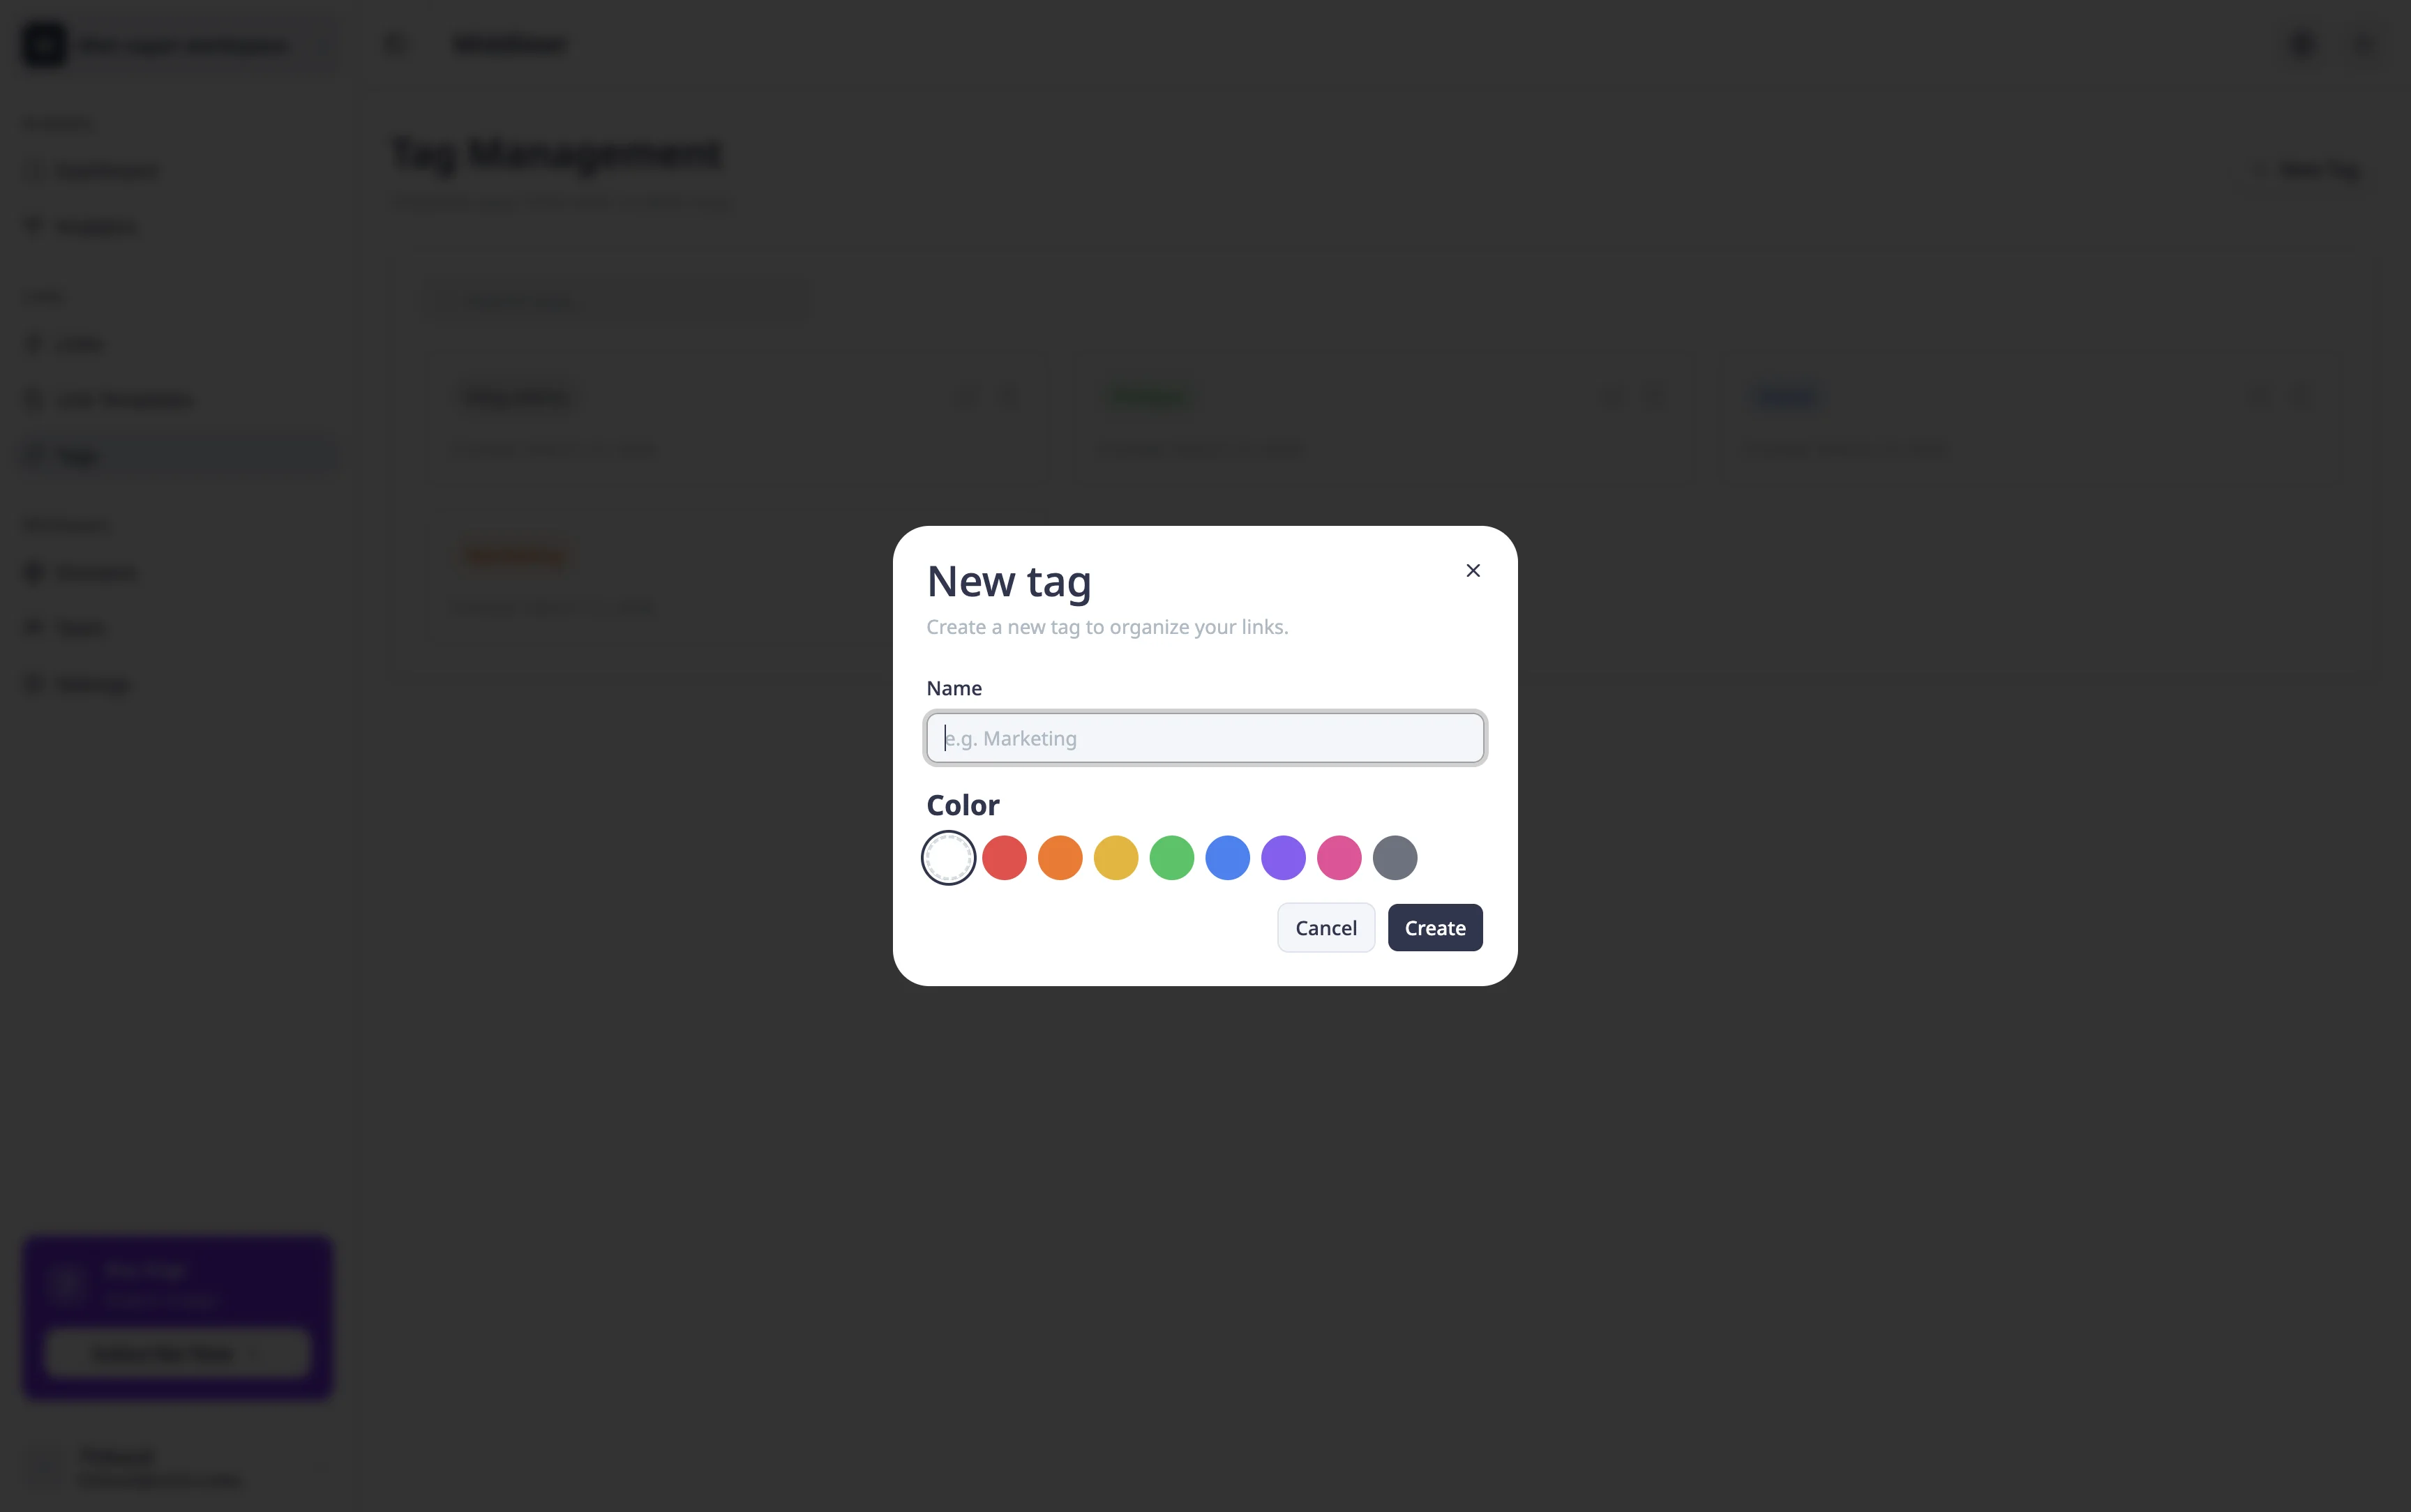
Click New Tag in the top-right corner. A modal appears with two fields:
- Name — a short, descriptive label for your tag. Keep it concise: "marketing", "social", "Q1-campaign", or "product" all work well. Names can be up to 50 characters.
- Color — pick a color from the palette to visually distinguish this tag from others. Color-coded tags make it easy to scan your links list at a glance.
Click Save and the tag is immediately available across your workspace. Repeat this for as many tags as you need — there's no limit.
Step 3: Assign tags to your links
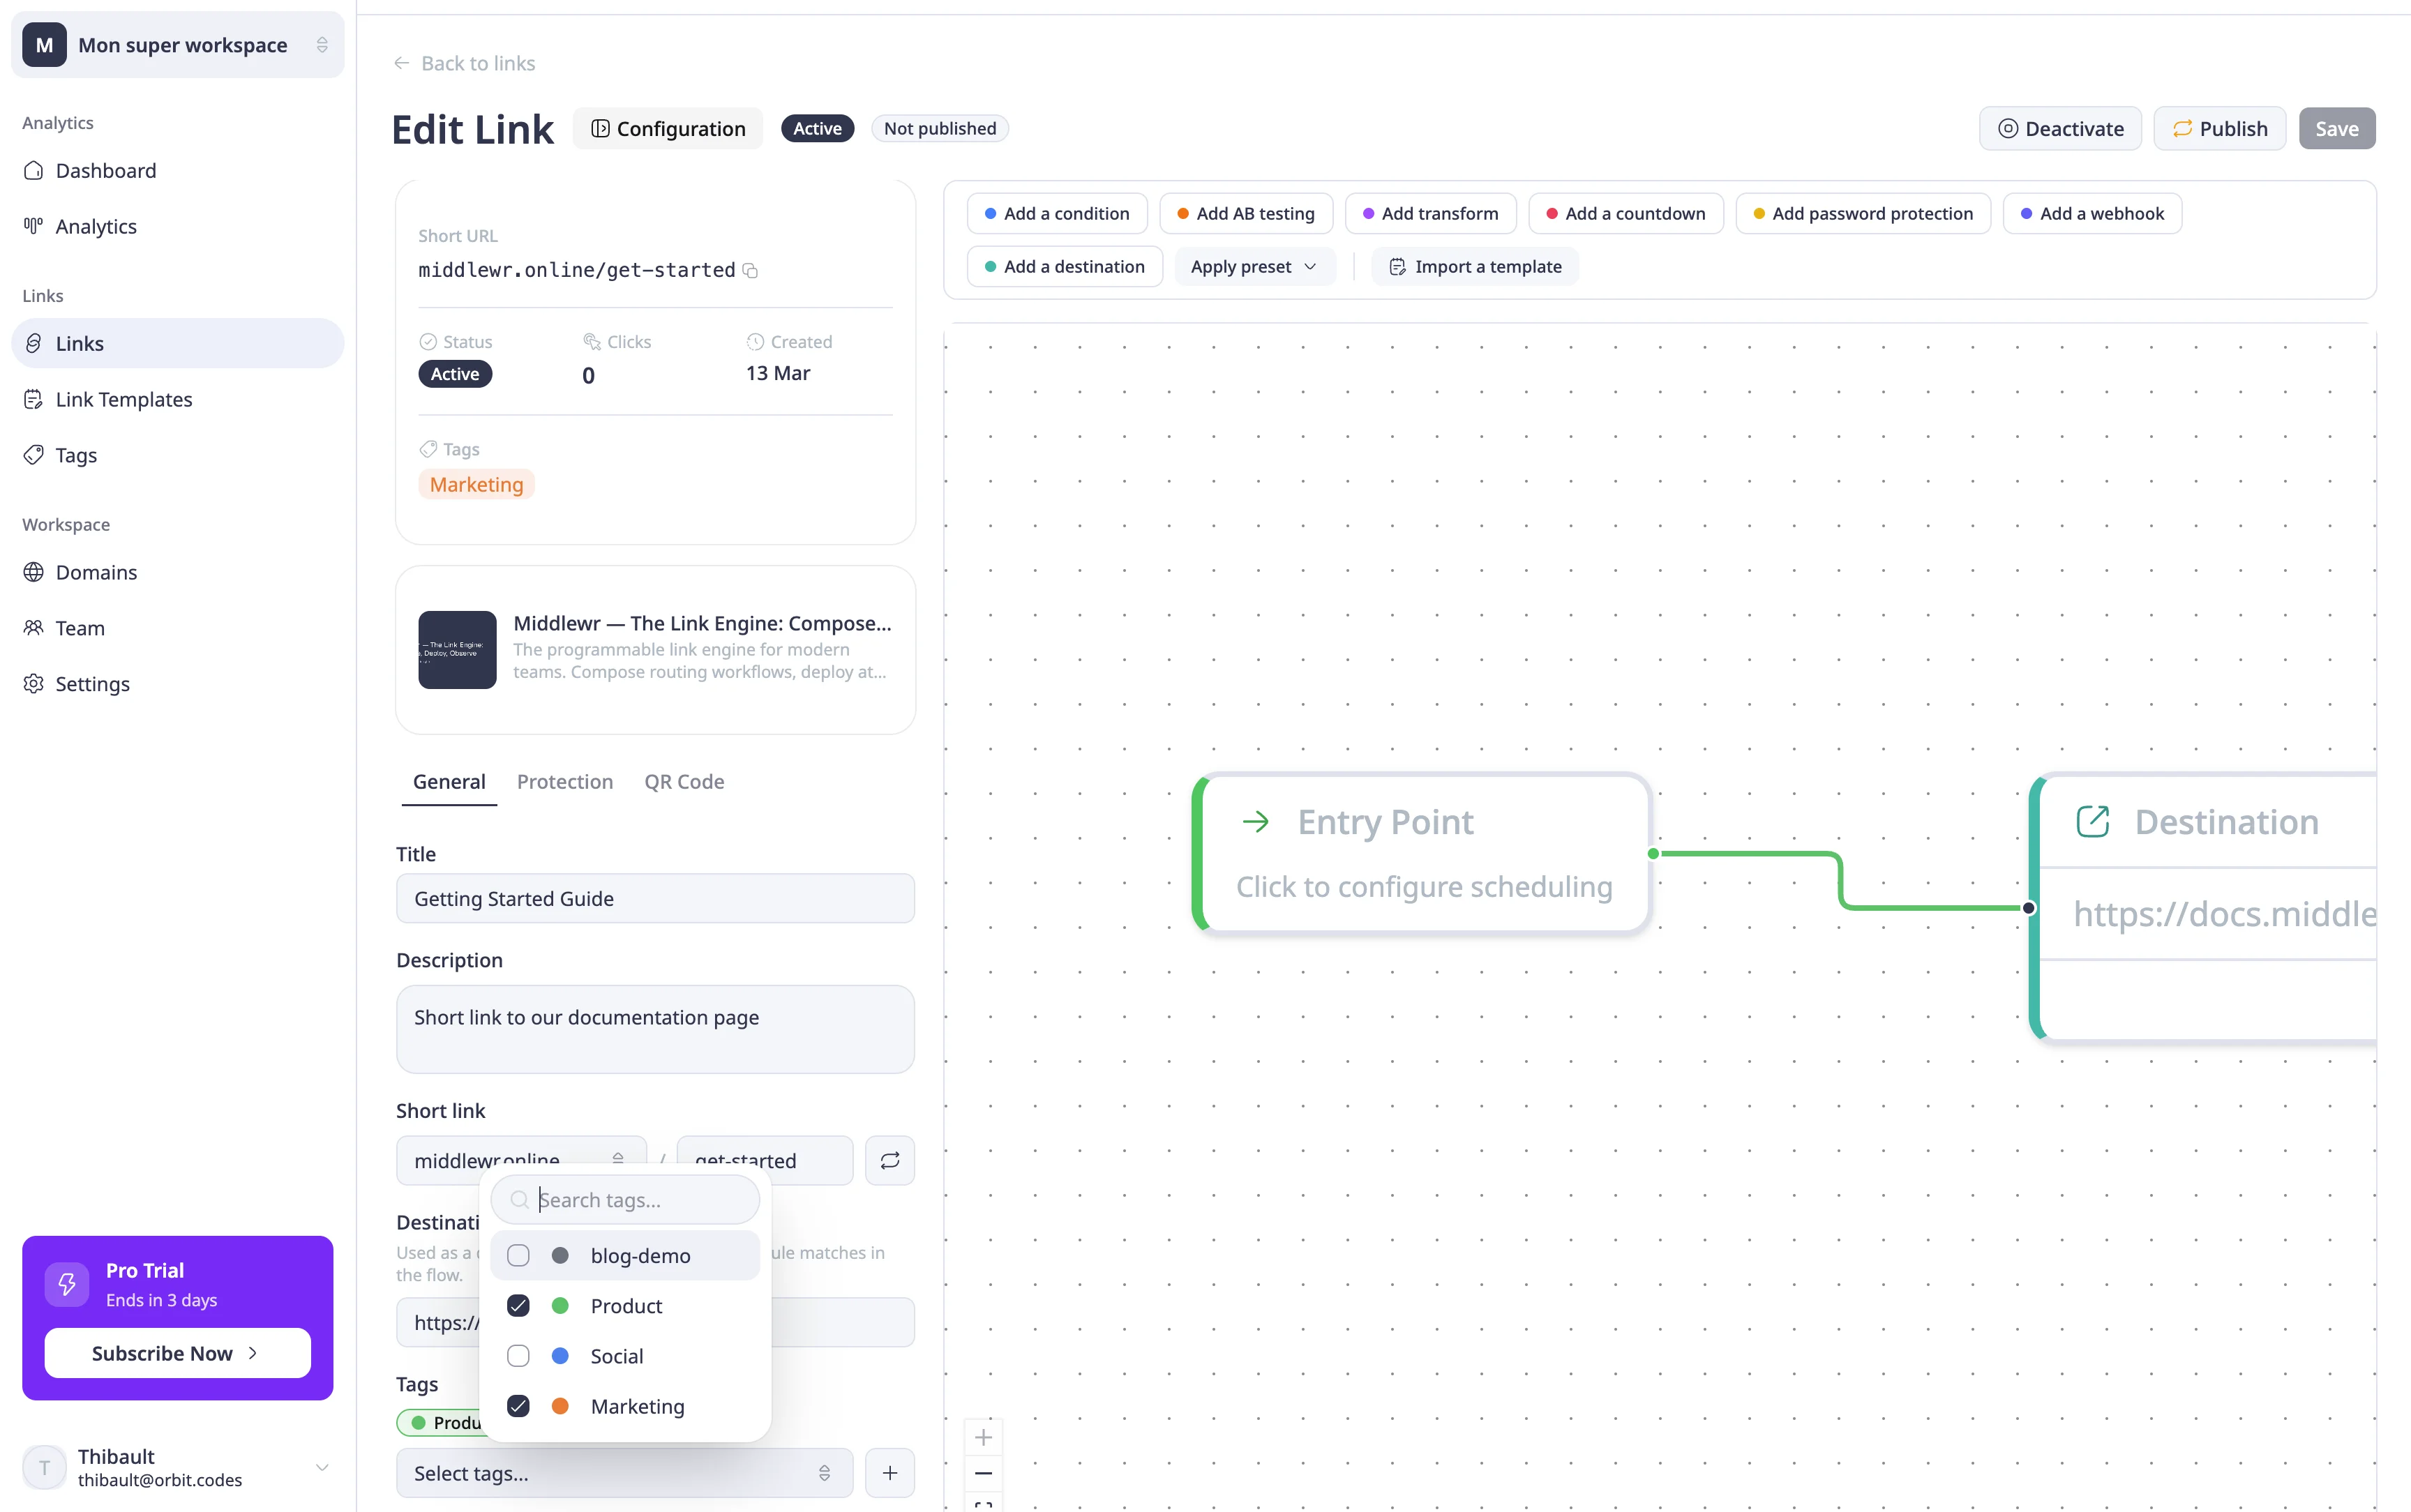
Now that your tags exist, you can assign them to links. Navigate to a link's detail page and open the configuration side panel. You'll find a Tags field that works as a multi-select: click to open the dropdown, search for a tag by name, and check the ones you want to apply. Selected tags appear as colored badges above the dropdown.
You can assign multiple tags to a single link — for example, a link could be tagged both "marketing" and "social" if it applies to both categories.
Need a new tag while editing a link? Click Create new tag directly inside the dropdown. The new tag is created and automatically assigned to your link in one step — no need to leave the panel.
Filtering links by tag
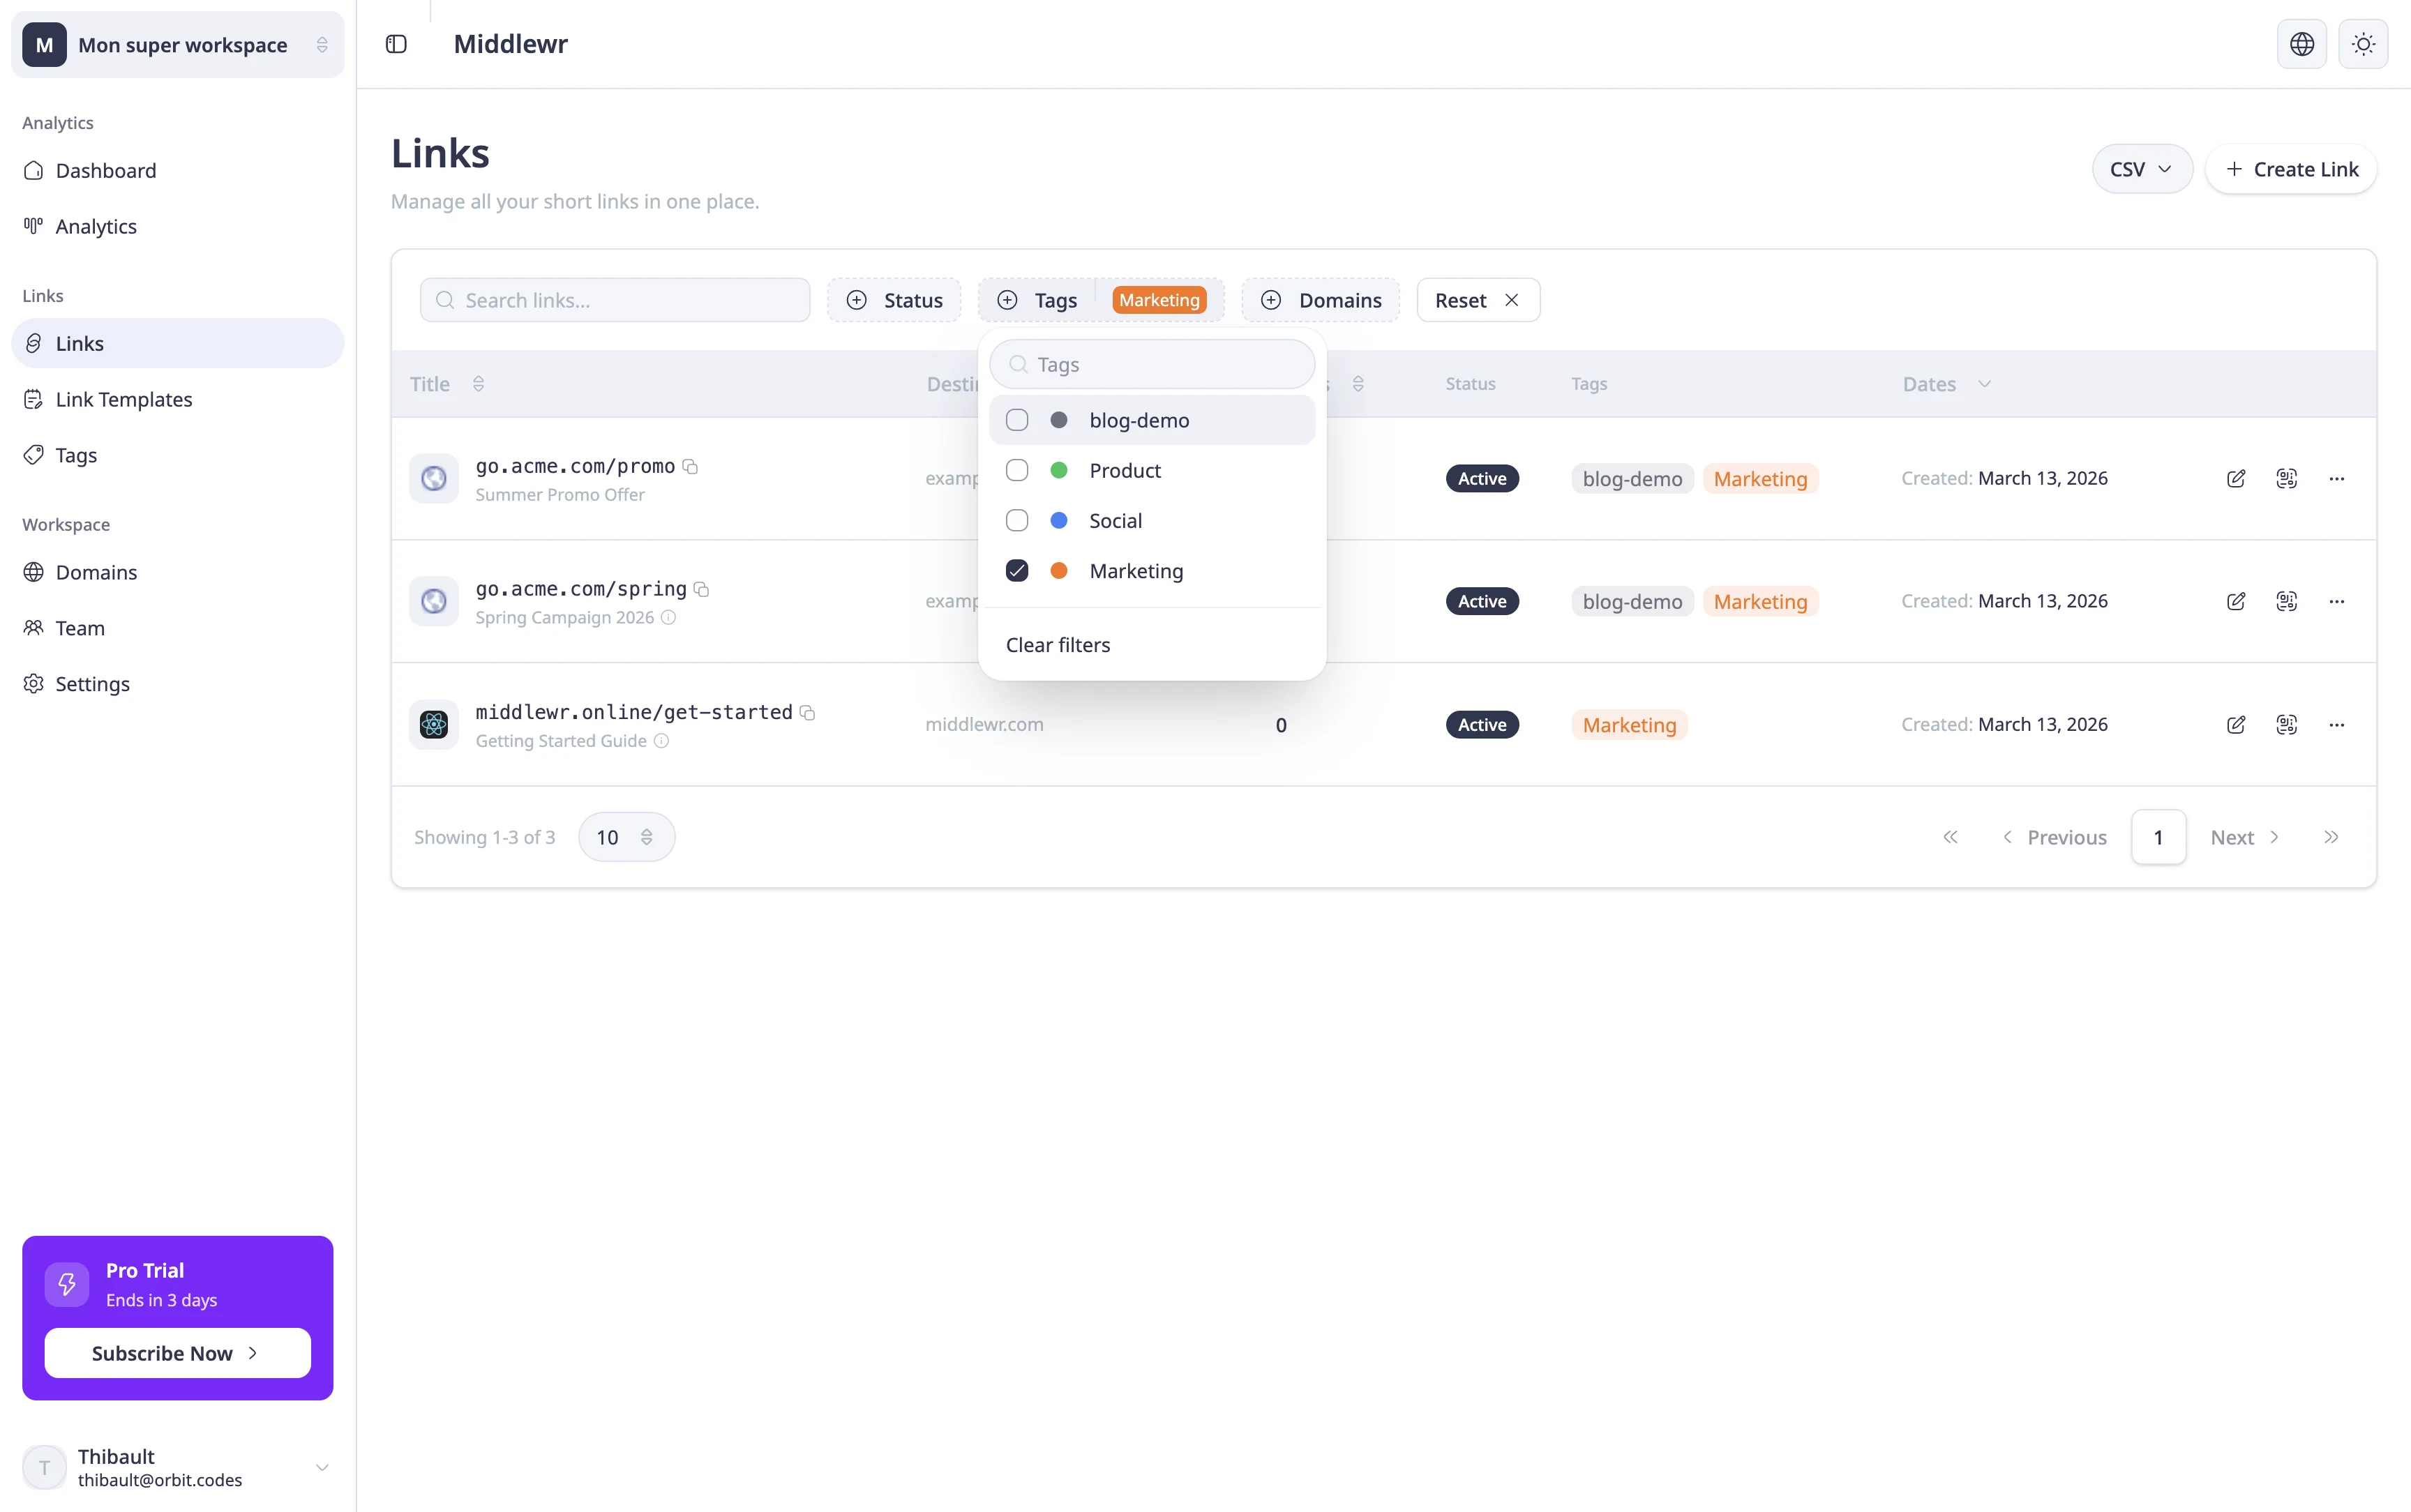
Once your links are tagged, head back to the Links page. You'll notice a Tags filter in the toolbar above the links table. Click it to see all available tags, then select one or more to narrow down the list. Only links matching the selected tags will be shown.
This is especially useful when you're managing dozens or hundreds of links and need to focus on a specific campaign, team, or channel. Tags also appear as colored badges in the links table, so you can visually identify a link's category without opening it.
Tip: You can click directly on a tag badge in the links table to instantly filter the list by that tag.
Going further
- Set up UTM tracking — combine tags with UTM parameters to track both internal organization and external campaign performance
- Create and use link templates — save time by creating templates with pre-assigned tags for recurring link patterns
- Import and export links via CSV — bulk-manage your links and their tags through CSV import and export